HP TouchSmart IQ830 Upgrade and Service - Page 48
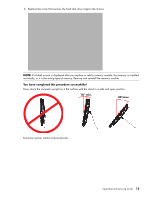
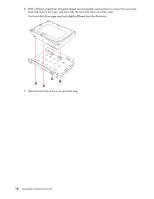
Place the hard disk drive in an anti-static bag.
 |
View all HP TouchSmart IQ830 manuals
Add to My Manuals
Save this manual to your list of manuals |
Page 48 highlights
6 With a Phillips screwdriver (magnetic-tipped recommended), remove the four screws that secure the hard disk drive to the cage, and then slide the hard disk drive out of the cage. Your hard disk drive cage may look slightly different from the illustration. 7 Place the hard disk drive in an anti-static bag. 16 Upgrading and Servicing Guide
-
 1
1 -
2
-
3
-
4
-
5
-
6
-
7
-
8
-
9
-
10
-
11
-
12
-
13
-
14
-
15
-
16
-
17
-
18
-
19
-
20
-
21
-
22
-
23
-
24
-
25
-
26
-
27
-
28
-
29
-
30
-
31
-
32
-
33
-
34
-
35
-
36
-
37
-
38
-
39
-
40
-
41
-
42
-
 43
43 -
 44
44 -
 45
45 -
 46
46 -
 47
47 -
 48
48 -
 49
49 -
 50
50 -
 51
51 -
 52
52 -
 53
53 -
54
-
55
-
56
 |
 |

16
Upgrading and Servicing Guide
6
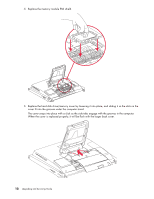
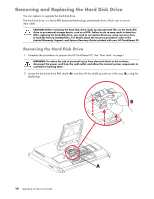
With a Phillips screwdriver (magnetic-tipped recommended), remove the four screws that secure the
hard disk drive to the cage, and then slide the hard disk drive out of the cage.
Your hard disk drive cage may look slightly different from the illustration.
7
Place the hard disk drive in an anti-static bag.