HP Vectra VT 6/xxx HP Vectra VT 6/xxx, User's Guide for Minitower models - Page 58
Replacing the Cover after Installing Accessories
 |
View all HP Vectra VT 6/xxx manuals
Add to My Manuals
Save this manual to your list of manuals |
Page 58 highlights
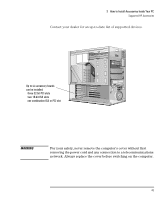
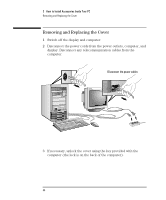
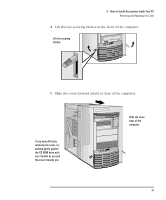
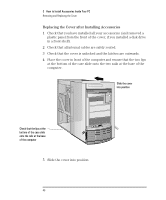
3 How to Install Accessories Inside Your PC Removing and Replacing the Cover Replacing the Cover after Installing Accessories 1 Check that you have installed all your accessories (and removed a plastic panel from the front of the cover, if you installed a disk drive in a front shelf). 2 Check that all internal cables are safely routed. 3 Check that the cover is unlocked and the latches are outwards. 4 Place the cover in front of the computer and ensure that the two lips at the bottom of the case slide onto the two rails at the base of the computer. Slide the cover into position Check that the lips at the bottom of the case slide onto the rails at the base of the computer 5 Slide the cover into position. 46 English
-
 1
1 -
2
-
3
-
4
-
5
-
6
-
7
-
8
-
9
-
10
-
11
-
12
-
13
-
14
-
15
-
16
-
17
-
18
-
19
-
20
-
21
-
22
-
23
-
24
-
25
-
26
-
27
-
28
-
29
-
30
-
31
-
32
-
33
-
34
-
35
-
36
-
37
-
38
-
39
-
40
-
41
-
42
-
43
-
44
-
45
-
46
-
47
-
48
-
49
-
50
-
51
-
52
-
 53
53 -
 54
54 -
 55
55 -
 56
56 -
 57
57 -
 58
58 -
 59
59 -
 60
60 -
 61
61 -
 62
62 -
 63
63 -
64
-
65
-
66
-
67
-
68
-
69
-
70
-
71
-
72
-
73
-
74
-
75
-
76
-
77
-
78
-
79
-
80
-
81
-
82
-
83
-
84
-
85
-
86
-
87
-
88
-
89
-
90
-
91
-
92
-
93
-
94
-
95
-
96
-
97
-
98
-
99
-
100
-
101
-
102
-
103
-
104
-
105
-
106
-
107
-
108
-
109
-
110
-
111
-
112
-
113
-
114
-
115
-
116
-
117
-
118
-
119
-
120
-
121
-
122
-
123
-
124
-
125
-
126
-
127
-
128
-
129
-
130
-
131
-
132
-
133
-
134
-
135
-
136
-
137
-
138
-
139
-
140
-
141
-
142
-
143
-
144
-
145
-
146
-
147
-
148
-
149
-
150
-
151
-
152
-
153
-
154
-
155
-
156
-
157
-
158
-
159
-
160
-
161
-
162
-
163
-
164
-
165
-
166
-
167
-
168
 |
 |
3
How to Install Accessories Inside Your PC
Removing and Replacing the Cover
46
English
Replacing the Cover after Installing Accessories
1
Check that you have installed all your accessories (and removed a
plastic panel from the front of the cover, if you installed a disk drive
in a front shelf).
2
Check that all internal cables are safely routed.
3
Check that the cover is unlocked and the latches are outwards.
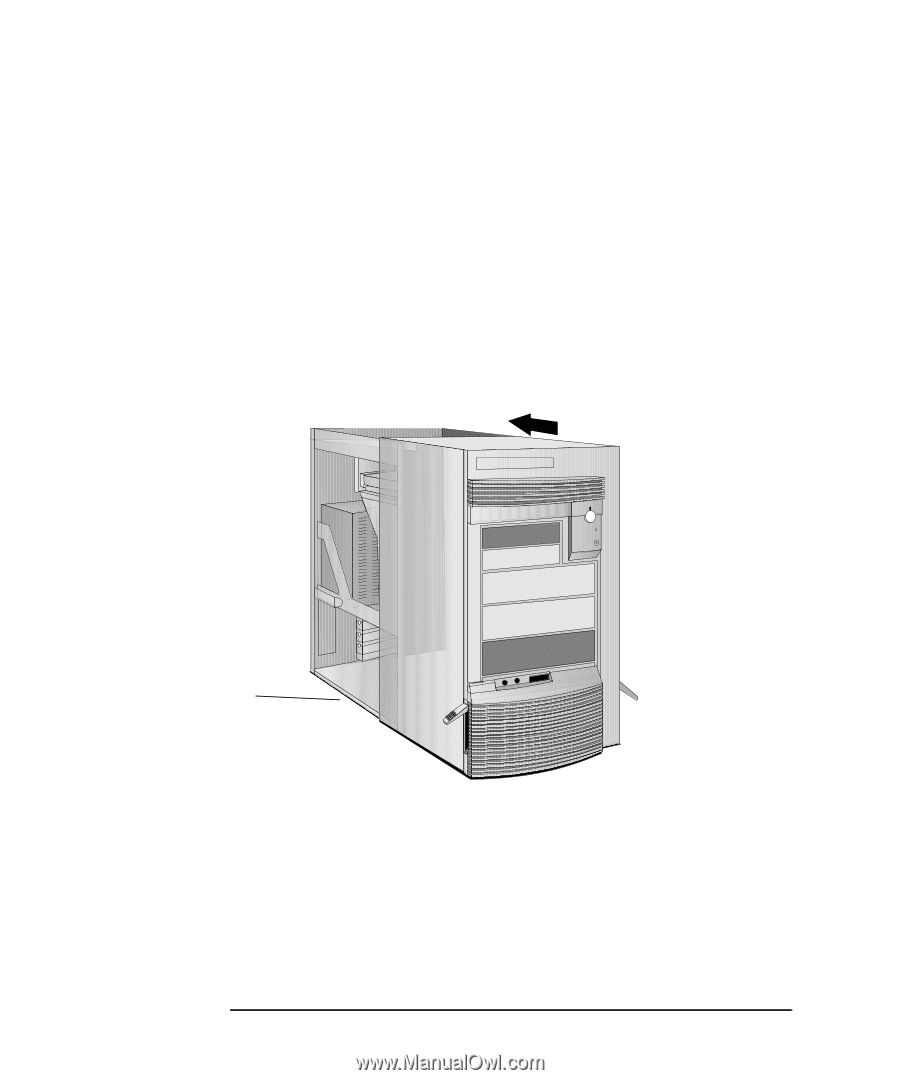
4
Place the cover in front of the computer and ensure that the two lips
at the bottom of the case slide onto the two rails at the base of the
computer.
5
Slide the cover into position.
Slide the cover
into position
Check that the lips at the
bottom of the case slide
onto the rails at the base
of the computer