HP Vectra XA 5/xxx HP Vectra XA 5/XXX Series 5 PC Minitower User’s Gu - Page 36
Installing a Flexible Disk Drive, CD-ROM Drive, or Tape Drive
 |
View all HP Vectra XA 5/xxx manuals
Add to My Manuals
Save this manual to your list of manuals |
Page 36 highlights
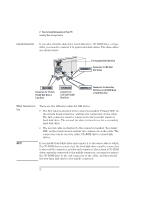
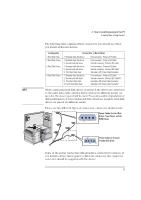
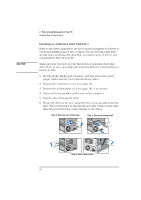
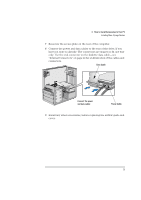
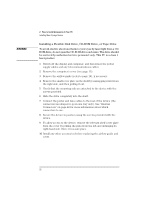
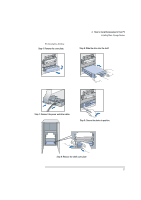
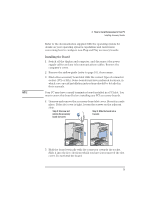
WARNING 2 How to Install Accessories In Your PC Installing Mass Storage Devices Installing a Flexible Disk Drive, CD-ROM Drive, or Tape Drive To avoid electric shock and harm to your eyes by laser light from a CDROM drive, do not open the CD-ROM drive enclosure. The drive should be serviced by authorized service personnel only. This PC is a class 1 laser product. 1 Switch off the display and computer, and disconnect the power supply cables and any telecommunications cables. 2 Remove the computer's cover (see page 15). 3 Remove the airflow guide (refer to page 16), if necessary. 4 Remove the small cover plate on the shelf by unsnapping it first from the right side, and then pulling it out. 5 Check that the mounting rails are attached to the device with the screws provided. 6 Slide the drive completely into the shelf. 7 Connect the power and data cables to the rear of the device (the connectors are shaped to go in one way only). See "Internal Connectors" on page 22 for more information about which connectors to use. 8 Secure the device in position using the screws provided with the device. 9 To allow access to the device, remove the relevant shelf cover plate from the cover by pulling the plate from the left and unhinging its right-hand side. Store it in a safe place. 10 Install any other accessories before replacing the airflow guide and cover. 26 English
-
 1
1 -
2
-
3
-
4
-
5
-
6
-
7
-
8
-
9
-
10
-
11
-
12
-
13
-
14
-
15
-
16
-
17
-
18
-
19
-
20
-
21
-
22
-
23
-
24
-
25
-
26
-
27
-
28
-
29
-
30
-
 31
31 -
 32
32 -
 33
33 -
 34
34 -
 35
35 -
 36
36 -
 37
37 -
 38
38 -
 39
39 -
 40
40 -
 41
41 -
42
-
43
-
44
-
45
-
46
-
47
-
48
-
49
-
50
-
51
-
52
-
53
-
54
-
55
-
56
-
57
-
58
-
59
-
60
-
61
-
62
-
63
-
64
-
65
-
66
-
67
-
68
-
69
-
70
-
71
-
72
-
73
-
74
-
75
-
76
-
77
-
78
-
79
-
80
-
81
-
82
-
83
-
84
-
85
-
86
-
87
-
88
-
89
-
90
-
91
-
92
-
93
-
94
-
95
-
96
 |
 |