HP Xw460c NVIDIA Quadro FX 1600M installation - Page 6
Step 3 — Remove the existing graphics card, Step 4 — Install the Quadro FX 1600M
 |
View all HP Xw460c manuals
Add to My Manuals
Save this manual to your list of manuals |
Page 6 highlights
Step 3 - Remove the existing graphics card Remove the currently-installed graphics card by unscrewing the three captive retaining screws as shown below. Step 4 - Install the Quadro FX 1600M Install the Quadro FX 1600M, pressing down on the connector area to seat the card. Tighten the retaining screws as shown below. 6 NVIDIA Quadro FX 1600M installation instructions ENWW
-
 1
1 -
 2
2 -
 3
3 -
 4
4 -
 5
5 -
 6
6 -
 7
7 -
 8
8
 |
 |
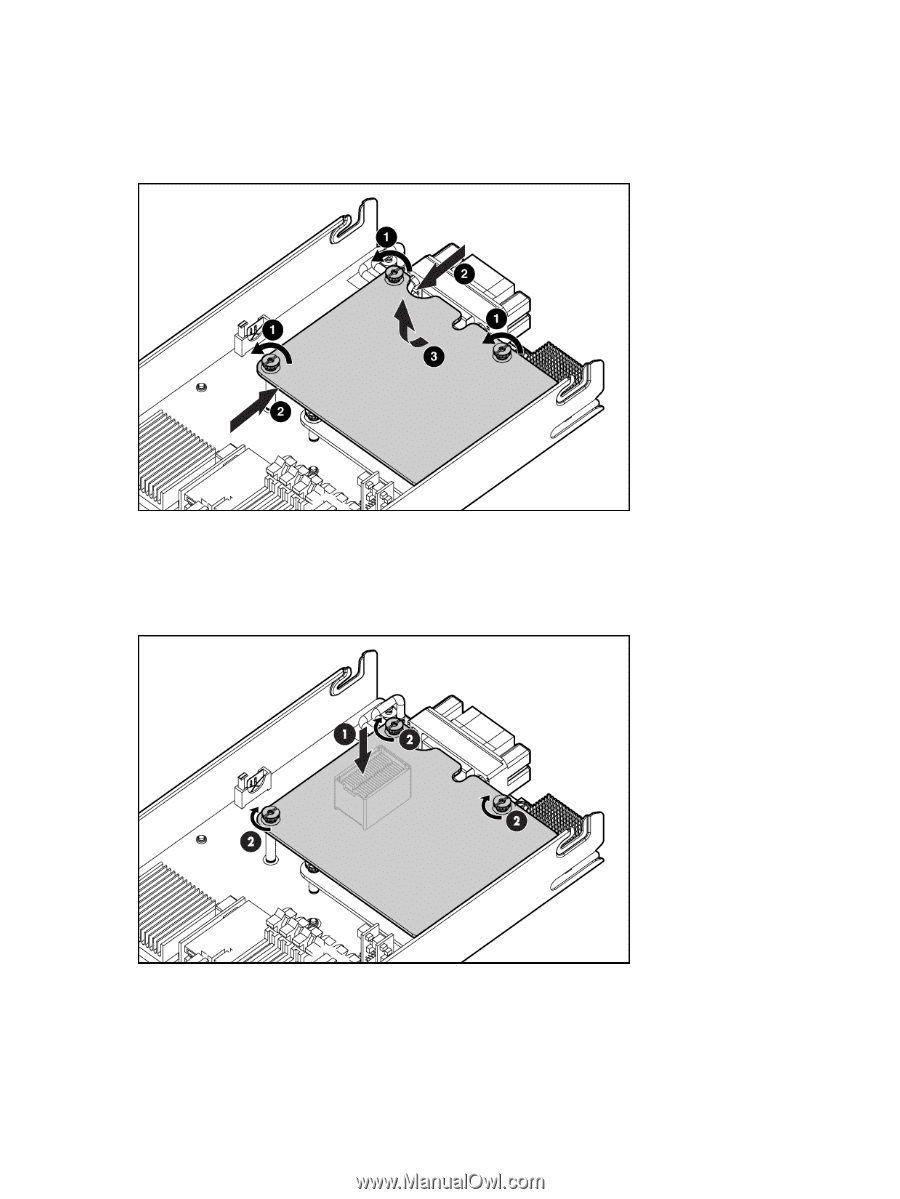
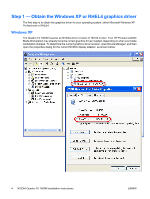
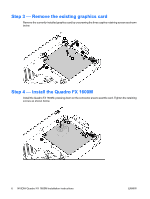
Step 3 — Remove the existing graphics card
Remove the currently-installed graphics card by unscrewing the three captive retaining screws as shown
below.
Step 4 — Install the Quadro FX 1600M
Install the Quadro FX 1600M, pressing down on the connector area to seat the card. Tighten the retaining
screws as shown below.
6
NVIDIA Quadro FX 1600M installation instructions
ENWW