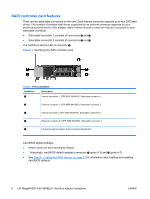
HP Xw6600 HP xw and Z Series Workstations - LSI 8888 8-port SAS RAID Controlle - Page 7
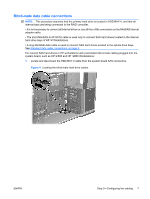
Blind-mate data cable connections
 |
UPC - 883585731121
View all HP Xw6600 manuals
Add to My Manuals
Save this manual to your list of manuals |
Page 7 highlights
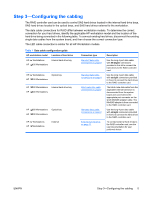
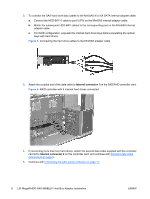
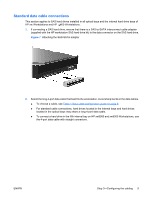
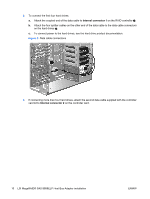
Blind-mate data cable connections NOTE: This procedure assumes that the primary hard drive is located in HDD-BAY-0, and that all internal bays are being connected to the RAID controller. • It is not necessary to connect all internal drives or use all four of the connectors on the MiniSAS internal adapter cable. • The short MiniSAS 4i-4X SATA cable is used only to connect SAS hard drives located in the internal hard drive bays of HP Workstations. • A long MiniSASi data cable is used to connect SAS hard drives located in the optical drive bays. See Standard data cable connections on page 9. For internal SAS hard drives in HP workstations with preinstalled blind-mate cabling plugged into the system board, such as HP 600 and HP 800 Workstations: 1. Locate and disconnect the HDD-BAY-0 cable from the system board SAS connectors. Figure 4 Locating the blind-mate hard drive cables ENWW Step 3-Configuring the cabling 7
-
 1
1 -
 2
2 -
 3
3 -
 4
4 -
 5
5 -
 6
6 -
 7
7 -
 8
8 -
 9
9 -
 10
10 -
 11
11 -
 12
12 -
13
 |
 |