HP Xw6600 HP xw Workstation series - SATA optical drive installation
HP Xw6600 - Workstation - 2 GB RAM Manual
 |
UPC - 883585731121
View all HP Xw6600 manuals
Add to My Manuals
Save this manual to your list of manuals |
HP Xw6600 manual content summary:
- HP Xw6600 | HP xw Workstation series - SATA optical drive installation - Page 1
) optical disk drive (ODD) on your workstation. Kit contents Ensure that the following components are included in your optical drive kit: ● 5.25-inch, half-height SATA ODD ● SATA interface cables ● Four M3 guide screws ● Warranty © 2007 Hewlett-Packard Development Company, L.P. The HP Invent logo - HP Xw6600 | HP xw Workstation series - SATA optical drive installation - Page 2
can damage the system board. Have an HP authorized reseller or service provider install the processor. If you plan to install it yourself, read all of the instructions carefully before you begin. - Failure to follow the workstation preparation instructions and these result in an improperly installed - HP Xw6600 | HP xw Workstation series - SATA optical drive installation - Page 3
of equipment. NOTE: HP accessories are for use in HP workstation products. They have electrostatic-sensitive parts: ● Use a wrist strap connected by a ground cord to a grounded workstation chassis. authorized dealer, reseller, or service provider install the part. NOTE: For additional information - HP Xw6600 | HP xw Workstation series - SATA optical drive installation - Page 4
devices. ● RAID/AHCI Mode - You will not be able to update system BIOS from the SATA ODD. ● Combined Mode or Separate Mode - BIOS can be updated using a SATA ODD attached to functional ports. NOTE: The xw4550 Workstation and xw4600 Workstation do not support PATA optical disk drives. Preparing for - HP Xw6600 | HP xw Workstation series - SATA optical drive installation - Page 5
the finish. ● If any object or liquid falls into the cabinet, immediately unplug the workstation and have it checked by an authorized service provider. ● When a disc is not in use, remove it from the drive and store it in its case. ● Handle the disc by the edges, not the flat surface of the disc - HP Xw6600 | HP xw Workstation series - SATA optical drive installation - Page 6
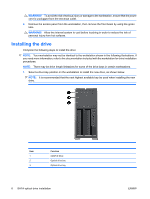
power cord is unplugged from the electrical outlet. 4. Remove the access panel from the workstation, then remove the front bezel by using the green tabs. WARNING! Allow the internal system to cool before touching in order to reduce the risk of personal injury from hot surfaces. Installing the drive - HP Xw6600 | HP xw Workstation series - SATA optical drive installation - Page 7
emissions. 4. If your optical drive requires guide screws, use the four M3 guide screws provided as part of the installation kit. Install two M3 guide screws into each side of the drive, as shown below, using a Torx T-15 screwdriver. NOTE: Some workstations, such as the xw6400, xw8400 - HP Xw6600 | HP xw Workstation series - SATA optical drive installation - Page 8
may cause damage to the drive when moving the workstation. NOTE: Refer to the documentation included with your workstation for specific instructions on securing an optional drive. 6. As shown below, connect the workstation power supply power cable (1) to the drive. Then connect the SATA interface - HP Xw6600 | HP xw Workstation series - SATA optical drive installation - Page 9
SATA configuration information. 7. Reassemble the workstation by reinstalling the front bezel and access panel, and then reconnecting any peripheral devices to the workstation. Enabling digital audio This section provides the information required to enable digital audio for the drive, based - HP Xw6600 | HP xw Workstation series - SATA optical drive installation - Page 10
. RHEL 5 The ODD digital audio capability is enabled by default when using RHEL 5. Operating the drive Identifying the controls Item 1 2 3 4 Components Functions Drive Activity Light Illuminates whenever the optical drive is reading information from the disc. Manual Eject Button Access Hole - HP Xw6600 | HP xw Workstation series - SATA optical drive installation - Page 11
ATA device. The SATA interface cable can be installed with the 90-degree connector attached to either the drive or the system board, whichever may be required by your workstation hardware configuration. NOTE: The SATA interface cables in your kit may not be identical to the cable in the following - HP Xw6600 | HP xw Workstation series - SATA optical drive installation - Page 12
has been tested and found to comply with the limits for a class B digital device of the FCC Rules. Refer to the Safety and Regulatory Information guide on the documentation CD that came with your workstation for additional regulatory information governing this product. 12 SATA optical
-
 1
1 -
 2
2 -
 3
3 -
 4
4 -
 5
5 -
 6
6 -
 7
7 -
8
-
9
-
10
-
11
-
12
 |
 |

SATA optical drive installation
This document describes how to install a Serial ATA (SATA) optical disk drive (ODD) on your
workstation.
Kit contents
Ensure that the following components are included in your optical drive kit:
●
5.25-inch, half-height SATA ODD
●
SATA interface cables
●
Four M3 guide screws
●
Warranty
© 2007 Hewlett-Packard Development Company, L.P. The HP Invent logo is a registered
trademark of Hewlett-Packard Development Company, L.P. Microsoft and Windows are
U.S. registered trademarks of Microsoft Corporation. Printed in the U.S.
ENWW
Kit contents
1
HP xw Workstation series