HP Xw6600 HP xw Workstation series - SATA optical drive installation - Page 7
Torx T-15 screwdriver.
 |
UPC - 883585731121
View all HP Xw6600 manuals
Add to My Manuals
Save this manual to your list of manuals |
Page 7 highlights
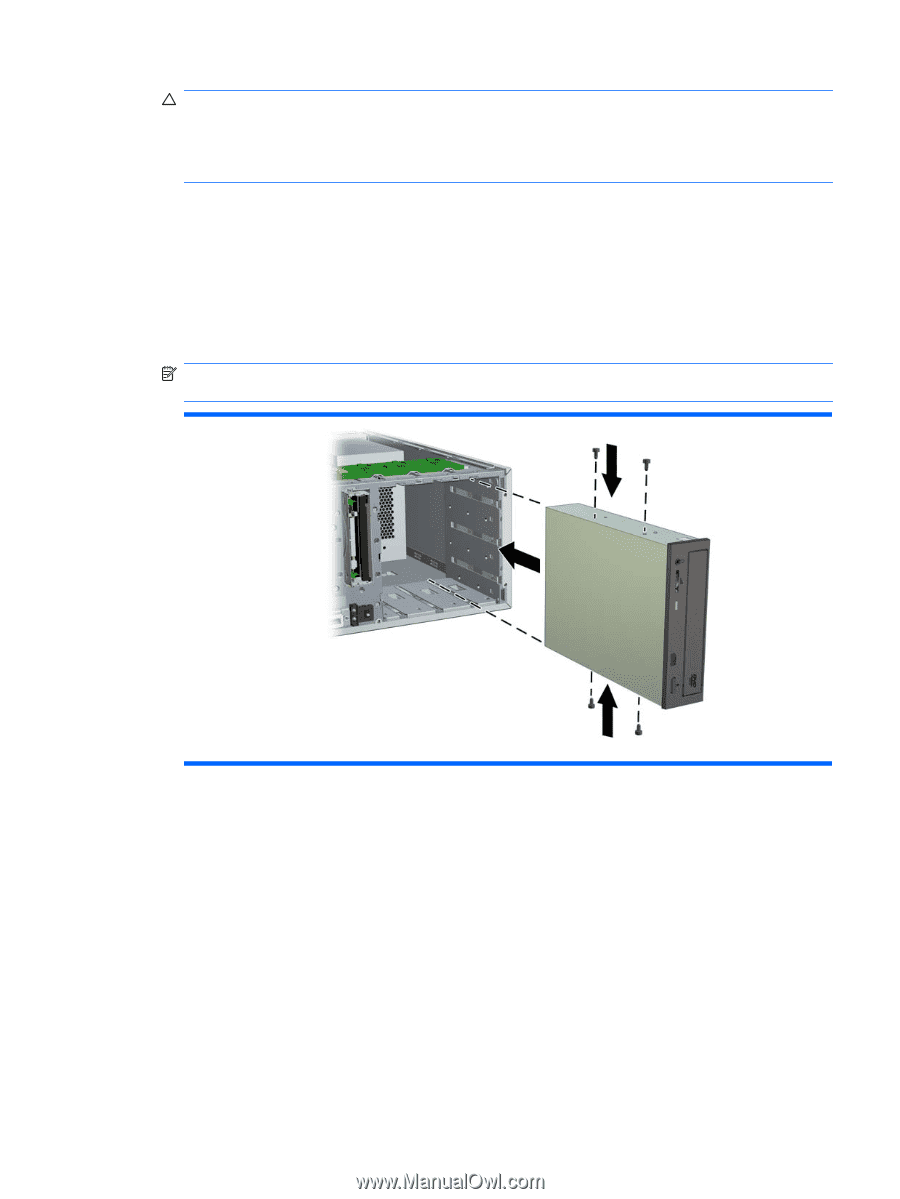
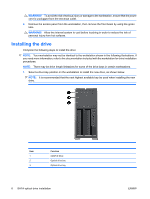
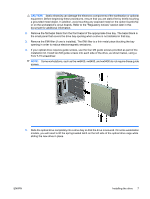
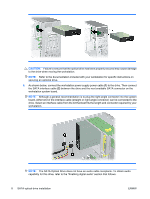
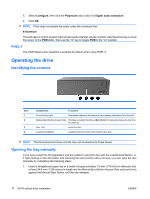
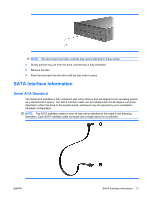
CAUTION: Static electricity can damage the electronic components of the workstation or optional equipment. Before beginning these procedures, ensure that you are static-free by briefly touching a grounded metal object. In addition, avoid touching any exposed metal on the option board/chip or on the workstation's circuit boards. Refer to the "Regulatory notices" section later in this document for additional information. 2. Remove the flat bezel blank from the front bezel of the appropriate drive bay. The bezel blank is the small panel that covers the drive bay opening when a drive is not installed in that bay. 3. Remove the EMI filler (if one is installed). The EMI filter is a thin metal piece blocking the bay opening in order to reduce electromagnetic emissions. 4. If your optical drive requires guide screws, use the four M3 guide screws provided as part of the installation kit. Install two M3 guide screws into each side of the drive, as shown below, using a Torx T-15 screwdriver. NOTE: Some workstations, such as the xw6400, xw8400, and xw9400 do not require these guide screws. 5. Slide the optical drive completely into a drive bay so that the drive is secured. On some workstation models, you will need to lift the spring-loaded latch on the left side of the optical drive cage while sliding the new drive in place. ENWW Installing the drive 7
-
 1
1 -
 2
2 -
 3
3 -
 4
4 -
 5
5 -
 6
6 -
 7
7 -
 8
8 -
 9
9 -
 10
10 -
 11
11 -
 12
12
 |
 |