HP Z3100 HP Designjet Z3100 Printing Guide [HP Raster Driver] - Printing a &qu - Page 6
> Proof Output, Source Options >
 |
UPC - 882780677531
View all HP Z3100 manuals
Add to My Manuals
Save this manual to your list of manuals |
Page 6 highlights
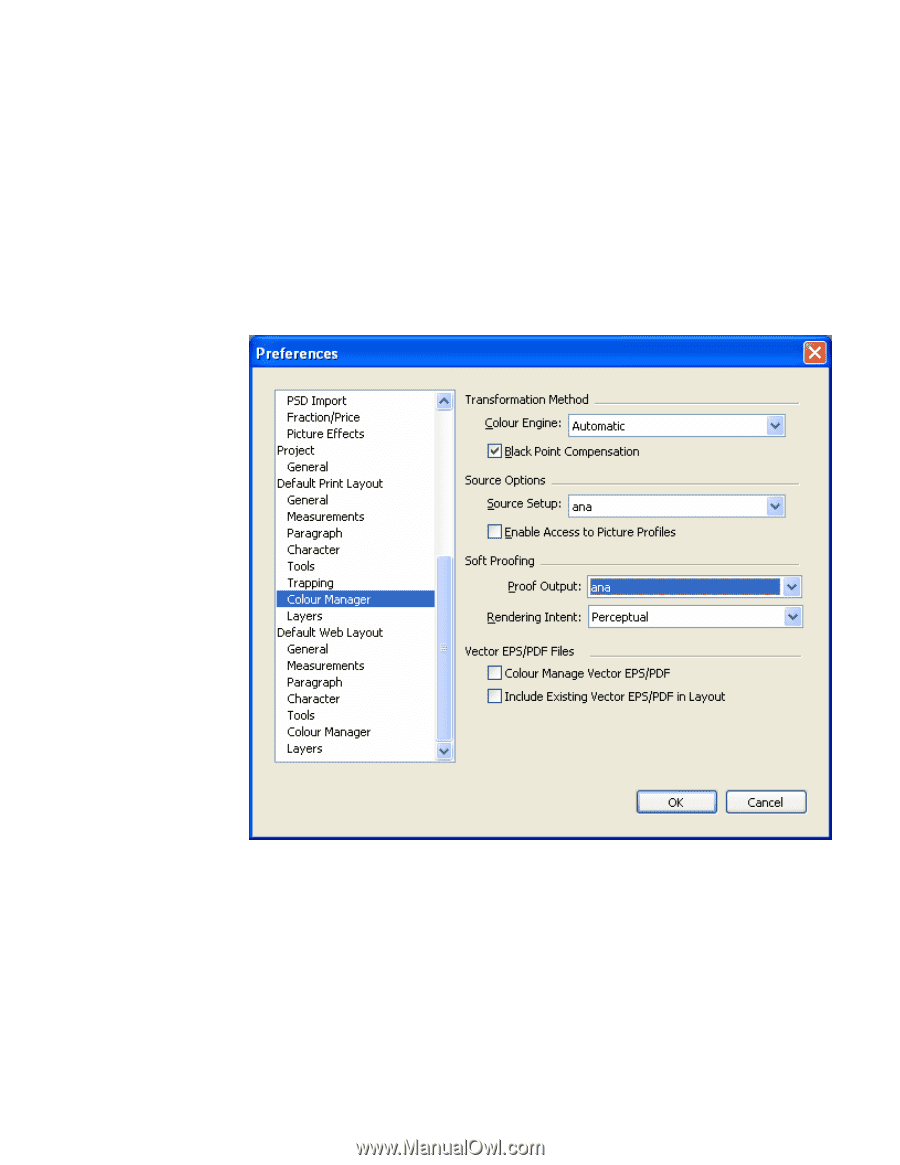
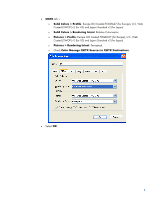
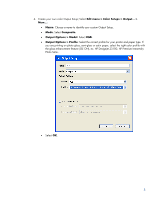
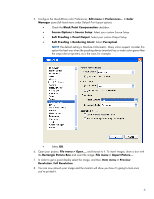
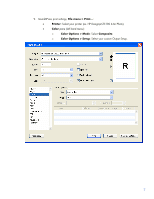
5. Configure the QuarkXPress color Preferences, Edit menu > Preferences... > Color Manager pane (left hand menu under Default Print Layout option): • Check the Black Point Compensation checkbox. • Source Options > Source Setup: Select your custom Source Setup. • Soft Proofing > Proof Output: Select your custom Output Setup. • Soft Proofing > Rendering Intent: Select Perceptual. NOTE The default setting is Absolute Colorimetric. Many colors experts consider this option the best one when the proofing device (monitor) has a wider color gamut than the output device (printer), as is the case, for example. • Select OK. 6. Open your project, File menu > Open..., and browse to it. To insert images, draw a box with the Rectangle Picture Box and insert the image, File menu > Import Picture...: 7. In order to get a good display select the image, and then, Item menu > Preview Resolution: Full Resolution. 8. You can now retouch your image and the monitor will show you how it's going to look once you've printed it. 6
-
 1
1 -
 2
2 -
 3
3 -
 4
4 -
 5
5 -
 6
6 -
 7
7 -
 8
8 -
 9
9 -
 10
10
 |
 |