HP d248 Quick Setup & Getting Started
HP d248 - Microtower Desktop PC Manual
 |
View all HP d248 manuals
Add to My Manuals
Save this manual to your list of manuals |
HP d248 manual content summary:
- HP d248 | Quick Setup & Getting Started - Page 1
Quick Setup & Getting Started HP Compaq Business Desktops d228 and d248 Models Document Part Number: 354886-001 November 2003 This guide provides basic information about setting up and maintaining your computer. - HP d248 | Quick Setup & Getting Started - Page 2
MS-DOS, Windows, and Windows NT are HP products and services are set forth in the express warranty statements accompanying such products and services. Nothing herein should be construed as constituting an additional warranty. HP HP Compaq Business Desktops d228 and d248 Models First Edition (November - HP d248 | Quick Setup & Getting Started - Page 3
or Upgrading Device Drivers 2-2 Customizing the Monitor Display 2-3 Protecting Your Software 2-3 Restore Solution 2-3 For More Information 2-4 Getting Help 2-5 Basic Troubleshooting 2-6 Overview 2-6 Helpful Hints 2-6 Solving General Problems 2-8 Solving Hardware Installation Problems 2-11 - HP d248 | Quick Setup & Getting Started - Page 4
Contents iv Quick Setup & Getting Started Guide - HP d248 | Quick Setup & Getting Started - Page 5
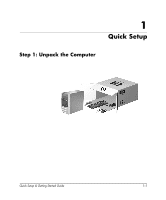
1 Quick Setup Step 1: Unpack the Computer Quick Setup & Getting Started Guide 1-1 - HP d248 | Quick Setup & Getting Started - Page 6
To reduce the risk of serious injury, read the Safety & Comfort Guide. It describes proper workstation setup, posture, and health and work and provides important electrical and mechanical safety information. This guide is located on the Web at http://www.hp.com/ergo and on the hard drive or on the - HP d248 | Quick Setup & Getting Started - Page 7
the voltage selection is compatible with your local power specifications. Failure to do so could result in damage to your computer. Quick Setup & Getting Started Guide 1-3 - HP d248 | Quick Setup & Getting Started - Page 8
- Headphone/Line-out connector q Microphone connector w Gameport connector Ä CAUTION: Do not add optional hardware devices to your personal computer until the operating system is successfully installed. Doing so may cause errors and may prevent the operating system from - HP d248 | Quick Setup & Getting Started - Page 9
light 4 Diskette drive activity light (optional) - System activity light 5 Diskette drive eject button (optional) q USB connectors 6 Optical Disc drive eject button Quick Setup & Getting Started Guide 1-5 - HP d248 | Quick Setup & Getting Started - Page 10
times. ■ Disconnect power from the personal computer by unplugging the power cord from either the electrical outlet or the personal computer. 1-6 Quick Setup & Getting Started Guide - HP d248 | Quick Setup & Getting Started - Page 11
takes about 5 to 10 minutes, depending on which operating system is being installed. Carefully read and follow the instructions that appear on the screen to complete the installation. Ä CAUTION: Once the automatic installation has begun, DO NOT TURN OFF THE COMPUTER UNTIL THE PROCESS IS COMPLETE - HP d248 | Quick Setup & Getting Started - Page 12
Windows operating systems, pressing the power button does not turn off the power, but causes the personal computer to enter a low-power state. This allows you to quickly power down, without closing applications, and to quickly return to the same operational state without any data loss. ✎ To manually - HP d248 | Quick Setup & Getting Started - Page 13
HP is committed to designing products, services, and programs with improved usability and accessibility for all customers. HP products with Microsoft Windows with variances of each, depending on the operating system and hard drive support. To check the file system format assigned to your hard drive ( - HP d248 | Quick Setup & Getting Started - Page 14
follow the instructions that appear on the screen to change the drive partitioning. This feature is available on select models only. Installing or Upgrading Device Drivers To install optional hardware devices after the OS installation is complete, you must install the device drivers for the device - HP d248 | Quick Setup & Getting Started - Page 15
and factory-installed software by using the Restore Plus! CD and any other CDs that came with the computer. Carefully read and follow the instructions for the restore solution that came with the computer. For questions about or problems with this CD, please contact HP customer service. Quick Setup - HP d248 | Quick Setup & Getting Started - Page 16
Information (PDF Format) ■ Worldwide Telephone Numbers Guide (PDF format) ■ Safety & Comfort Guide (Windows Help format) ✎ If you do not have a CD-ROM drive, you may download the product documentation from the HP Web site at http://www.hp.com/support. 1. Insert the compact disc into the CD - HP d248 | Quick Setup & Getting Started - Page 17
.exe (where X is the drive letter designator for the CD-ROM drive) 3. Click OK. Getting Help Additional help and other information can be obtained through HP Technical Support information at http://www.hp.com or in the warranty information included with your computer. Quick Setup & Getting Started - HP d248 | Quick Setup & Getting Started - Page 18
may elect to purchase a Quick Troubleshooting Guide (part number 120205-002, available in select countries and only in English) that contains easy to follow flow charts that can lead you through the debug process. This guide was written for HP authorized service providers and contains steps that may - HP d248 | Quick Setup & Getting Started - Page 19
expansion board or other option. See "Solving Hardware Installation Problems" for instructions. ■ Make sure that all the required device drivers have been installed. For example, if you have connected a printer, you need to install a printer driver. ■ Remove all diskettes from your system before - HP d248 | Quick Setup & Getting Started - Page 20
contact your HP authorized reseller or service provider. Problem Cause Solution any expansion board that was has been installed. just installed. Drive power, data, or power Reseat internal fan is running. Contact HP authorized reseller or service provider. Power line selector switch - HP d248 | Quick Setup & Getting Started - Page 21
RTC date and time). If the problem persists, replace the RTC battery. Refer to the Hardware Reference Guide for instructions on installing a new battery, or contact your HP authorized reseller or service provider for RTC battery replacement. Computer appears to pause periodically. Network driver - HP d248 | Quick Setup & Getting Started - Page 22
Getting Started Problem Blank monitor screen. (continued) Cause Solution The cable connections are not correct. Check the monitor cable connection from the monitor Set the selector switch to agree with the switch is not properly set. cable connection. 2-10 Quick Setup & Getting Started Guide - HP d248 | Quick Setup & Getting Started - Page 23
installation of the new hardware. In Windows 2000 and Windows XP Professional, select the Add New Hardware icon in the Control Panel and follow the instructions that appear on the screen. Problem of changes to the instructions for accepting the changes. configuration, you did not accept them. Quick - HP d248 | Quick Setup & Getting Started - Page 24
Getting Started 2-12 Quick Setup & Getting Started Guide - HP d248 | Quick Setup & Getting Started - Page 25
2-6 cautions adding external devices 1-4 computer pauses 2-9 D date and time display 2-9 Documentation CD 2-4, 2-5 Computer Setup (F10) Guide 2-4 Hardware Reference Guide 2-4 language displayed 2-4 Quick Setup & Getting Started Guide 2-4 running when Autorun is disabled 2-4 Safety & Comfort - HP d248 | Quick Setup & Getting Started - Page 26
Index Index-2 Quick Setup & Getting Started Guide
-
 1
1 -
 2
2 -
 3
3 -
 4
4 -
 5
5 -
 6
6 -
 7
7 -
8
-
9
-
10
-
11
-
12
-
13
-
14
-
15
-
16
-
17
-
18
-
19
-
20
-
21
-
22
-
23
-
24
-
25
-
26
 |
 |

Quick Setup & Getting Started
HP Compaq Business Desktops d228 and
d248 Models
Document Part Number: 354886-001
November 2003
This guide provides basic information about setting up and
maintaining your computer.