HP t100 Hardware Reference Guide HP MultiSeat Thin Client t100 - Page 15
Mounting the HP MultiSeat Thin Client t100, Mounting Bracket
 |
View all HP t100 manuals
Add to My Manuals
Save this manual to your list of manuals |
Page 15 highlights
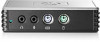
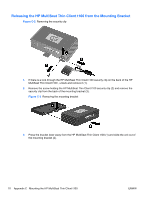
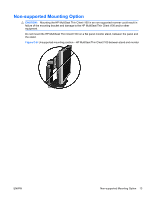
C Mounting the HP MultiSeat Thin Client t100 Before mounting the HP MultiSeat Thin Client t100, be sure to attach the mounting bracket. See Mounting Bracket on page 9 for more information. Mounting Bracket The HP MultiSeat Thin Client t100 ships with a mounting bracket which should be used to secure the HP MultiSeat Thin Client t100 to various mounting solutions. The bracket incorporates four mounting points on one side of the unit. These mounting points follow the VESA (Video Electronics Standards Association) standard, which provides industry-standard mounting interfaces for Flat Displays (FDs), such as flat panel monitors, flat displays, and flat TVs. Attaching the HP MultiSeat Thin Client t100 to the Mounting Bracket 1. Attach the mounting bracket to a supported mounting solution. See Supported Mounting Options on page 11 for more information. Figure C-1 Inserting the HP MultiSeat Thin Client t100 into the mounting bracket 2. Hold the HP MultiSeat Thin Client t100 so that the bottom of the unit will be next to the Mounting Bracket and slide the HP MultiSeat Thin Client t100 front-first into the bracket. 3. Secure the HP MultiSeat Thin Client t100 to the mounting bracket. See Securing the HP MultiSeat Thin Client t100 in the Mounting Bracket on page 7 ENWW Mounting Bracket 9
-
 1
1 -
2
-
3
-
4
-
5
-
6
-
7
-
8
-
9
-
 10
10 -
 11
11 -
 12
12 -
 13
13 -
 14
14 -
 15
15 -
 16
16 -
 17
17 -
 18
18 -
 19
19 -
 20
20 -
21
-
22
-
23
-
24
-
25
 |
 |
