HP t420 Administrator Guide - Page 70
Updating thin clients, Using the broadcast update method, Example of performing DHCP tagging
 |
View all HP t420 manuals
Add to My Manuals
Save this manual to your list of manuals |
Page 70 highlights
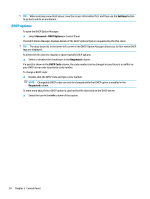
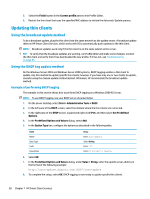
5. Select the Finish button in the Current profile pane to exit Profile Editor. 6. Restart the thin client that uses the specified MAC address to initiate the Automatic Update process. Updating thin clients Using the broadcast update method To do a broadcast update, plug the thin client into the same network as the update server. A broadcast update relies on HP Smart Client Services, which works with IIS to automatically push updates to the thin client. NOTE: Broadcast updates work only if the thin client is on the same subnet as the server. TIP: To verify that the broadcast updates are working, run Profile Editor and make some changes. Connect the thin client and verify that it has downloaded the new profile. If it has not, see Troubleshooting on page 65. Using the DHCP tag update method On the Windows Server 2003 and Windows Server 2008 systems, DHCP tagging enables a thin client to update. Use this method to update specific thin clients; however, if you have only one or two clients to update, consider using the manual update method instead. Otherwise, HP recommends the broadcast update method. Example of performing DHCP tagging The example in this section shows how to perform DHCP tagging on a Windows 2008 R2 Server. NOTE: To use DHCP tagging, see your DHCP server documentation. 1. On the server desktop, select Start > Administrative Tools > DHCP. 2. In the left pane of the DHCP screen, select the domain where the thin clients are connected. 3. In the right pane of the DHCP screen, expand and right-click IPv4, and then select Set Predefined Options. 4. In the Predefined Options and Values dialog, select Add. 5. In the Option Type box, configure the options as described in the following table. Field Name Data Type Code Description Entry Enter auto-update. Select String. Enter 137. Enter HP Automatic Update. 6. Select OK. 7. In the Predefined Options and Values dialog, under Value > String, enter the update server address in the format of the following example: http://auto-update.dominio.com:18287/auto-update 8. To complete the setup, select OK. DHCP tagging is now ready to update specific thin clients. 58 Chapter 7 HP Smart Client Services
-
 1
1 -
2
-
3
-
4
-
5
-
6
-
7
-
8
-
9
-
10
-
11
-
12
-
13
-
14
-
15
-
16
-
17
-
18
-
19
-
20
-
21
-
22
-
23
-
24
-
25
-
26
-
27
-
28
-
29
-
30
-
31
-
32
-
33
-
34
-
35
-
36
-
37
-
38
-
39
-
40
-
41
-
42
-
43
-
44
-
45
-
46
-
47
-
48
-
49
-
50
-
51
-
52
-
53
-
54
-
55
-
56
-
57
-
58
-
59
-
60
-
61
-
62
-
63
-
64
-
 65
65 -
 66
66 -
 67
67 -
 68
68 -
 69
69 -
 70
70 -
 71
71 -
 72
72 -
 73
73 -
 74
74 -
 75
75 -
76
-
77
-
78
-
79
-
80
-
81
-
82
-
83
-
84
-
85
-
86
-
87
-
88
-
89
-
90
-
91
-
92
-
93
-
94
-
95
-
96
-
97
-
98
-
99
-
100
-
101
-
102
-
103
-
104
-
105
-
106
-
107
-
108
-
109
-
110
-
111
-
112
-
113
-
114
-
115
-
116
-
117
-
118
-
119
-
120
-
121
-
122
-
123
-
124
-
125
-
126
-
127
-
128
-
129
-
130
-
131
-
132
-
133
-
134
-
135
-
136
-
137
-
138
-
139
-
140
-
141
-
142
-
143
-
144
-
145
-
146
-
147
-
148
-
149
-
150
-
151
-
152
-
153
-
154
-
155
-
156
-
157
-
158
-
159
 |
 |
