Hitachi D10VF Handling Instructions - Page 4
Prior To Operation - drill
 |
UPC - 717709006133
View all Hitachi D10VF manuals
Add to My Manuals
Save this manual to your list of manuals |
Page 4 highlights
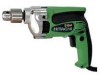
PRIOR TO OPERATION 1. Power source Ensure that the power source to be utilized conforms to the power requirements specified on the product nameplate. 2. Power switch Ensure that the power switch is in the OFF position. If the plug is connected to a receptacle while the power switch is in the ON position, the power tool will start operating immediately, inviting serious accident. 3. Extension cord When the work area is removed from the power source. Use an extension cord of sufficient thickness and rated capacity. The extension cord should be kept as short as practicable. 4. Selecting the appropriate drill bit: ⅜ When boring metal or plastic Use ordinary metalworking drill bits. ⅜ When boring wood Use ordinary woodworking drill bits. However, when drilling 6.5 mm or smaller holes, use a metalworking drill bit. 5. Mounting and dismounting of the bit For keyed chuck (Fig. 1) (1) Open the chuck jaws, and insert the bit into the chuck. (2) Place the chuck wrench in each of the three holes in the chuck, and turn it in the clockwise direction (viewed from the front side). Tighten securely. (3) To remove the bit, place the chuck wrench into one of the holes in the chuck and turn it in the counterclockwise direction. Drill Chuck Chuck Tighten Wrench Loosen Ring Sleeve Loosen Tighten Fig. 2 (4) If it is hard to loosen the sleeve, fix the spindle using the open-end wrench, hold the sleeve firmly, and turn it in the loosening direction (counterclockwise when viewed from the front). (Fig. 3) Open End Wrench Loosen Fig. 3 6. Installing the side handle For D10VG and D13VF A Side handle is supplied with drill. It can be installed on either side of the tool for right or left handed use. To install the side handle, thread it into the socket on the desired side of the tool and tighten it securely. (Fig. 4) Fig. 1 For keyless chuck (Fig. 2) (1) Open the chuck jaws, and insert the bit into the chuck. To open the chuck jaws, hold the ring while turning the sleeve in the counterclockwise direction (viewed from the front side). (2) Firmly grasp the ring and turn the sleeve in the clockwise direction. Tighten securely. (3) To remove the bit, firmly grasp the ring and turn the sleeve in the counterclockwise direction. Loosen Side Handle Tighten Fig. 4 For D13VG D13VF for Australia The large torque of the motor for this drill can result in considerable reaction to your arms during drilling work. Accordingly, make absolutely sure before use that the side handle and the handle joint are completely installed. (Fig. 5) 4
-
 1
1 -
 2
2 -
 3
3 -
 4
4 -
 5
5 -
 6
6 -
 7
7 -
 8
8 -
 9
9 -
 10
10 -
11
-
12
 |
 |
