Hitachi D10VF Handling Instructions - Page 6
HOW TO USE - electric drill
 |
UPC - 717709006133
View all Hitachi D10VF manuals
Add to My Manuals
Save this manual to your list of manuals |
Page 6 highlights
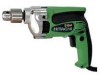
High Speed 9. Attaching the hook. (Optional accessory) (Fig. 13) To attach the hook, it is necessary to disassemble the handle portion which covered the tool's electrical system. For your continued safety and electrical shock protection, installing the hook on this drill should ONLY be performed by a HITACHI AUTHORIZED SERVICE CENTER. Hook (A) Fig. 10 (3) Installing the side handle (Fig. 11) The side handle can be installed on either side of the angle unit for right or left handed use. To install the side handle, thread it into the socket on the desired side of the angle unit and tighten it securely. Fig. 13 Side Handle Fig. 11 (4) Removing chuck from angle unit (Fig. 12) ⅜ The chuck can be removed from angle unit in the same manner it was removed from the drill; however, ALWAYS REMOVE ANGLE UNIT FROM THE DRILL BEFORE ATTEMPTING TO LOOSEN CHUCK. This will prevent damage of drills gear. Use open end wrench provided to hold angle unit spindle before attempting to loosen chuck. CAUTION: When the power tool is used with a hook fixed to it, pay attention to the following points: ⅜ Before hanging the main unit from the waist belt, make sure that the drill has come to a complete stop. While it is suspended from the waist belt, the power plug must be disconnected from the power source. ⅜ Do not walk about with the power tool hanging from the waist belt. ⅜ In the case of operation in a high place, it is dangerous to drop the tool accidentally. If the hook is deformed or hung from the wrong position, there is danger that the hook will slip off and the tool will fall. Be careful to avoid danger. ⅜ In making a through hole, the power tool sometimes shakes violently when the workpiece is pierced, from example. Be careful you are not hurt by the hook even if such situation happens. 10. RCD The use of a residual current device with a rated residual current of 30mA or less at all times is recommended. Open End Wrench Hex. Bar Wrench Fig. 12 CAUTION: If the chuck cannot be removed by striking the wrench, don't strike the wrench forcibly and send the drill to a HITACHI AUTHORIZED SERVICE CENTER. HOW TO USE 1. Switch operation ⅜ When the trigger is depressed, the tool rotates. When the trigger is released, the tool stops. ⅜ The rotational speed of the drill can be controlled by varying the amount that the trigger switch is pulled. Speed is low when the trigger switch is pulled slightly and increases as the trigger switch is pulled more. ⅜ Pulling the trigger and pushing the stopper, it keeps the switched-on condition which is convenient for continuous running. When switching off, the stopper can be disconnected by pulling the trigger again. 2. Drilling ⅜ When drilling, start the drill slowly, and gradually increasing speed as you drill. ⅜ Always apply pressure in a straight line with the bit. Use enough pressure to keep drilling, but do not push hard enough to stall the motor or deflect the bit. 6
-
 1
1 -
 2
2 -
 3
3 -
 4
4 -
 5
5 -
 6
6 -
 7
7 -
 8
8 -
 9
9 -
 10
10 -
 11
11 -
 12
12
 |
 |
