Hitachi DZ-MV200A Owners Guide - Page 12
Names of Parts - accessories
 |
View all Hitachi DZ-MV200A manuals
Add to My Manuals
Save this manual to your list of manuals |
Page 12 highlights
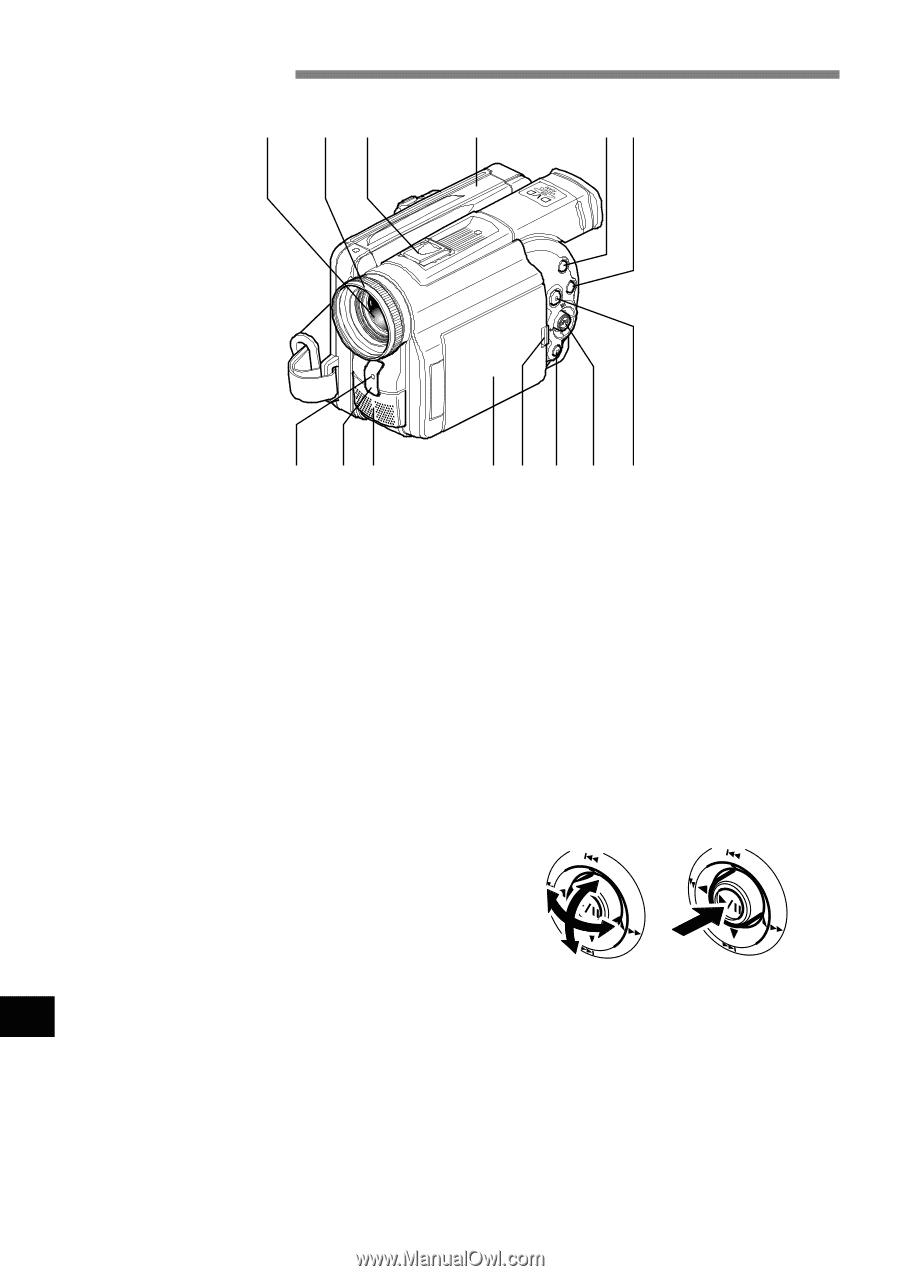
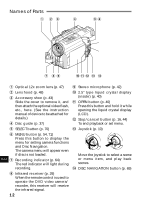
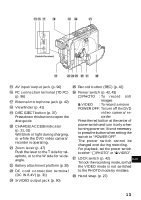
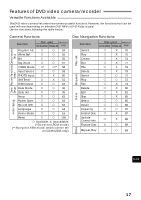
Names of Parts 1 23 4 56 7 89 !"# $ % 1 Optical 12x zoom lens (p. 47) 2 Lens hood (p. 48) 3 Accessory shoe (p. 43) Slide the cover to remove it, and then attach the optional video flash, etc., here. (See the instruction manual of device to be attached for details.) 4 Disc guide (p. 37) 5 SELECT button (p. 70) 6 MENU button (p. 54, 71) Press this button to display the menu for setting camera functions and Disc Navigation. The camera menu will appear even if disc is not loaded. English 7 Recording indicator (p. 64) The red indicator will light during recording. 8 Infrared receiver (p. 29) When the remote control is used to operate the DVD video camera/ recorder, this receiver will receive the infrared signal. 12 9 Stereo microphone (p. 42) ! 2.5" type liquid crystal display (inside) (p. 40) " OPEN button (p. 40) Press this button and hold it while opening the liquid crystal display (LCD). # Stop/cancel button (p. 16, 44) To end playback or set menu. $ Joystick (p. 10) Move the joystick to select a scene or menu item, and play back scenes. % DISC NAVIGATION button (p. 69)
-
 1
1 -
2
-
3
-
4
-
5
-
6
-
 7
7 -
 8
8 -
 9
9 -
 10
10 -
 11
11 -
 12
12 -
 13
13 -
 14
14 -
 15
15 -
 16
16 -
 17
17 -
18
-
19
-
20
-
21
-
22
-
23
-
24
-
25
-
26
-
27
-
28
-
29
-
30
-
31
-
32
-
33
-
34
-
35
-
36
-
37
-
38
-
39
-
40
-
41
-
42
-
43
-
44
-
45
-
46
-
47
-
48
-
49
-
50
-
51
-
52
-
53
-
54
-
55
-
56
-
57
-
58
-
59
-
60
-
61
-
62
-
63
-
64
-
65
-
66
-
67
-
68
-
69
-
70
-
71
-
72
-
73
-
74
-
75
-
76
-
77
-
78
-
79
-
80
-
81
-
82
-
83
-
84
-
85
-
86
-
87
-
88
-
89
-
90
-
91
-
92
-
93
-
94
-
95
-
96
-
97
-
98
-
99
-
100
-
101
-
102
-
103
-
104
-
105
-
106
-
107
-
108
-
109
-
110
-
111
-
112
-
113
-
114
 |
 |