Hitachi EC119SA Instruction Manual - Page 9
English, Transport, Operation, Maintenance - parts breakdown
 |
UPC - 717709011243
View all Hitachi EC119SA manuals
Add to My Manuals
Save this manual to your list of manuals |
Page 9 highlights
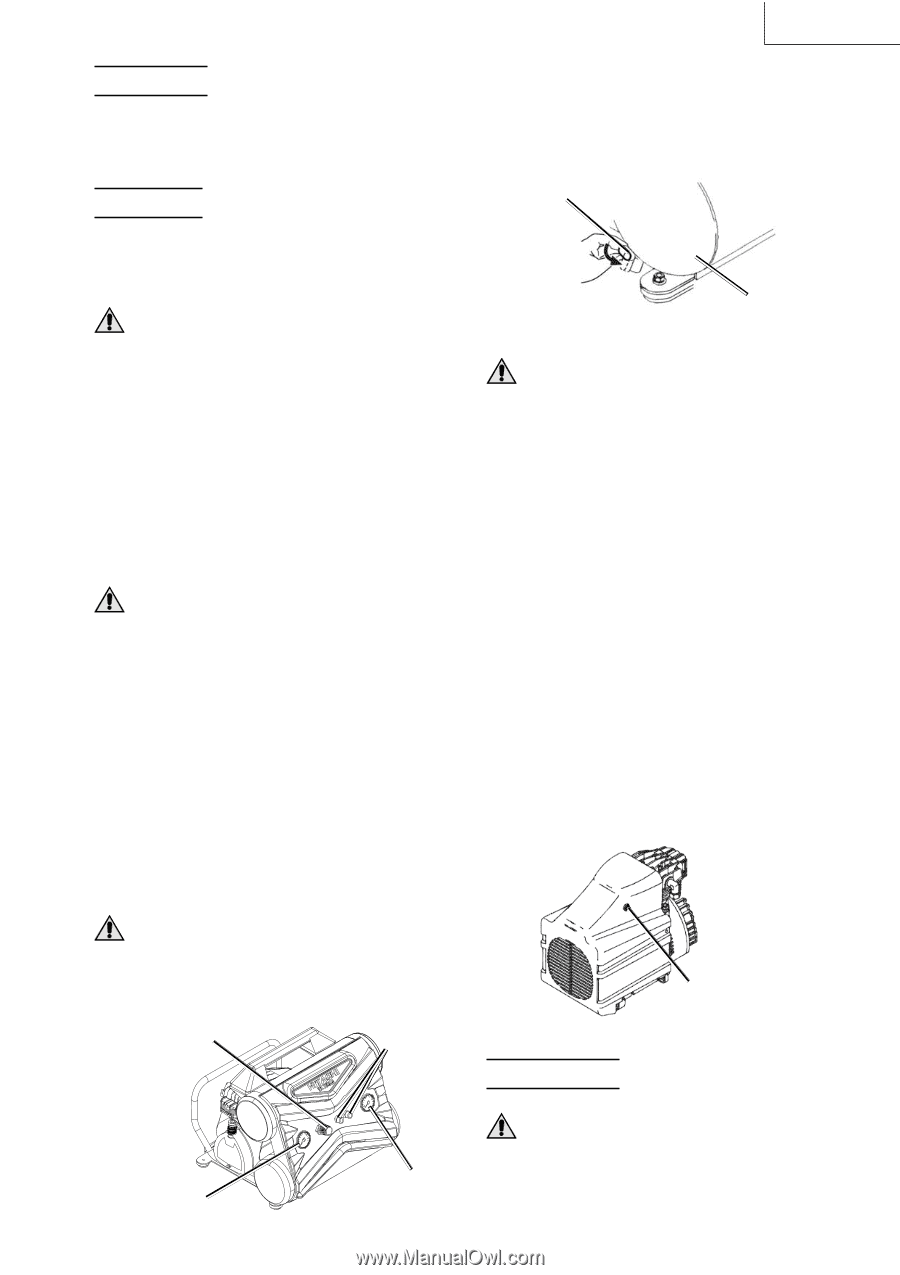
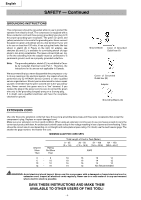
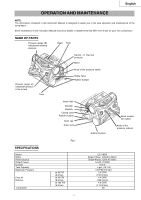
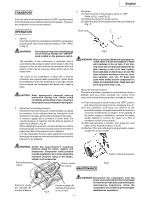
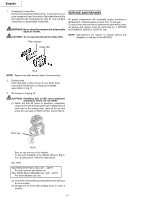
English TRANSPORT 3. Shutdown (1) Push the knob of the pressure switch to "OFF" (Refer to Fig. 1 and Fig. 2). Push the knob of the pressure switch to "OFF" and disconnect (2) Unplug the plug from power source. it from the power source before move the compressor. Transport (3) Open the drain cock located at the lower part of the tank the compressor in the correct manner. (Fig. 7). OPERATION Drain cock 1. Start-up Insert the plug into the receptacle and start the compressor by pulling the knob of the pressure switch to "ON" (Refer to Fig. 2). Tank WARNING: Do not stop or start the compressor by use of the plug. Always use "ON/OFF" knob located on the pressure switch. Fig.7 The operation of the compressor is automatic and is controlled by the pressure switch which stops it when the pressure in the air-tank reaches the maximum level and restart it when the air pressure drops during use to the restart level. WARNING: Risk of bursting. When the tank gets corroded, there is a risk of breakdown. Water will condense in the air tank. If not drained, water will corrode and weaken the air tank causing a risk of air tank rupture. Drain tank daily or after 4 hours of use. The The motor of the compressor is fitted with a thermal protection with manual reset (push-button), which stops the compressor when the temperature is too high. Should this be tripped, the compressor will restart only if reset is done. drain contains moisture in the air, abrasion particles, rust, etc.. To drain tank open valve slowly and tilt compressor to empty accumulated water. Keep face and eyes away from drain cock. 4. About the thermal protector The thermal protector operates to stop the motor when a CAUTION: Wear appropriate personal hearing protection during use. Under some problem such as a motor overload, etc.. occurs. If the motor should stop during operation, proceed as follows. conditions and duration of use, noise from this product may contribute to hearing loss. (1) Push the pressure switch knob to the "OFF" position and disconnect the plug from the receptacle (Fig. 2). 2. Adjustment of working pressure Unlock the knob of the pressure reducer pulling it up, adjust the pressure to the required level by turning the knob clockwise to increase and counterclockwise to decrease. A pressure gauge (B) is provided to know when the required pressure is reached, lock the knob by pushing it down firmly (Refer to Fig. 6). When adjusting the pressure, check and make sure that a pressure gauge for the tank has the pressure level that is higher than that of the pressure to be adjusted. (2) If the extension cord does not conform to the specifications given on page 6 replace with an extension cord such as that shown on page 6. If the capacity of the power supply is insufficient, increase the power supply capacity to remove the cause of a flow of excessive current (over-current). (3) Wait approximately 5 minutes, then press the reset switch of the thermal protector (Fig. 8). (4) Start up. If the motor still stops during operation, please contact the service center. It is also imperative that you make adjustment by slowly starting up the pressure from the level that is lower than the pressure to be adjusted. WARNING: Check the manufacturer's maximum pressure rating for nailers, staplers and accessories. Compressor outlet pressure must be regulated so as to never exceed the maximum pressure rating of the nailers, staplers and accessories. Knob of the pressure reducer Quick coupler (air outlet) MAINTENANCE Switch of thermal protector Fig.8 Pressure gauge (B) indicates the working pressure Fig.6 Pressure gauge (A) indicates the pressure in the air tank - 9 - WARNING: Disconnect the compressor from the power source and remove the compressed air from the air tank before performing the maintenance operations. Allow the compressor to cool before performing the maintenance operations.
-
 1
1 -
2
-
3
-
 4
4 -
 5
5 -
 6
6 -
 7
7 -
 8
8 -
 9
9 -
 10
10 -
 11
11 -
 12
12 -
 13
13 -
 14
14 -
15
-
16
-
17
-
18
-
19
-
20
-
21
-
22
-
23
-
24
-
25
-
26
-
27
-
28
-
29
-
30
-
31
-
32
 |
 |