Hitachi L42S503 Owners Guide - Page 37
HDMI-CEC, Input Labels, Component Options, Phase, Reset
 |
UPC - 050585127562
View all Hitachi L42S503 manuals
Add to My Manuals
Save this manual to your list of manuals |
Page 37 highlights
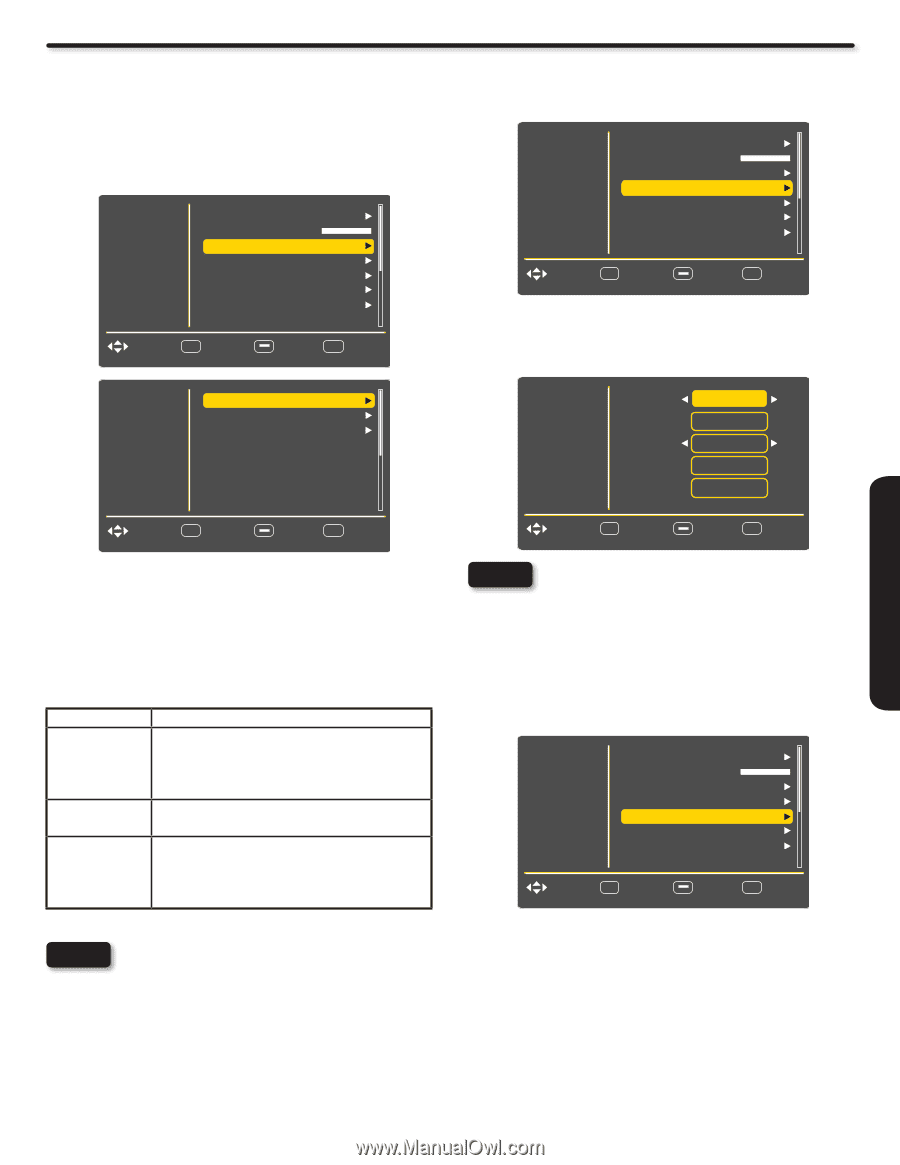
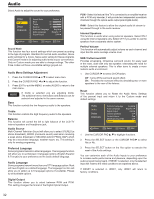
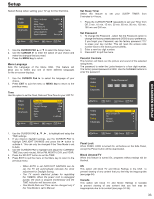
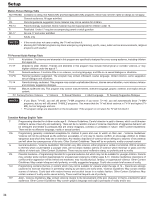
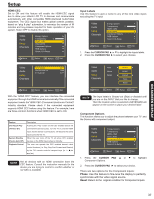
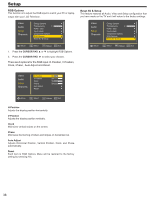
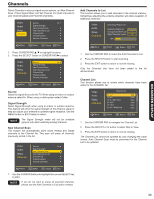
ON-SCREEN DISPLAY Setup HDMI-CEC Set to ON and this feature will enable the HDMI-CEC signal bus to allow your Hitachi LCD TV to discover and communicate automatically with other compatible HDMI-interfaced Audio/Video equipment. The CEC signal bus makes global controls possible, based on "plug & play" automation, to minimize the number of IR remotes and key-presses required for basic operation of your AV system. Select OFF to disable this option. Video Audio Setup Channels Energy Options Transparency 0 HDMI - CEC Input Labels Component Options RGB Options Reset AV & Setup Move SEL Select Return EXIT Exit Input Labels Use this feature to give a name to any of the nine video inputs excluding the TV input. Video Audio Setup Channels Energy Options Transparency 0 HDMI - CEC Input Labels Component Options RGB Options Reset AV & Setup Move SEL Select Return EXIT Exit 1. Press the CURSOR PAD ▲ or ▼ to highlight the Inputs labels. 2. Press the CURSOR PAD ► to select your choices. Video CEC Enable On Audio Device Auto Off On TV Auto On On Setup Channels Move SEL Select Return EXIT Exit With the "HDMI-CEC" feature, you can interface the connected equipment through the HDMI terminal automatically if the connected equipment meets the"HDMI CEC (Consumer Electronics Control)" industry standard. Please check if the connected equipment supports HDMI CEC before using this feature. For example, here are three common functions when HDMI CEC is set to ON. Feature One-Touch Play (TV Auto On) System Standby (Device Auto Off) Playback Control Description Pushing the "Play" button on the CEC enabled device will command the device to play , turn the TV on, and the HDMI input, that the device is connected to, will become the active input source for the TV. When the user turns off the TV, all active CEC enabled devices on the HDMI input will go to Standby. The user can operate the CEC enabled device's deck control functions (i.e. Play, Stop,Fast Forward and Rewind) by the TV's remote control's transport keys (ie. 4,
-
 1
1 -
2
-
3
-
4
-
5
-
6
-
7
-
8
-
9
-
10
-
11
-
12
-
13
-
14
-
15
-
16
-
17
-
18
-
19
-
20
-
21
-
22
-
23
-
24
-
25
-
26
-
27
-
28
-
29
-
30
-
31
-
 32
32 -
 33
33 -
 34
34 -
 35
35 -
 36
36 -
 37
37 -
 38
38 -
 39
39 -
 40
40 -
 41
41 -
 42
42 -
43
-
44
-
45
-
46
-
47
-
48
-
49
-
50
-
51
-
52
-
53
-
54
-
55
-
56
 |
 |