HoMedics AF-75 Downloadable Instruction Book - Page 6
Cleaning the HEPA Filter - air cleaner hepa
 |
View all HoMedics AF-75 manuals
Add to My Manuals
Save this manual to your list of manuals |
Page 6 highlights
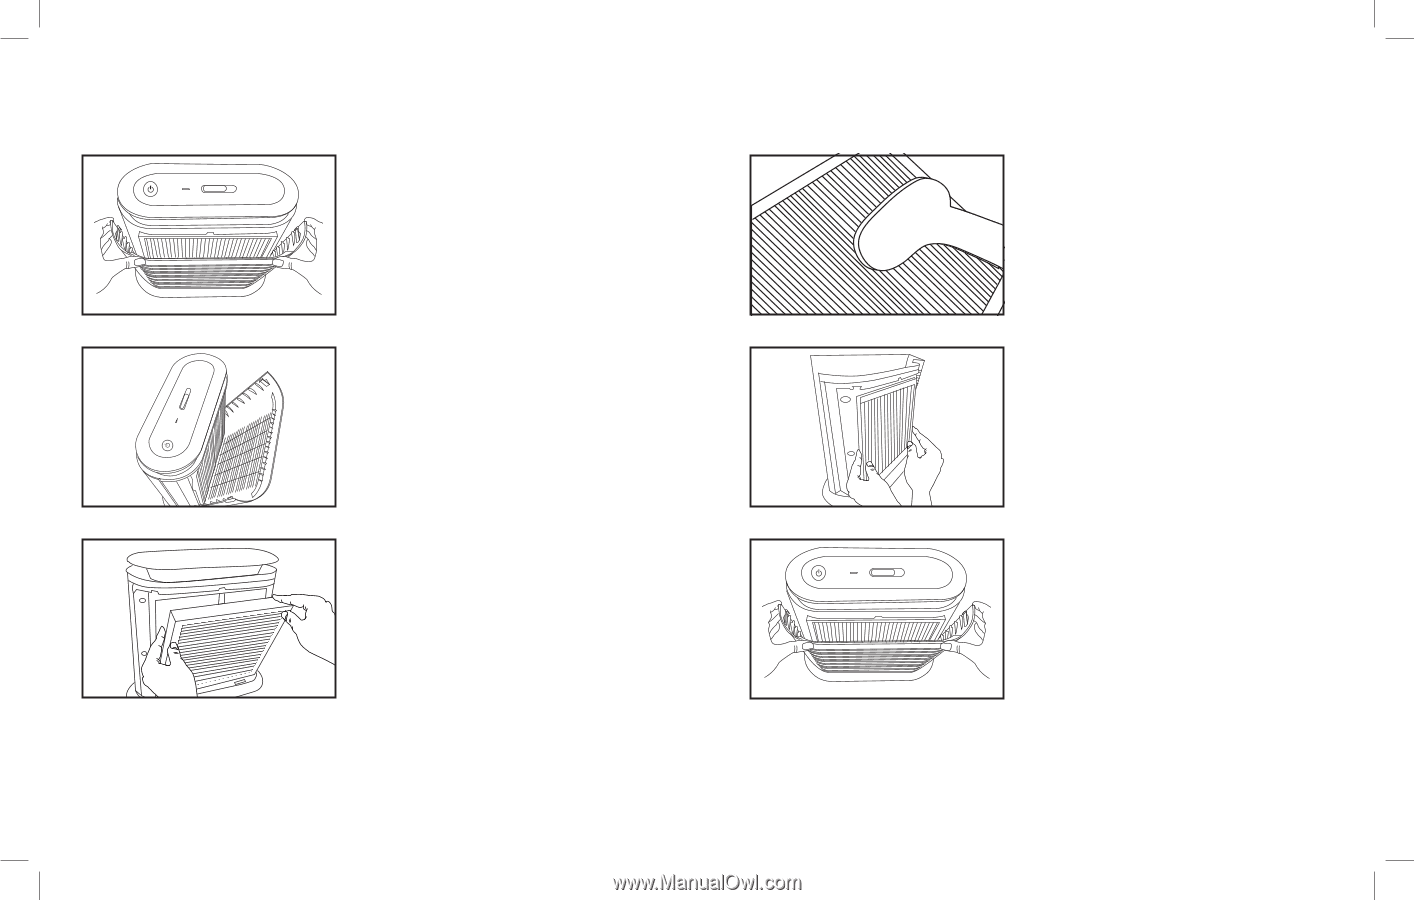
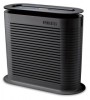
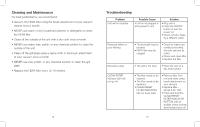
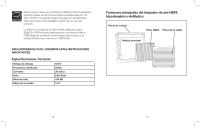
Cleaning the HEPA Filter Make sure that the air cleaner is turned OFF and unplugged from the outlet before cleaning. 1. Open the front grill by gently pulling on the tabs on either side of the top of the grill plate. Fig. 5 Fig. 5 2. Open the plate outward until the tabs at the bottom of the grill plate easily slide away from the unit. Fig. 6 Fig. 6 3. Remove the HEPA filter from the main unit. Fig. 7 Fig. 7 10 4. Use the brush attachment with your vacuum cleaner. Run the attachment along both sides of the HEPA filter, cleaning thoroughly between the accordion folds of the filter. Fig. 8 Fig. 8 5. Place the clean HEPA filter back in the main unit, making sure it is firmly seated inside the unit. Fig. 9 Fig. 9 6. Place the tabs at the bottom of the grill plate into the base of the unit. Gently push the grill plate back into place until you hear a click sound indicating that the grill is firmly latched. Fig. 10 Fig. 10 11
-
 1
1 -
 2
2 -
 3
3 -
 4
4 -
 5
5 -
 6
6 -
 7
7 -
 8
8 -
 9
9 -
 10
10 -
 11
11 -
 12
12 -
13
-
14
 |
 |