HoMedics BPA-100 User Manual - Page 8
Date & Time Set Procedure, Applying The Cuff
 |
View all HoMedics BPA-100 manuals
Add to My Manuals
Save this manual to your list of manuals |
Page 8 highlights
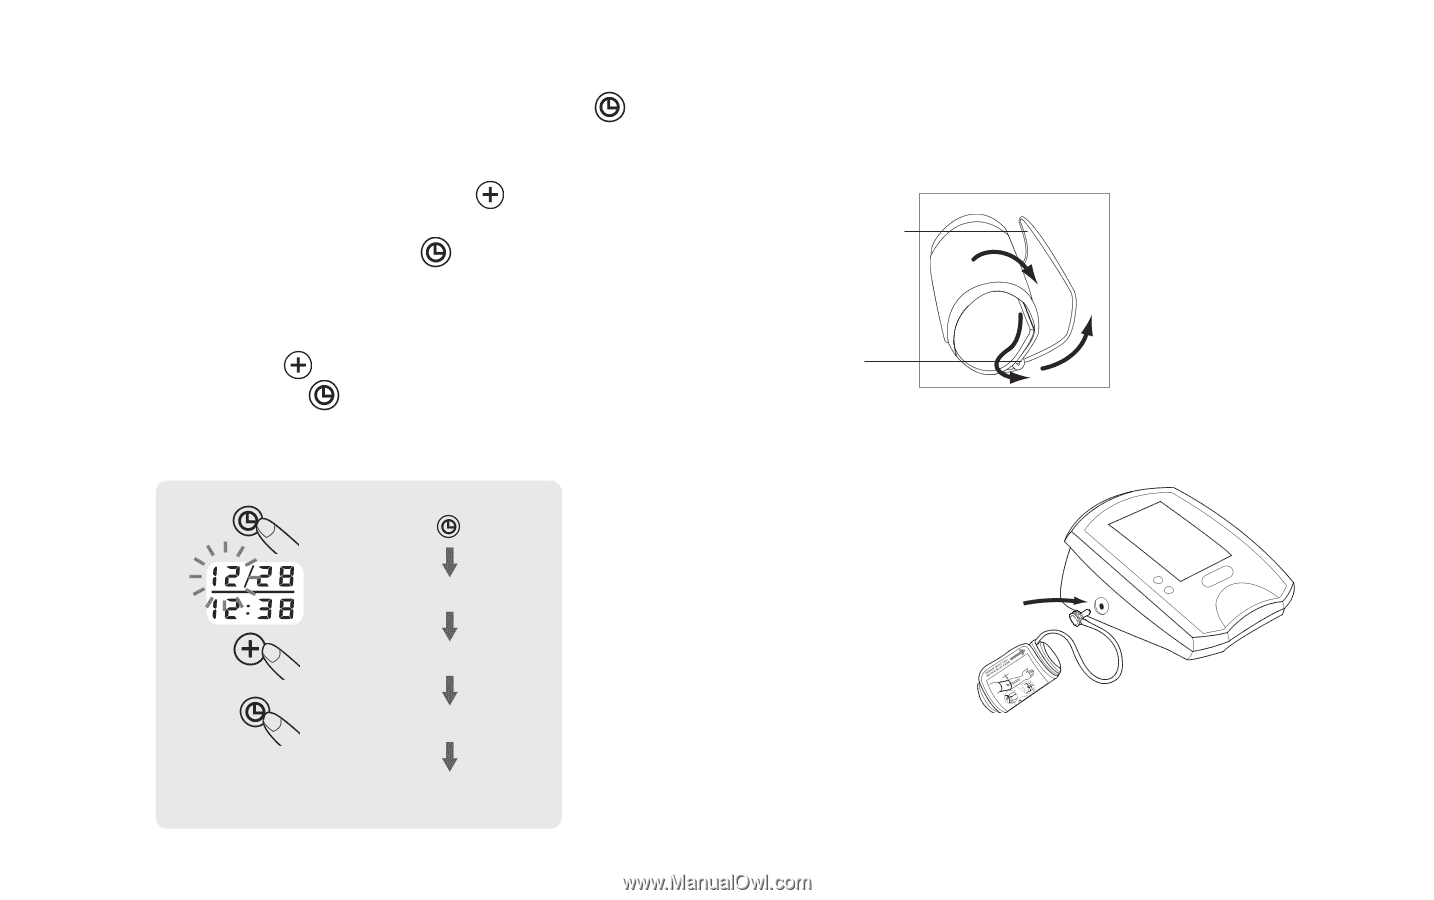
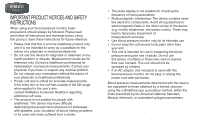
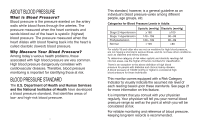
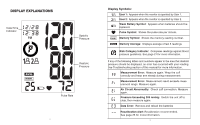
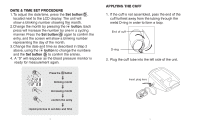
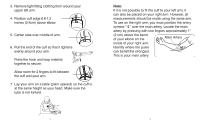
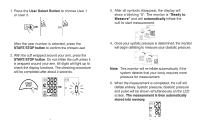
DATE & TIME SET PROCEDURE 1.To adjust the date/time, press the Set button , located next to the LCD display. The unit will show a blinking number showing the month. 2.Change the month by pressing the button. Each press will increase the number by one in a cycling manner. Press the Set button again to confirm the entry, and the screen will show a blinking number representing the day of the month. 3.Change the date and time as described in Step 2 above, using the button to change the numbers and the Set button to confirm the entries. 4. A "0" will reappear as the blood pressure monitor is ready for measurement again. Press the button blinking month increasing month confirm the entry repeat process to set date and time 13 FiAttlolcaounfwfidft rsbyoeeooctumuwrreefaeolrynrm. 2t.hfeincgueffrs (0.28~"~3 1c.m2") Cemnitdedrletuobfeaorvme.r APPLYING THE CUFF 1. If the cuff is not assembled, pass the end of the cuff furthest away from the tubing through the metal D-ring in order to form a loop. End of cuff D-ring 2. Plug the cuff tube into the left side of the unit. Insert plug here 14 Po0s.a8ibt-ioo1v.n2ecienulcfbhfoeewsd(.g2e-3cm)
-
 1
1 -
2
-
 3
3 -
 4
4 -
 5
5 -
 6
6 -
 7
7 -
 8
8 -
 9
9 -
 10
10 -
 11
11 -
 12
12 -
 13
13 -
14
-
15
-
16
-
17
-
18
-
19
-
20
-
21
-
22
-
23
-
24
-
25
-
26
-
27
-
28
-
29
-
30
-
31
-
32
 |
 |