HoMedics DWS-130 User Manual - Page 2
Getting Started, Setting Time, Setting Alarm Time
 |
View all HoMedics DWS-130 manuals
Add to My Manuals
Save this manual to your list of manuals |
Page 2 highlights
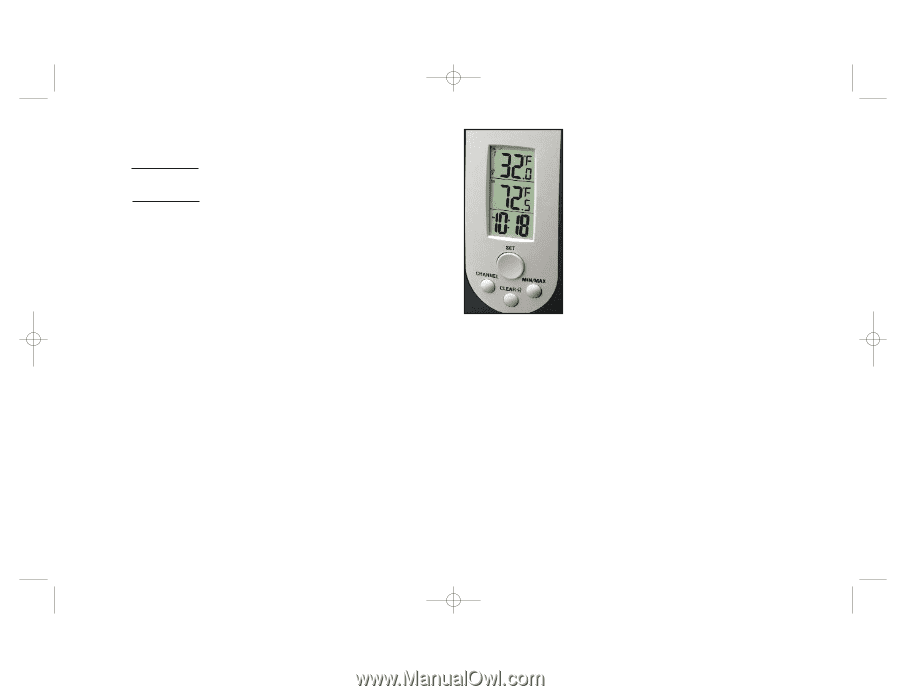
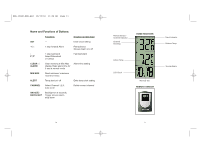
DWS-130SP-ENG.qxd 10/12/04 11:36 AM Page 3 GETTING STARTED 1. IMPORTANT: Insert batteries into the home receiver first. Home Receiver: • Install 2 alkaline AA batteries according to the polarity indicated. Close the battery cover. Remote Sensor: Install 2 alkaline AA batteries according to the polarity indicated. Close the battery cover. 2. Place the home receiver as close as possible to the remote sensor. This will help with synchronization between the two units. 3. REMEMBER: Once you are ready to position your remote sensor and home receiver, ensure that the distance is not outside the effective transmission range (100 feet). Some building materials and location of the home receiver or remote sensor can affect transmission quality and range. Try various locations for best results. NOTE: There are no consumer serviceable parts. All questions or service requests should be directed to our consumer relations department. (See Warranty section for contact information.) SETTING TIME 1. Hold "SET " button for 3 seconds to enter clock set. 2. First, select 12 hour or 24 hour setting using the " + , - " buttons located on the back of the home receiver. Press " SET " button to confirm. 3. Select Hour - Use the " + , - " buttons located on the back of the home receiver to adjust hour setting. Press " SET " button to confirm. 4. Select Minute - Use the " + , - " buttons located on the back of the home receiver to adjust minute setting. Press " SET " button to confirm. 5. Select Centigrade/Fahrenheit Temperature Readings - Use the " - " button located on the back of the home receiver to select Fahrenheit or Centigrade. 2 SETTING ALARM TIME 1. Hold the "CLEAR " button for 3 seconds. 2. Set alarm time - Press " + , - " on the back of the unit to enter the desired Hr/ Min values. Press "CLEAR " to confirm. 3. To view alarm time - Press "CLEAR " button. Alarm time will display for 5 seconds and then resume to normal clock. 4. To select daily alarm, snooze alarm or alarm off - Press " + " button on the back of the unit. For Daily Alarm - The " " icon will appear in the bottom center portion of the time display. For Snooze Alarm - Press " + " button twice so that the "Zz" icon appears in the top center portion of the time display. No Alarm - The " " icon will not be shown. 5. The home receiver will provide either a daily alarm, which lasts for 2 minutes or a snooze mode where the alarm will repeat every 10 minutes until manually cleared (see SNOOZE/LIGHT section below). 6. To turn ringing alarm off - Simply press any button under the LCD display. SNOOZE/ LIGHT 1. Press the SNOOZE/ LIGHT button for an extended backlight. 2. In snooze alarm mode, press this button to trigger a repetitive snooze alarm. MIN/ MAX MEMORY SETTINGS 1. Press "MIN/ MAX" button to view the maximum values for 5 seconds. Press again to view the minimum values. 2. To clear the memory record, press "CLEAR " while the respective values are displayed on screen. 3
-
 1
1 -
 2
2 -
 3
3 -
 4
4 -
 5
5 -
 6
6 -
 7
7 -
 8
8 -
9
-
10
-
11
-
12
 |
 |