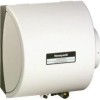
Honeywell HE260A1010 Installation Guide - Page 7
Testing Humidifier Operation, Checklist - humidifier wiring diagram
 |
UPC - 085267207744
View all Honeywell HE260A1010 manuals
Add to My Manuals
Save this manual to your list of manuals |
Page 7 highlights
HE220, HE260 HUMIDIFIER INSTALLATION KIT 1. Run the two-strand thermostat wire from the humidifier to the transformer, from the transformer to the humidistat, and from the humidistat to the sail switch. 2. Cut lengths of thermostat wire to reach between components, leaving adequate wire at both ends for connections. NOTE: Transformer, humidistat and sail switch can be wired in any order. 3. At the humidifier, connect the black and white conductors to the two black humidifer wires. 4. At the transformer, connect both black conductors to the two transformer terminals. Use a wire nut to connect together the two white conductors. 5. At the humidistat, connect both black conductors to the two humidistat terminals. Use a wire nut to connect together the two white conductors. 6. At the sail switch, connect the black and white conductors to the Com and NO sail switch terminals (NC terminal is not used). TESTING HUMIDIFIER OPERATION Checklist ❑ Humidifier is level. ❑ Starter collar is secured with sheet metal screws. ❑ Summer shut-off damper is open (in winter position). ❑ Control wiring was reviewed using circuit diagram. ❑ Transformer is plugged in. ❑ Feed line has no kinks. ❑ Drain line slopes continuously down and ends at floor drain. ❑ Water hose inside humidifier is connected to PerfectFlow™ water distribution tray. After installation use the following steps to check the humidifier operation: 1. Turn on the power and the water supply 2. Turn the H8908 Humidity Control to On and turn on the heat by setting the thermostat to 10ºF (6ºC) above room temperature. IMPORTANT The furnace blower must be on in to activate the humidifier. 3. Make sure that water is flowing out of the drain hose. If water does not flow, see Troubleshooting Your Humidifier section. 4. Check for leaks. 5. Reset the thermostat and H8908 Humidity Control to a comfortable setting for automatic operation. 7 69-1570


