Honeywell RTH5100B Owner's Manual - Page 17
terminal. Be sure to read the notes referenced
 |
View all Honeywell RTH5100B manuals
Add to My Manuals
Save this manual to your list of manuals |
Page 17 highlights
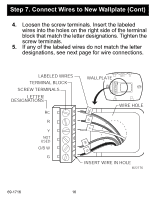
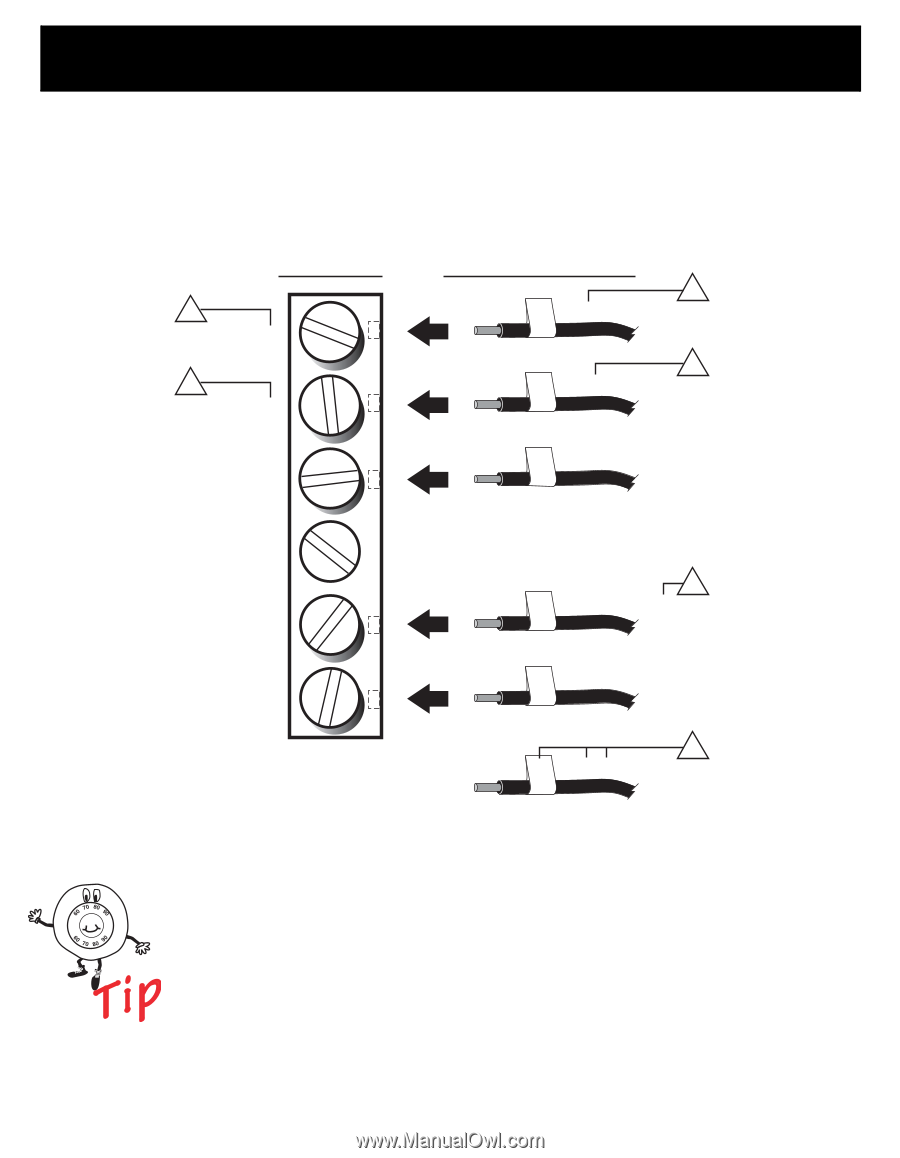
Step 7. Connect Wires to New Wallplate (Cont) 6. Compare letter designations on your old and new thermostats. New Possible letter designations Thermostat on the labeled wires 1 RC 2 RC or R 2 1 R or RH, 4, V R Y or Y1, M Y NOT USED O/B W 3 W or W1, H, O, B G or F G Do Not Connect C or X, B 4 M22055 Do not connect more than one wire to each terminal. Be sure to read the notes referenced in the numbered triangles above. These numbered notes appear on the next page. 17 69-1716
-
 1
1 -
2
-
3
-
4
-
5
-
6
-
7
-
8
-
9
-
10
-
11
-
 12
12 -
 13
13 -
 14
14 -
 15
15 -
 16
16 -
 17
17 -
 18
18 -
 19
19 -
 20
20 -
 21
21 -
 22
22 -
23
-
24
-
25
-
26
-
27
-
28
-
29
-
30
-
31
-
32
 |
 |
17
69-1716
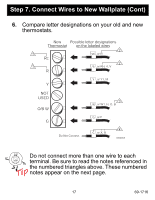
Step 7. Connect Wires to New Wallplate (Cont)
6.
Compare letter designations on your old and new
thermostats.
Do not connect more than one wire to each
terminal. Be sure to read the notes referenced in
the numbered triangles above. These numbered
notes appear on the next page.
G
O/B W
NOT
USED
Y
R
R
C
or R
New
Thermostat
Possible letter designations
on the labeled wires
M22055
Do Not Connect
RC
or RH, 4, V
R
or Y1, M
Y
or W1, H, O, B
W
or F
G
or X, B
C
1
2
2
3
4
1