Hoover U5458910 Manual - Page 5
How to use - vacuum
 |
View all Hoover U5458910 manuals
Add to My Manuals
Save this manual to your list of manuals |
Page 5 highlights
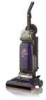
STEP III Position tools 1-15 1-16 A 1-14 C B A Place smaller unridged end of wand into bottom of rack. Snap wand into clip. Repeat with other wand. Open tool cover. Insert ends of dusting brush (A), crevice tool (B) into storage areas. Secure furniture nozzle (C) in clip. Close tool cover. B Remove switch lock (A) above ON/ OFF switch (B) by pulling it straight out. Dispose of switch lock. If switch lock has come off during assembly, make sure switch is in OFF position (down) before plugging cord into electrical outlet. 2. How to use Cleaner description 2-1 1 5 6 7 2 3 3 4 22 8 21 19 20 18 17 16 15 14 9 10 11 12 12 13 3 23 13 The assembled cleaner will look like the drawing. 1. Handle 2. ON/OFF switch 3. Cord hooks: wrap cord around hooks for storage. The top hook can be rotated right or left for easy cord release. 4. Hose 5. Tool cover 6. Dusting brush 7. Furniture nozzle 8. Crevice tool 9. Carrying handle 10. Wands 11. Final filter door 12. Handle release lever: step on lever to lower handle to operating or low positions. 13. Edge groomers 14. Furniture guard: helps prevent cleaner from marking furniture. 15. Nozzle control knob: slide knob to correct setting for height of carpet being cleaned. 16. Headlight 17. Embedded Dirt FINDER™ sensitivity switch* 18. 'Dirt FINDER' display* 19. Check bag indicator 20. Stair cleaning handle: located below lower edge of door. 21. Bag door 22. Cord clip 23. Hose rack *some models only Operate cleaner only at voltage specified on data plate on bottom of cleaner. This cleaner is intended for household use. Polarized plug To reduce the risk of electric shock, this appliance has a polarized plug (one blade is wider than the other). This plug will fit in a polarized outlet only one way. If the plug does not fit fully in the outlet, reverse the plug. If it still does not fit, contact a qualified electrician to install the proper outlet. Do not change the plug in any way. ON-OFF switch Plug cord into electrical outlet. To turn cleaner ON, push switch up. To turn cleaner OFF, push switch down. 2-2 A Cord clip To help keep the cord out of the way while vacuuming, position cord in cord clip (A) located at rear of cleaner on hose rack. Continued 5
-
 1
1 -
 2
2 -
 3
3 -
 4
4 -
 5
5 -
 6
6 -
 7
7 -
 8
8 -
 9
9 -
 10
10 -
 11
11 -
12
 |
 |
