Hoover UH40145B Manual - Page 15
Powered, brication
 |
View all Hoover UH40145B manuals
Add to My Manuals
Save this manual to your list of manuals |
Page 15 highlights
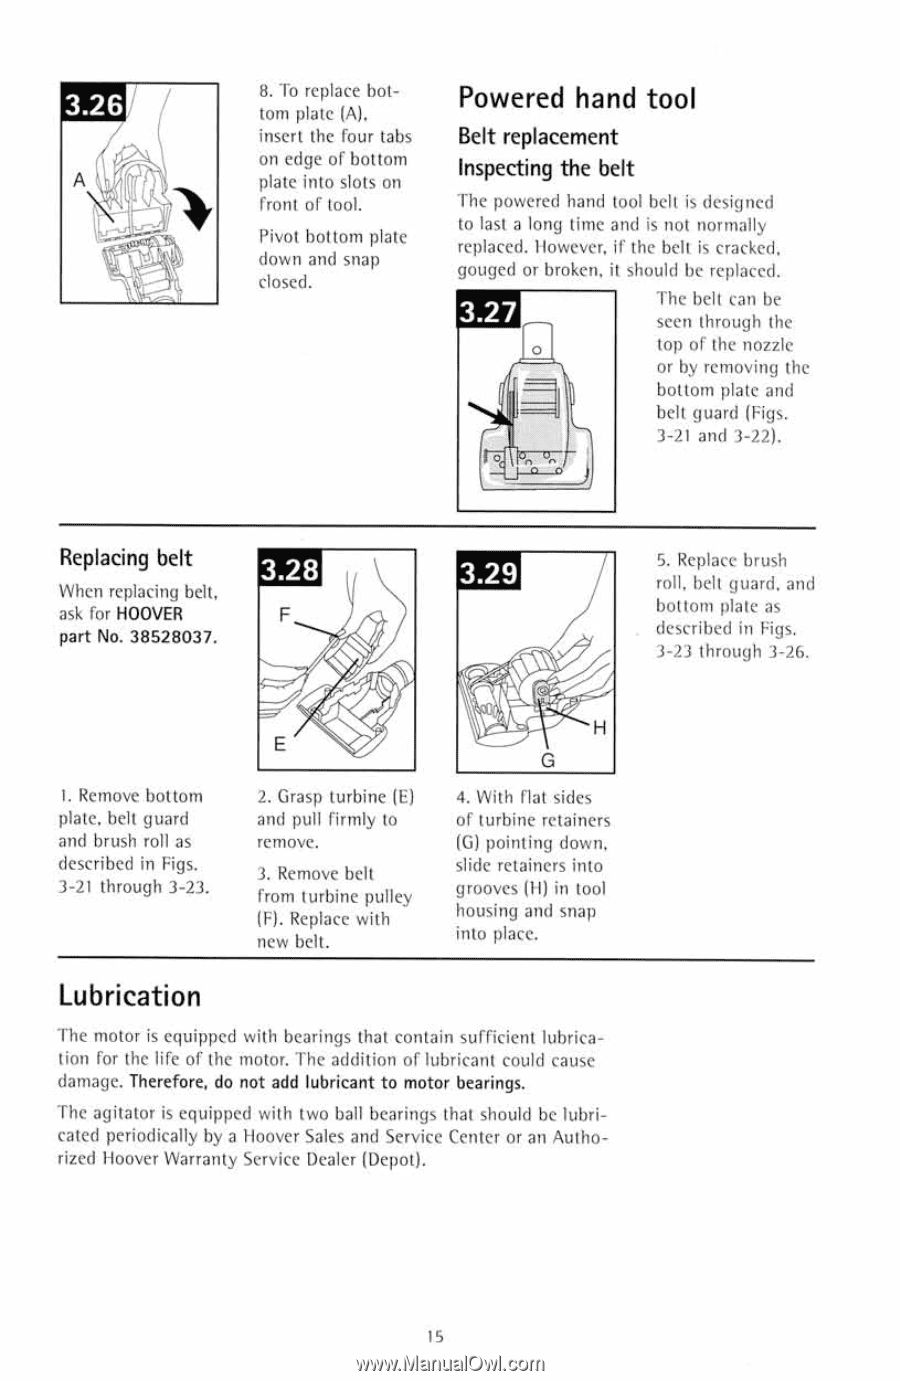
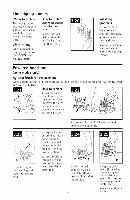
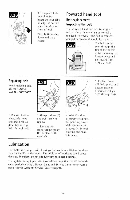
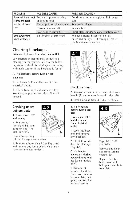
B . T o r e p l a c eb o t tom plate {A), insert the four tabs on edgeof bottom plateinto slotson front of tool. Pivotbottom plate down and snap c l o s ed . P o w e r ehda n dt o o l Beltreplacement Inspectintghe belt T h e p o w e r e dh a n d t o o l b e l t i s d e s i g n e d to lasta long time andis not normally r e p l a c e dH. o w e v e r ,i f t h e b e l t i s c r a c k e d , g o u g e d o r b r o k e n ,i t s h o u l db e r e p l a c e d . The belt can be seenthrough the top of the nozzle or by removingthe bottom piateand belt guard (Figs. 3-21and 3-22). R e p l a c i nbge l t W h e nr e p l a c i nbge l t , askfor HOOVER p a r tN o . 3 8 5 2 8 0 3 7 . 5 . R e p l a c eb r u s h roll,belt guard,and bottom nlateas d e s c r i b e di n F i g s . 3-23 throuqh : -26. l . R e m o v eb o t t o m p l a t e ,b e l t g u a r d and brushroll as d e s c r i b e di n F i g s . 3-21 through 3-23. 2 . G r a s pt u r b i n e { E ) and pull firmly to r e mo v e . 3 . R e m o v eb e l t from turbine pulley ( F ) .R e p l a c ew i t h new belt. 4. With flat sides of turbineretainers (G)pointingdown, s l i d er e t a i n e r si n t o g r o o v e s( H ) i n t o o l h o u s i n ga n d s n a p into place. L ub r i c a t i o n T h e m o t o r i s e q u i p p e dw i t h b e a r i n g st h a t c o n t a i n s u f f i c i e n tl u b r i c a tion for the life of the motor.The additionof lubricantcould cause d a m a g e .T h e r e f o r e ,d o n o t a d d l u b r i c a n tt o m o t o r b e a r i n g s . T h e a g i t a t o ri s e q u i p p e dw i t h t w o b a l l b e a r i n g st h a t s h o u l db e l u b r i c a t e dp e r i o d i c a l l yb y a H o o v e rS a l e sa n d S e r v i c eC e n t e ro r a n A u t h o r i z e d H o o v e rW a r r a n t yS e r v i c eD e a l e r( D e p o t ) . l5
-
 1
1 -
2
-
3
-
4
-
5
-
6
-
7
-
8
-
9
-
 10
10 -
 11
11 -
 12
12 -
 13
13 -
 14
14 -
 15
15 -
 16
16 -
 17
17 -
 18
18 -
 19
19
 |
 |