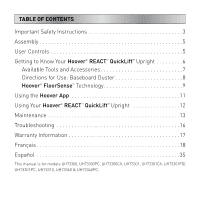
Hoover UH73301 Product Manual - Page 7
Assembly, User Controls
 |
View all Hoover UH73301 manuals
Add to My Manuals
Save this manual to your list of manuals |
Page 7 highlights
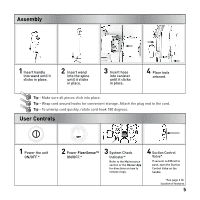
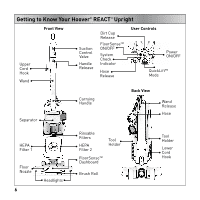
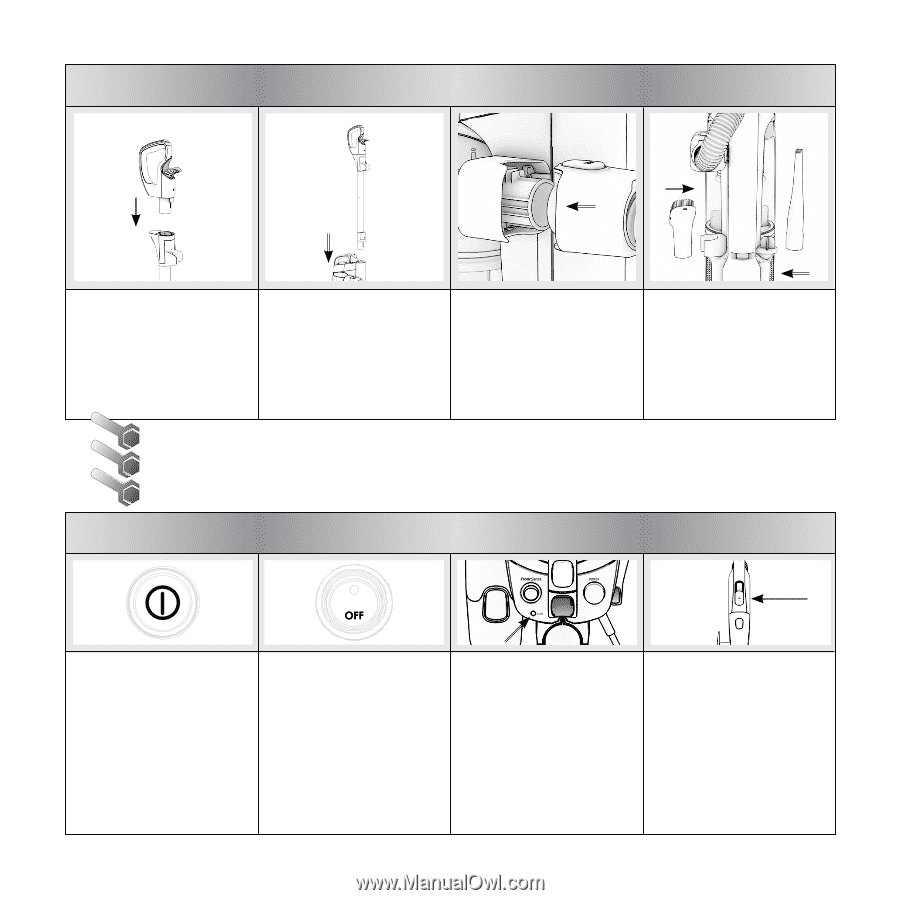
Assembly 1 1 Insert handle into wand until it clicks in place. 2 Insert wand into the spine until it clicks in place. 3 Insert hose into canister until it clicks in place. 4 Place tools onboard. Tip - Make sure all pieces click into place. Tip - Wrap cord around hooks for convenient storage. Attach the plug end to the cord. Tip - To unwrap cord quickly, rotate cord hook 180 degrees. User Controls 1 Power the unit ON/OFF.* 2 Power FloorSense™ ON/OFF.* 3 System Check Indicator* Refer to the Maintenance section or the Hoover App for directions on how to remove clogs. 4 Suction Control Val ve* If vacuum is difficult to push, open the Suction Control Valve on the handle. *See page 6 for location of features 5
-
 1
1 -
 2
2 -
 3
3 -
 4
4 -
 5
5 -
 6
6 -
 7
7 -
 8
8 -
 9
9 -
 10
10 -
 11
11 -
 12
12 -
13
-
14
-
15
-
16
-
17
-
18
-
19
-
20
-
21
-
22
-
23
-
24
-
25
-
26
-
27
-
28
-
29
-
30
-
31
-
32
-
33
-
34
-
35
-
36
-
37
-
38
-
39
-
40
-
41
-
42
-
43
-
44
-
45
-
46
-
47
-
48
-
49
-
50
-
51
-
52
-
53
-
54
-
55
 |
 |
5
4
2
3
4
Insert wand
into the spine
until it clicks
in place.
Insert handle
into wand until it
clicks in place.
Insert hose
into canister
until it clicks
in place.
Place tools
onboard.
Assembly
1
Power the unit
ON/OFF.*
Power
FloorSense
™
ON/OFF.*
System Check
Indicator*
Refer to the Maintenance
section or the
Hoover App
for directions on how to
remove clogs.
Tip
-
Make sure all pieces click into place.
Tip
-
Wrap cord around hooks for convenient storage. Attach the plug end to the cord.
Tip
-
To unwrap cord quickly, rotate cord hook 180 degrees.
User Controls
Suction Control
Valve*
If vacuum is difficult to
push, open the Suction
Control Valve on the
handle.
2
3
1
*See page 6 for
location of features