Hotpoint RGB508PEHWH Installation Instructions - Page 11
Using the oven., CAUTION, Safety Instructions
 |
UPC - 084691085188
View all Hotpoint RGB508PEHWH manuals
Add to My Manuals
Save this manual to your list of manuals |
Page 11 highlights
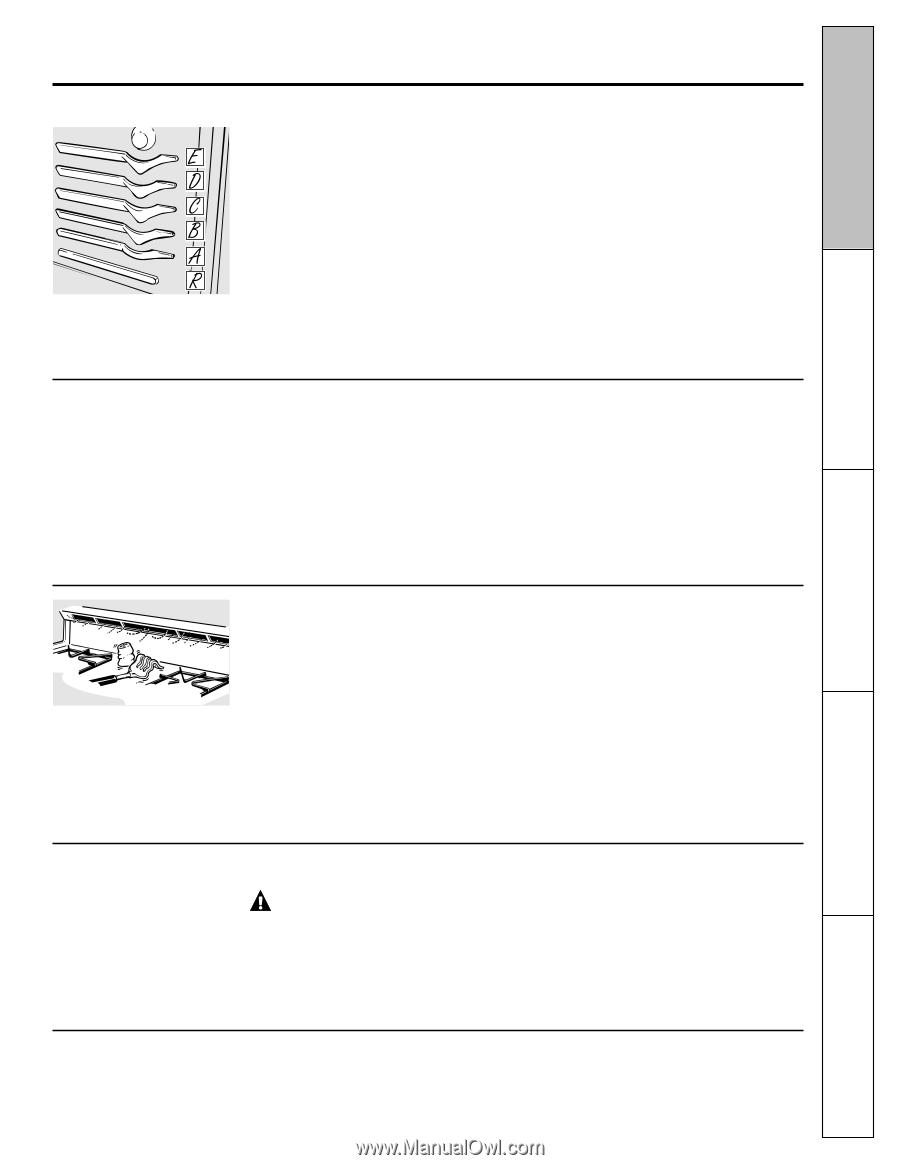
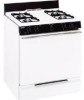
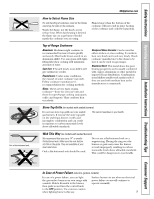
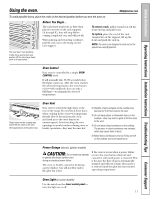
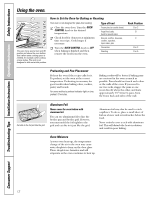
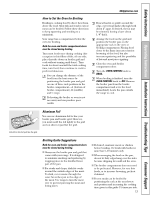
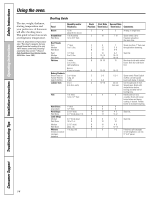
Safety Instructions Operating Instructions Installation Instructions Troubleshooting Tips Consumer Support Using the oven. GEAppliances.com To avoid possible burns, place the racks in the desired position before you turn the oven on. Before You Begin... The racks have stop-locks, so that when placed correctly on the rack supports (A through E), they will stop before coming completely out, and will not tilt. When placing and removing cookware, pull the rack out to the bump on the rack support. To remove a rack, pull it toward you, tilt the front end up and pull it out. To replace, place the end of the rack (stop-locks) on the support, tilt up the front and push the rack in. NOTE: The rack is not designed to slide out at the special low rack (R) position. The oven has 5 rack positions. It also has a special low rack position (R) for extra large items, such as a large turkey. Oven Control Your oven is controlled by a single OVEN CONTROL knob. It will normally take 30-90 seconds before the flame comes on. After the oven reaches the selected temperature, the oven burner cycles-off completely, then on with a full flame-to maintain the selected temperature. Plastic items on the cooktop may melt if left too close to the vent. Vent appearance and location vary. Oven Vent Your oven is vented through ducts at the rear of the range. Do not block these ducts when cooking in the oven-it is important that the flow of hot air from the oven and fresh air to the oven burner be uninterrupted. Avoid touching the vent openings or nearby surfaces during oven or broiler operation-they may become hot. I Handles of pots and pans on the cooktop may become hot if left too close to the vent. I Do not leave plastic or flammable items on the cooktop-they may melt or ignite if left too close to the vent. I Do not leave closed containers on the cooktop. The pressure in closed containers may increase, which may cause them to burst. I Metal items will become very hot if they are left on the cooktop, and could cause burns. Power Outage (electric ignition models) CAUTION: Do not make any attempt to operate the electric ignition oven during an electrical power failure. The oven or broiler cannot be lit during a power failure. Gas will not flow unless the glow bar is hot. If the oven is in use when a power failure occurs, the oven burner shuts off and cannot be re-lit until power is restored. This is because the flow of gas is automatically stopped and will not resume when power is restored until the glow bar has reached operating temperature. Oven Light (on some models) Use the switch on the lower control panel to turn the light on or off. 11
-
 1
1 -
2
-
3
-
4
-
5
-
 6
6 -
 7
7 -
 8
8 -
 9
9 -
 10
10 -
 11
11 -
 12
12 -
 13
13 -
 14
14 -
 15
15 -
 16
16 -
17
-
18
-
19
-
20
-
21
-
22
-
23
-
24
-
25
-
26
-
27
-
28
-
29
-
30
-
31
-
32
-
33
-
34
-
35
-
36
-
37
-
38
-
39
-
40
-
41
-
42
-
43
-
44
-
45
-
46
-
47
-
48
 |
 |