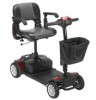
Hoveround Spitfire EX 4-Wheel Travel Scooter Owners Manual - Page 17
Battery, Fuses, Circuit Breaker And Tires, Suggestion, Caution, Maintenance
 |
View all Hoveround Spitfire EX 4-Wheel Travel Scooter manuals
Add to My Manuals
Save this manual to your list of manuals |
Page 17 highlights
BATTERY, FUSES, CIRCUIT BREAKER AND TIRES Battery Refer to "BATTERIES & CHARGER" Section. Fuse There are two fuses on your scooter. One is located inside the operation panel; another is in the battery pack. If the key switch is "ON" and the battery gauge does not move, check the fuse. Suggestion Ask for help from your dealer for inspecting or replacing the fuses, (since battery pack has to be disassembled first for replacement of fuses). Circuit Breaker There is one button for the circuit breaker (located on the battery pack). If the power switch is "ON" and the battery gauge does is not move, it is possible an electric current has overloaded the scooter. Reset the circuit breaker by pressing the button. Tires The condition of the tires depends on how you drive and use your scooter. Please check the tread depth regularly. Replace the tires when the tread depth is less than 0.5 mm. Regularly inspect your scooter's tires for signs of wear. Caution When tread depth is below 0.5mm, it can easily lead to slippage, making braking distances longer. Therefore, replace the tires as early as possible. MAINTENANCE 1. You must maintain the scooter frequently if you drive on grass, sand, or gravel roads. 2. Do not use water, oil or other chemical solutions to clean your scooter. Be sure NOT to spray the scooter with water to prevent damaging the electronic components and printed circuit board. Please clean the scooter by wiping it with either a dry or moist cloth. 3. Please take the scooter to authorized dealers for repairs and adjustments. Improper adjustments could lead to accidents and scooter malfunction. 4. Please use soft and dry cloths to keep your scooter tidy. Please use moderate or mild detergent to clean the scooter. Caution When conducting maintenance of your scooter, please turn the key switch "OFF" and remove the charger cord. Spitfire EX 1320/1420 Owner's Manual 16
-
 1
1 -
2
-
3
-
4
-
5
-
6
-
7
-
8
-
9
-
10
-
11
-
 12
12 -
 13
13 -
 14
14 -
 15
15 -
 16
16 -
 17
17 -
 18
18 -
 19
19 -
 20
20 -
 21
21 -
 22
22 -
23
-
24
 |
 |
