Hunter 21315 Owner's Manual - Page 11
with Hunter's Dust Armor protection, making
 |
View all Hunter 21315 manuals
Add to My Manuals
Save this manual to your list of manuals |
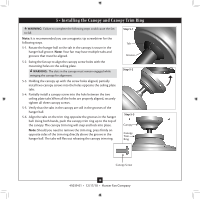
Page 11 highlights
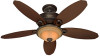
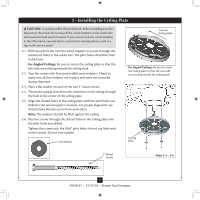
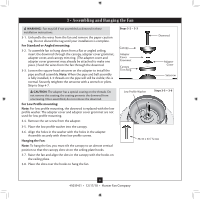
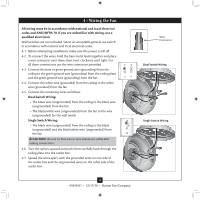
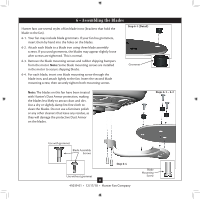
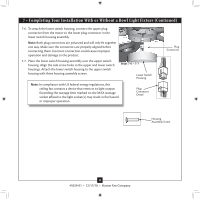
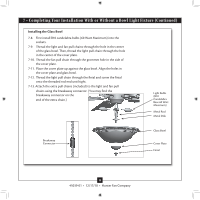
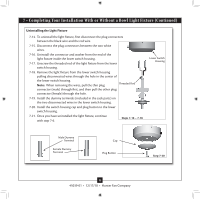
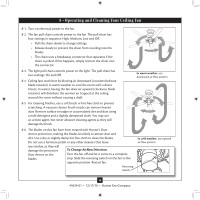
6 • Assembling the Blades Hunter fans use several styles of fan blade irons (brackets that hold the blade to the fan). 6-1. Your fan may include blade grommets. If your fan has grommets, insert them by hand into the holes on the blades. 6-2. Attach each blade to a blade iron using three blade assembly screws. If you used grommets, the blades may appear slightly loose after screws are tightened. This is normal. 6-3. Remove the blade mounting screws and rubber shipping bumpers from the motor. Note: Some blade mounting screws are installed in the motor to secure shipping blocks. 6-4. For each blade, insert one blade mounting screw through the blade iron, and attach lightly to the fan. Insert the second blade mounting screw, then securely tighten both mounting screws. Step 6-1 (Detail) Grommet Note: The blades on this fan have been treated with Hunter's Dust Armor protection, making the blades less likely to attract dust and dirt. Use a dry or slightly damp lint free cloth to clean the blades. Do not use a furniture polish or any other cleaners that leave any residue, as they will damage the protective Dust Armor on the blades. Steps 6-1 - 6-2 Use with grommet Blade Assembly Screws Step 6-4 Use without grommet 11 45039-01 • 12/17/10 • Hunter Fan Company Blade Mounting Screw
-
 1
1 -
2
-
3
-
4
-
5
-
 6
6 -
 7
7 -
 8
8 -
 9
9 -
 10
10 -
 11
11 -
 12
12 -
 13
13 -
 14
14 -
 15
15 -
 16
16 -
17
 |
 |
