Hunter 21978 Owner's Manual - Page 13
Check the 3 elongated slots in the top of the fitter to see if they are
 |
View all Hunter 21978 manuals
Add to My Manuals
Save this manual to your list of manuals |
Page 13 highlights
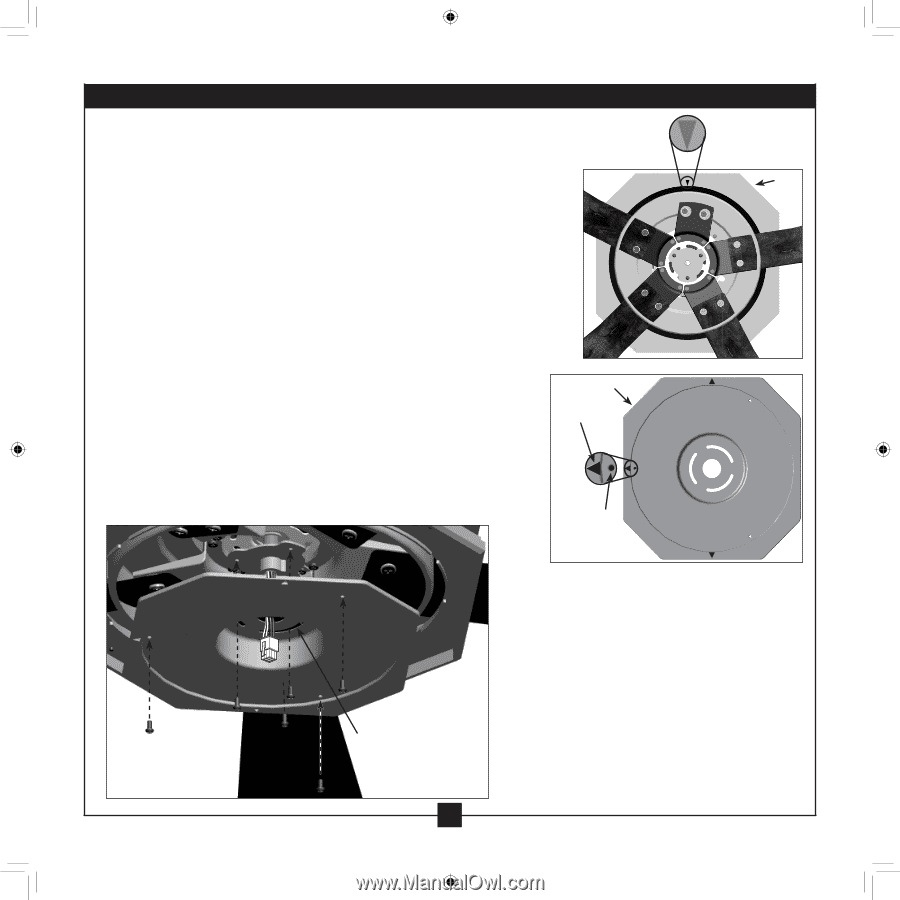
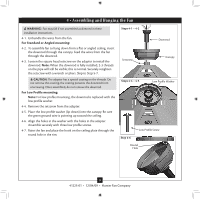
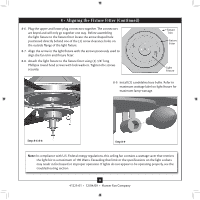
3 • Assembling tbe Blades 8 • Aligning the Fixture Fitter 8-1. Looking up at the bottom of the fan trim. Locate the raised arrow on the bottom of the trim. Before proceeding with the next step make Step 8-1 sure you've located the arrow. Fan Note: You may have to rotate the fan blades in order to see the Trim arrow. 8-2. The (8) sides of the fitter must be aligned with the matching (8) sides of the fan trim. To orient the fitter locate the (3) arrow shaped holes near the outer edges of the fitter. 8-3. Select the arrow which has a screw hole directly behind it, and align this arrow with the arrow in the trim. 8-4. Thread the upper plug connector from the motor through the large hole in the center of the fitter. 8-5. Check the (3) elongated slots in the top of the fitter to see if they are aligned with the (3) mating screw holes in the fitter mounting plate. If any of the screw holes in the mounting plate are covered by the fitter, rotate the fitter ninety degrees either direction to allow access to the (3) mounting holes in the mounting plate. Assemble the fitter to the fitter mounting plate using (3) 3/8" long Phillips head screws with lock washers. Tighten securely. Fitter Arrow Shaped Hole Screw Hole Step 8-2 Steps 8-4-8-5 Elongated Slots 13 41225-01 • 12/04/09 • Hunter Fan Company
-
 1
1 -
2
-
3
-
4
-
5
-
6
-
7
-
 8
8 -
 9
9 -
 10
10 -
 11
11 -
 12
12 -
 13
13 -
 14
14 -
 15
15 -
 16
16 -
 17
17
 |
 |