Hunter 21978 Owner's Manual - Page 15
Installing the Glass Bowl
 |
View all Hunter 21978 manuals
Add to My Manuals
Save this manual to your list of manuals |
Page 15 highlights
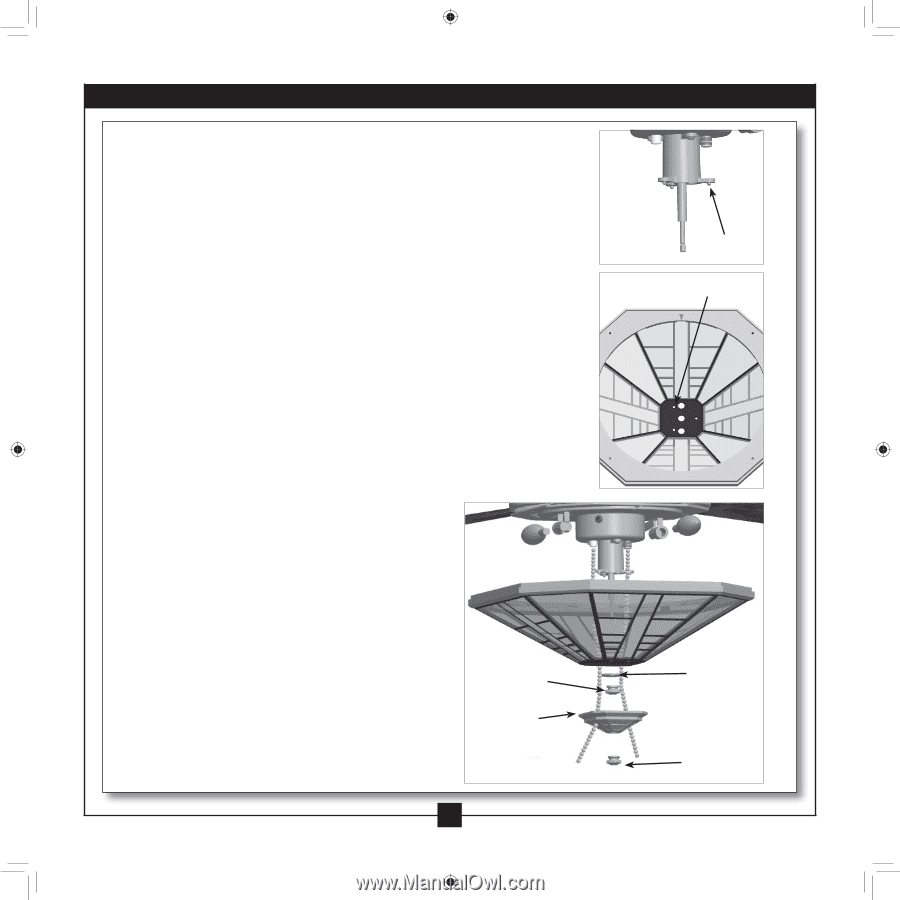
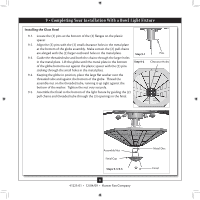
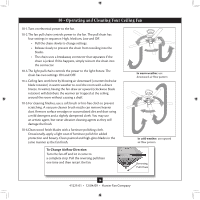
9 • Completing Your Installation With a Bowl Light Fixture Installing the Glass Bowl 9-1. Locate the (3) pins at the bottom of the (3) flanges on the plastic spacer. 9-2. Align the (3) pins with the (3) small clearance holes in the metal plate at the bottom of the globe assembly. Make certain the (2) pull chains are alinged with the (2) larger outboard holes in the metal plate. Step 9-1 9-3. Guide the threaded tube and both the chains through the larger holes in the metal plate. Lift the globe until the metal plate in the bottom Step 9-2 of the globe bottoms out against the plastic spacer with the (3) pins sticking through the small holes in the metal plate. 9-4. Keeping the globe in position, place the large flat washer over the threaded tube and against the bottom of the globe. Thread the assembly nut on the threaded tube, running it up tight against the bottom of the washer. Tighten the nut very securely. 9-5. Assemble the finial to the bottom of the light fixture by guiding the (2) pull chains and threaded tube through the (3) openings in the finial. Pins Clearance Holes Assembly Nut Finial Cap Steps 9-3-9-5 15 41225-01 • 12/04/09 • Hunter Fan Company Metal Disc Finial
-
 1
1 -
2
-
3
-
4
-
5
-
6
-
7
-
8
-
9
-
 10
10 -
 11
11 -
 12
12 -
 13
13 -
 14
14 -
 15
15 -
 16
16 -
 17
17
 |
 |