IBM 09N4290 User Guide
IBM 09N4290 Manual
 |
View all IBM 09N4290 manuals
Add to My Manuals
Save this manual to your list of manuals |
IBM 09N4290 manual content summary:
- IBM 09N4290 | User Guide - Page 1
- IBM 09N4290 | User Guide - Page 2
- IBM 09N4290 | User Guide - Page 3
Console Switch Installation and User's Guide - IBM 09N4290 | User Guide - Page 4
- IBM 09N4290 | User Guide - Page 5
- IBM 09N4290 | User Guide - Page 6
if a caution statement begins with a number 1, translations for that caution statement appear in the IBM Safety Information book under statement 1. Be sure to read all caution and danger statements in this documentation before performing the instructions. Read any additional safety information that - IBM 09N4290 | User Guide - Page 7
- IBM 09N4290 | User Guide - Page 8
- IBM 09N4290 | User Guide - Page 9
space 10 Installing the Console Switch ...11 Tiering Multiple Console Switches 13 Adding Earlier-model Switches ...14 Configuring the Console Switch System 16 Chapter 3: Basic Operations 17 Controlling the System at the Local Ports 17 Viewing and Selecting Ports and Servers 17 Selecting - IBM 09N4290 | User Guide - Page 10
Contents Scanning the System...32 Broadcasting to Servers...34 Changing the Switch Mode ...36 Setting the Keyboard Country Code 37 Appendices...39 Appendix A: Firmware Upgrades...39 Appendix B: Technical Specifications 41 Appendix C: Notices ...42 Appendix D: Electronic Emission Notices 44 Index - IBM 09N4290 | User Guide - Page 11
of Figures Figure 1.1: PS/2 Switch Cable and USB Switch Cable 2 Figure 1.2: Example of a Console Switch Configuration 4 Figure 2.1: Console Switch vertical installation 10 Figure 2.2: Console Switch Horizontal Installation 11 Figure 2.3: Basic Console Switch Configuration 12 Figure 2.4: Console - IBM 09N4290 | User Guide - Page 12
xii List of Figures - IBM 09N4290 | User Guide - Page 13
xiii LIST OF TABLES List of Tables Table 1.1: Console Switch Cable Resolution and Refresh Rate 2 Table 2.1: Earlier-model Switches 14 Table 3.1: OSCAR Interface Status Symbols 18 Table 3.2: OSCAR Interface Navigation Basics 20 Table 3.3: Setup Features to Manage Routine Tasks for the Servers 21 - IBM 09N4290 | User Guide - Page 14
xiv List of Tables - IBM 09N4290 | User Guide - Page 15
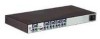
and Benefits The IBM 1x8 Console Switch and the IBM 2x16 Console Switch integrate keyboard, video, and mouse (KVM) switching technology with advanced cable management, flexible access for up to two simultaneous users, and an intuitive user interface. The console switches feature powerful onscreen - IBM 09N4290 | User Guide - Page 16
Switch Cable USB Switch Cable Figure 1.1: PS/2 Switch Cable and USB Switch Cable OSCAR Graphical User Interface The console switch uses the OSCAR interface, which features intuitive menus to configure the switch system and select servers. Servers can be identified by a unique name and port number - IBM 09N4290 | User Guide - Page 17
always running the most current version available. See "Appendix A: Firmware Upgrades" for more information. Tiering Expansion The 1x8 console switch supports up to 8 directly attached servers and the 2x16 console switch supports up to16 directly attached servers. Each model can conveniently scale - IBM 09N4290 | User Guide - Page 18
4 IBM Console Switch Installation and User's Guide Earlier-model Switch (tiered) Switch Cable (tiered) Console Switch (tiered) Rack of Servers Critical Server Local User B Console Switch (main) Local User A Figure 1.2: Example of a Console Switch Configuration Safety Precautions Use the following - IBM 09N4290 | User Guide - Page 19
Chapter 1: Product Overview 5 - IBM 09N4290 | User Guide - Page 20
6 IBM Console Switch Installation and User's Guide General • Observe and follow service markings. • Do not service any console switch except as explained in the console switch documentation. • Opening or removing covers that are marked with the triangular symbol with a lightning bolt might expose - IBM 09N4290 | User Guide - Page 21
only power cables provided with the console switch. • To help prevent electric shock, plug the console switch and peripheral power cables into prop- Refer to the rack installation documentation accompanying the rack for specific caution statements and procedures. • Elevated ambient temperature: If - IBM 09N4290 | User Guide - Page 22
8 IBM Console Switch Installation and User's Guide - IBM 09N4290 | User Guide - Page 23
rack mounting brackets) • Documentation CD • Quick Installation Guide • 1U filler panel Additional items needed • One IBM 3M Console Switch Cable (PS/2 or USB) per attached server • One IBM 3M Console Switch Cable (PS/2) per attached switch • One Phillips screwdriver Rack Mounting the Console - IBM 09N4290 | User Guide - Page 24
10 IBM Console Switch Installation and User's Guide 4. Mount the switch assembly to the rack by matching the long slots on the rack so that the nut is positioned on the inside of the rack. 5. Mount the switch assembly to the rack by matching the holes in the short side of each mounting bracket to - IBM 09N4290 | User Guide - Page 25
11 Figure 2.2: Console Switch Horizontal Installation Installing the Console Switch Connect the supplied power cord into the back of the console switch and then into an appropriate power source. Figure 2.3 illustrates one possible configuration for the console switch. See the following detailed - IBM 09N4290 | User Guide - Page 26
12 IBM Console Switch Installation and User's Guide Local User B (2x16 model only) ACI Port Configuration Port (for updating firmware) Console Switch ARI Ports Servers 2-16 Local User A Console Switch Cable Server 1 Figure 2.3: Basic Console Switch Configuration Connecting a switch cable to a - IBM 09N4290 | User Guide - Page 27
the tiered local port On-screen Configuration and Activity Reporting (OSCAR) interface is disabled when the main console switch is tiered below another console switch. Local User B Local User A (2x16 only) Console Switch ACI Port Tiered (secondary) Console Switch ARI Ports Primary Servers Figure - IBM 09N4290 | User Guide - Page 28
console switch must be at the top level of the tier. See the following table for earlier-model switches compatible with the console switch configuration. Table 2.1: Earlier-model Switches Earlier-model Switch NetBAY™ 1x4 Console Switch NetBAY 2x8 Console Switch Option Part Number 09N4290 09N4291 - IBM 09N4290 | User Guide - Page 29
, and mouse connectors of the switch cable to the local port on the tiered switch. 3. Connect the RJ-45 connector on the PS/2 switch cable to an ARI port on the back of the console switch. 4. Connect the servers to the tiered switch according to the instructions included with that device. 5. Power - IBM 09N4290 | User Guide - Page 30
16 IBM Console Switch Installation and User's Guide 2. Locate the port set labeled A on the back of the console switch. Connect these peripherals devices to their respective ports. 3. For the 2x16 console switch, repeat steps 1 and 2 for the local port set labeled B. 4. Bundle and label the cables - IBM 09N4290 | User Guide - Page 31
first launch the OSCAR interface. The Port column indicates the ARI port to which a server is connected. If you connect an earliermodel switch to the console switch or a tiered console switch, the port numbering displays the ARI port first, then the switch port to which the server is connected. For - IBM 09N4290 | User Guide - Page 32
18 IBM Console Switch Installation and User's Guide Figure 3.1: Example of Configured Main Window NOTE: You can also press Ctrl twice within one second to launch the OSCAR interface. You can use this key sequence in any place you see Print Screen throughout this installation and user's guide. - IBM 09N4290 | User Guide - Page 33
selected for the user. NOTE: The status flag displays on the desktop and shows the name or the port number of the selected server or the status of the selected port. NOTE: To clear all directly connected offline switch cables from the list, click Clear. Soft switching Soft switching is the ability - IBM 09N4290 | User Guide - Page 34
20 IBM Console Switch Installation and User's Guide 4. Click OK. Soft switching to a server 1. To select a server, press Print Screen. If the display order of the server list is by port (Port button is selected), type the port number and press Enter. -orIf the display order of the server list is by - IBM 09N4290 | User Guide - Page 35
Setup Features to Manage Routine Tasks for the Servers Feature Menu Flag Broadcast Scan Security Devices Names Switch Keyboard Purpose Change the server listing between numerically by port number and alphabetically by name. -orChange the Screen Delay Time before the OSCAR interface displays after - IBM 09N4290 | User Guide - Page 36
22 IBM Console Switch Installation and User's Guide Figure 3.2: Setup Window Assigning server names Use the Names window to identify individual servers by name rather than by port number. The Names list is always sorted by port order. Names are stored in the switch cable, so even if you move the - IBM 09N4290 | User Guide - Page 37
used as the default name. Assigning device types The console switch automatically discovers tiered switches, but you will need to specify the number of ports on the tiered switch through the Devices window. You will see an abbreviation of the switch type displayed in the Type category for the tiered - IBM 09N4290 | User Guide - Page 38
Installation and User's Guide Accessing the Devices window 1. Press Print Screen to launch the OSCAR interface. The Main window opens. 2. Click Setup - Devices. The Devices window opens. Figure 3.5: Devices Window When the console switch discovers a tiered switch, the port numbering changes to - IBM 09N4290 | User Guide - Page 39
Chapter 3: Basic Operations 25 3. Choose the number of ports supported by the tiered switch and click OK. 4. Repeat steps 1 to 3 for each port requiring a device type to be assigned. 5. Click OK in the Devices window to save the settings. NOTE: Changes made in the Device Modify window are - IBM 09N4290 | User Guide - Page 40
and User's Guide Setting a Screen Delay Time enables you to complete a soft switch without the OSCAR interface displaying. To perform a soft switch, see "Soft switching" on page 19. Controlling the status flag The status flag displays on the desktop and shows the name or the port number of - IBM 09N4290 | User Guide - Page 41
Determining the display of the status flag 1. Select Name or Port to determine what information will be displayed. 2. Select Displayed to show the flag all the time or select Timed to display the flag for only five seconds after switching. 3. Select a flag color in the Display Color area. 4. In the - IBM 09N4290 | User Guide - Page 42
IBM Console Switch Installation and User's Guide Setting console switch security The OSCAR interface enables you to set security on the local port console. You can establish a screen saver mode that engages after the console switch support. See "Appendix C: Technical Support" for contact information. - IBM 09N4290 | User Guide - Page 43
a password to gain access to the Security window, proceed to step 2. -orIf the console switch is password protected, see the previous procedure, then go to step 2. 2. Select Enable Screen Saver. 3. Type the number of minutes for Inactivity Time (from 1 to 99) to delay activation of the screen saver - IBM 09N4290 | User Guide - Page 44
30 IBM Console Switch Installation and User's Guide 5. (Optional) Click Test to activate the screen saver test which lasts 10 seconds then returns you to the Security window. 6. Click OK. NOTE: Activation of the screen saver mode disconnects the user from a server; no server is selected. The status - IBM 09N4290 | User Guide - Page 45
cables are not upgradeable and the version information is displayed for technical support purposes only. 5. Click X to close the Cable Version window. Figure 3.13: Cable Version Window NOTE: You can use the Reset button to reset the PS/2 switch cable. This activity is only relevant when the console - IBM 09N4290 | User Guide - Page 46
IBM Console Switch Installation and User's Guide Resetting a switch cable 1. Press Print Screen. The Main window opens. 2. Click Commands - Display Versions. The Version window opens. 3. Click Cable. The Cable Selection window opens. 4. Select the switch list. The port name or port number of the - IBM 09N4290 | User Guide - Page 47
Window 3. The Scan window contains a listing of all servers attached to the console switch. Click the check box next to the servers you want to scan. -orDouble-click on the name or port of a server. -orPress Alt and the number of the server you want to scan. You can select up to 16 - IBM 09N4290 | User Guide - Page 48
34 IBM Console Switch Installation and User's Guide Figure 3.15: Commands Window 3. Select Scan Enable in the Commands window. You can broadcast to up to 16 servers at a time, one server per ARI port. Accessing the Broadcast window 1. Press Print Screen. The Main window opens. 2. Click Setup - - IBM 09N4290 | User Guide - Page 49
state must be identical for all servers receiving a broadcast to interpret keystrokes identically. Specifically, the Caps Lock and Num Lock modes must be the same on all keyboards. While the console switch attempts to send keystrokes to the selected servers simultaneously, some servers can block and - IBM 09N4290 | User Guide - Page 50
36 IBM Console Switch Installation and User's Guide Figure 3.17: Broadcast Enable Window 5. Click OK to enable the broadcast. Click X or press Esc to cancel and return to the Commands window. 6. If broadcasting - IBM 09N4290 | User Guide - Page 51
time-out period in seconds. 5. Click OK to save the Switch Mode and Share Mode settings. Setting the Keyboard Country Code The console switch enables you to set the keyboard country code servers for the Sun server with USB ports. Setting the keyboard country code 1. Press Print Screen. The Main - IBM 09N4290 | User Guide - Page 52
38 IBM Console Switch Installation and User's Guide 3. Select the keyboard country code for the Sun servers. Click OK. The Keyboard Warning window opens. Figure 3.20: Keyboard Warning Window 4. Click OK on the Keyboard Warning window to save the keyboard country code setting. - IBM 09N4290 | User Guide - Page 53
and the server • Firmware update Upgrading firmware 1. Connect a standard serial cable to a COM port on the server and to the serial connector on the back panel of the switch. Make a note of which COM port you have chosen, then turn on the switch. 2. Go to http://www.ibm.com/pc/support and click on - IBM 09N4290 | User Guide - Page 54
IBM Console Switch Installation and User's Guide • A standard serial cable is used. • In the selected COM port Advanced Port settings, verify that the FIFO buffers are selected and that the receive buffer is set to High. ATTENTION: While upgrading, do not use the server for anything else or switch - IBM 09N4290 | User Guide - Page 55
41 Appendix B: Technical Specifications Table B.1: Console Switch Product Specifications Product Specifications Server Ports Number Cable Types Connectors Sync Types Plug and Play Video Resolution Update Port Number Type Connector Local Port Sets Number Type Connectors Dimensions Dimensions - IBM 09N4290 | User Guide - Page 56
42 IBM Console Switch Installation and User's Guide Appendix C: Notices This information was developed for products and services offered in the U.S.A. IBM may not offer the products, services, or features discussed in this document in other countries. Consult your local IBM representative for - IBM 09N4290 | User Guide - Page 57
no representations or warranties with respect to non-IBM products. Support (if any) for the nonIBM products is provided by the third party, not IBM. Some software may differ from its retail version (if available), and may not include user manuals or all program functionality. Product recycling and - IBM 09N4290 | User Guide - Page 58
IBM Console Switch Installation and User's Guide Appendix D: Electronic Emission Notices Federal Communications Commission (FCC) statement Note: This equipment has been tested and found to comply with the limits for a Class A digital device, pursuant to Part the instruction manual, the user may be - IBM 09N4290 | User Guide - Page 59
a nonrecommended modification of the product, including the fitting of non-IBM option cards. This product has been tested and found to comply domestic environment this product may cause radio interference in which case the user may be required to take adequate measures. Taiwan Class A warning - IBM 09N4290 | User Guide - Page 60
46 IBM Console Switch Installation and User's Guide - IBM 09N4290 | User Guide - Page 61
12 D device types assigning 23 display behavior 25 E earlier-model console switches 3 F firmware upgrades 3, 39 I IBM Console Switch features 1 resolution and refresh rates 1 K Keep Alive 1 keyboard and mouse resetting 32 KVM connectivity 1 L local ports controlling system at 17 N Notices 42 - IBM 09N4290 | User Guide - Page 62
disconnecting users 19 removing from scan list 33 soft switching to 20 server names assigning 22 servers 17 setting scan duration 33 setting security 28 soft switching 19 starting scan mode 33 status flag controlling 19, 26 SVGA 2 switch cable status 18 Switch mode 36 T technical specifications 41 - IBM 09N4290 | User Guide - Page 63
- IBM 09N4290 | User Guide - Page 64
31R3148 590-479-999A
-
 1
1 -
 2
2 -
 3
3 -
 4
4 -
 5
5 -
 6
6 -
 7
7 -
8
-
9
-
10
-
11
-
12
-
13
-
14
-
15
-
16
-
17
-
18
-
19
-
20
-
21
-
22
-
23
-
24
-
25
-
26
-
27
-
28
-
29
-
30
-
31
-
32
-
33
-
34
-
35
-
36
-
37
-
38
-
39
-
40
-
41
-
42
-
43
-
44
-
45
-
46
-
47
-
48
-
49
-
50
-
51
-
52
-
53
-
54
-
55
-
56
-
57
-
58
-
59
-
60
-
61
-
62
-
63
-
64
 |
 |