IBM 8479 Hardware Maintenance Manual - Page 70
Completing, installation, Installing, cover
 |
UPC - 087944653912
View all IBM 8479 manuals
Add to My Manuals
Save this manual to your list of manuals |
Page 70 highlights
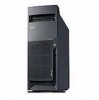
6. Thread the cable through the U-bolt and around an object that is a part of or permanently secured to the building structure or foundation, and from which it cannot be removed; then, fasten the cable ends together with a lock. 7. Reconnect the external cables and power cords; then, turn on the peripheral devices and the server. Completing the installation Attention: For correct cooling and airflow, install the cover before turning on the server. Operating the server for extended periods of time (over 30 minutes) with the top cover removed might damage server components. To complete the installation, you must reinstall the cover, reconnect all the cables that you disconnected earlier and, for certain options, run the Configuration/Setup Utility program. Follow the instructions in this section. Note: If you have just plugged the power cords of the server into an electrical outlet, you will have to wait approximately 20 seconds before pressing the power-control button. Installing the cover The following information describes how the cover installation procedure. Notes: 1. The illustrations in this document might differ slightly from your hardware. 2. If you removed the support-bracket assembly after you removed the cover, reinstall it before you install the cover. See "Removing the support bracket assembly" on page 45 for details. 62 xSeries 200 Type 8479 and xSeries 200VL Type 8481: Hardware Maintenance Manual
-
 1
1 -
2
-
3
-
4
-
5
-
6
-
7
-
8
-
9
-
10
-
11
-
12
-
13
-
14
-
15
-
16
-
17
-
18
-
19
-
20
-
21
-
22
-
23
-
24
-
25
-
26
-
27
-
28
-
29
-
30
-
31
-
32
-
33
-
34
-
35
-
36
-
37
-
38
-
39
-
40
-
41
-
42
-
43
-
44
-
45
-
46
-
47
-
48
-
49
-
50
-
51
-
52
-
53
-
54
-
55
-
56
-
57
-
58
-
59
-
60
-
61
-
62
-
63
-
64
-
 65
65 -
 66
66 -
 67
67 -
 68
68 -
 69
69 -
 70
70 -
 71
71 -
 72
72 -
 73
73 -
 74
74 -
 75
75 -
76
-
77
-
78
-
79
-
80
-
81
-
82
-
83
-
84
-
85
-
86
-
87
-
88
-
89
-
90
-
91
-
92
-
93
-
94
-
95
-
96
-
97
-
98
-
99
-
100
-
101
-
102
-
103
-
104
-
105
-
106
-
107
-
108
-
109
-
110
-
111
-
112
-
113
-
114
-
115
-
116
-
117
-
118
-
119
-
120
-
121
-
122
-
123
-
124
-
125
-
126
-
127
-
128
-
129
-
130
-
131
-
132
-
133
-
134
-
135
-
136
-
137
-
138
-
139
-
140
-
141
-
142
-
143
-
144
-
145
-
146
-
147
-
148
 |
 |
