Image Fitness 19.0 R Treadmill English Manual - Page 7
Upright Base 84 with a Wheel Bolt 81 and a Wheel Nut
 |
View all Image Fitness 19.0 R Treadmill manuals
Add to My Manuals
Save this manual to your list of manuals |
Page 7 highlights
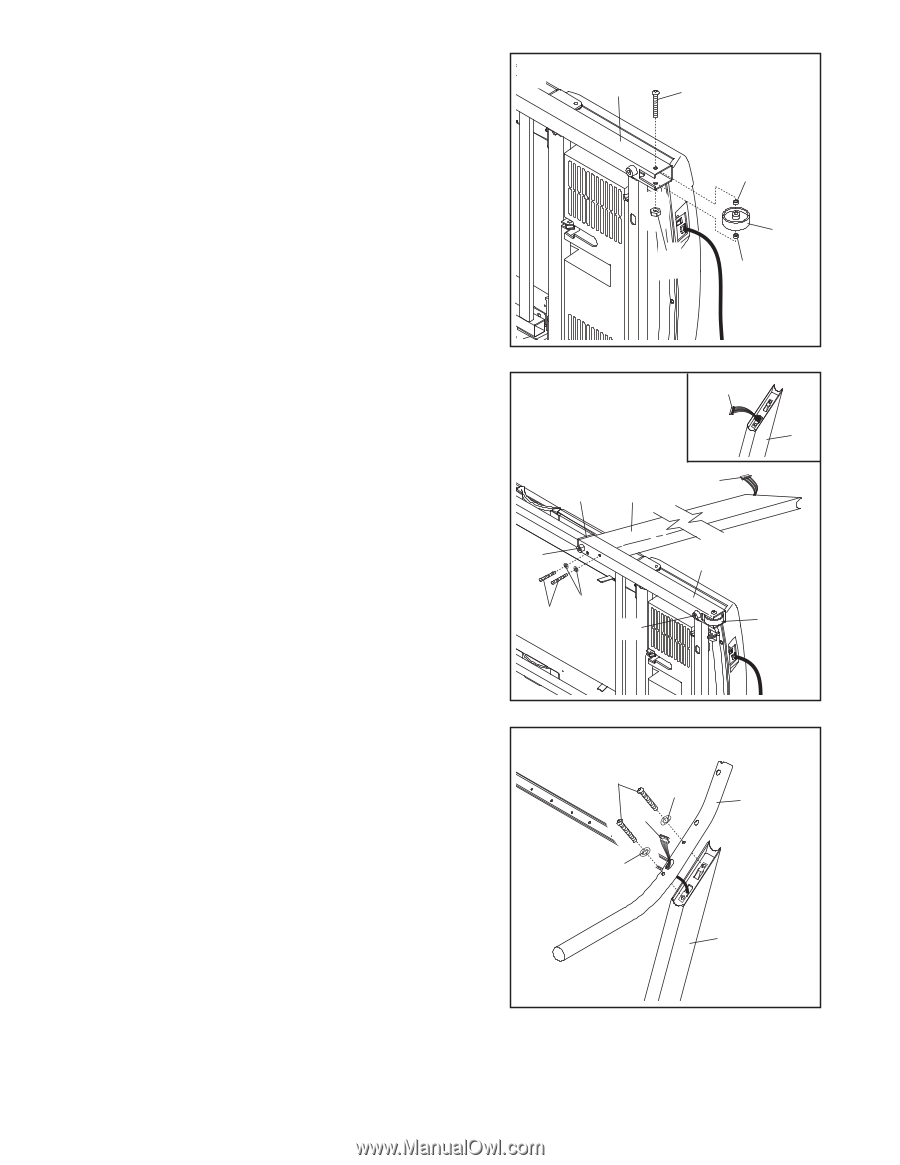
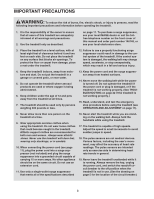
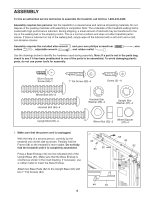
2. Attach a Wheel (80) and two Wheel Spacers (97) to the Upright Base (84) with a Wheel Bolt (81) and a Wheel Nut 2 (32) as shown. Do not overtighten the Wheel Nut; the Wheel should turn freely. 84 81 97 80 32 97 3. Identify the Right Upright (14). Straighten the Upright Wire Harness (77), and feed it into the lower end of the Right Upright (14) and out of the hole shown in the inset drawing. Next, hold the Right Upright against the right side of the Upright Base (84); make sure that the Right Upright is turned so that the upper end is angled in the direction shown. Hand tighten two Upright Bolts (65) with two Upright Star Washers (67) into the Upright Base and the Right Upright; be careful not to damage the Upright Wire Harness. Do not tighten the Upright Bolts yet. With the help of a second person, carefully tip the treadmill onto its other side. Attach the other Base Endcap (44) and two Base Pads (82) as described in step 1. Next, attach the other Wheel (80) as described in step 2. Then, attach the Left Upright (not shown) as described above. Note: There is not a wire harness on the left side. 4. With the help of a second person, carefully raise the Uprights (14, 13 [not shown]) to a vertical position. Hold the Handrail (20) near the Right Upright (14). Insert the Upright Wire Harness (77) into the hole in the bottom of the Handrail and out of the top as shown. Next, set the Handrail (20) on the Right Upright (14) and the Left Upright (not shown). Do not let the Upright Wire Harness (77) fall into the Right Upright. Attach the Handrail (20) with four Handrail Bolts (64) (only two are shown) and four Handrail Star Washers (89); start all four Handrail Bolts, slide the Handrail upward, and then firmly tighten the Handrail Bolts. 3 44 14 82 67 65 82 77 14 77 84 80 4 64 89 20 77 89 14 7
-
 1
1 -
 2
2 -
 3
3 -
 4
4 -
 5
5 -
 6
6 -
 7
7 -
 8
8 -
 9
9 -
 10
10 -
 11
11 -
 12
12 -
13
-
14
-
15
-
16
-
17
-
18
-
19
-
20
-
21
-
22
-
23
-
24
-
25
-
26
-
27
-
28
-
29
-
30
 |
 |