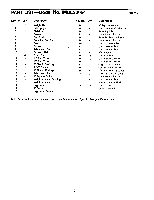
Image Fitness 3.01995 Bench English Manual - Page 7
GA30 O\er
 |
View all Image Fitness 3.01995 Bench manuals
Add to My Manuals
Save this manual to your list of manuals |
Page 7 highlights
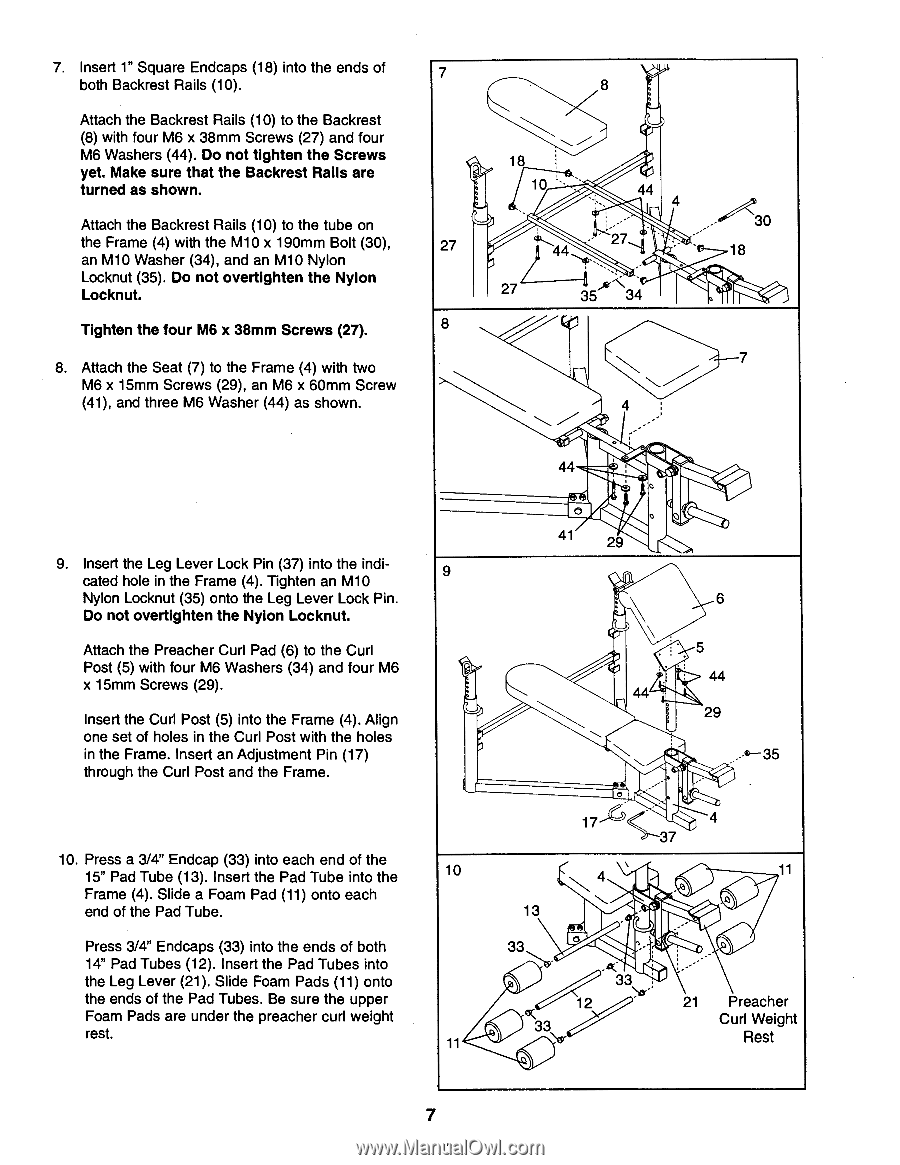
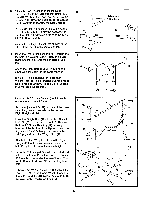
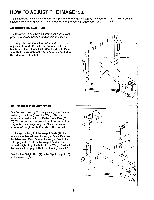
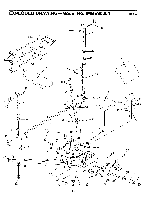
7. Insert 1" Square Endcaps (18) into the ends of 7 both Backrest Rails (10). 8 Attach the Backrest Rails (10) to the Backrest (8) with four M6 x 38mm Screws (27) and four M6 Washers (44). Do not tighten the Screws yet. Make sure that the Backrest Rails are turned as shown. Attach the Backrest Rails (10) to the tube on the Frame (4) with the M10 x 190mm Bolt (30), an M10 Washer (34), and an M10 Nylon Locknut (35). Do not overtighten the Nylon Locknut. 18 10 • , ' 44 4 ,„ .-- A30 27 op,, • 7 . 18 . . 27 35_ \ 34 Tighten the four M6 x 38mm Screws (27). 8 8. Attach the Seat (7) to the Frame (4) with two M6 x 15mm Screws (29), an M6 x 60mm Screw (41), and three M6 Washer (44) as shown. 7 4 ,--- 0 44 ' : 9. Insert the Leg Lever Lock Pin (37) into the indicated hole in the Frame (4). Tighten an M10 9 Nylon Locknut (35) onto the Leg Lever Lock Pin. Do not overtighten the Nylon Locknut. Attach the Preacher Curl Pad (6) to the Curl Post (5) with four M6 Washers (34) and four M6 x 15mm Screws (29). Insert the Curl Post (5) into the Frame (4). Align one set of holes in the Curl Post with the holes in the Frame. Insert an Adjustment Pin (17) through the Curl Post and the Frame. 10. Press a 3/4" Endcap (33) into each end of the 15" Pad Tube (13). Insert the Pad Tube into the 10 Frame (4). Slide a Foam Pad (11) onto each end of the Pad Tube. Press 3/4" Endcaps (33) into the ends of both 14" Pad Tubes (12). Insert the Pad Tubes into the Leg Lever (21). Slide Foam Pads (11) onto the ends of the Pad Tubes. Be sure the upper Foam Pads are under the preacher curl weight rest. 11 41 29 6 \ 5 44 44 29 \ ' 6-35 17 4 3 4 G 11 - n 13 . 33 O ,,., . . - 12 33 \er 33 . 21 Preacher Curl Weight Rest 7
-
 1
1 -
 2
2 -
 3
3 -
 4
4 -
 5
5 -
 6
6 -
 7
7 -
 8
8 -
 9
9 -
 10
10 -
 11
11 -
 12
12 -
13
-
14
-
15
-
16
 |
 |