Insignia NS-DSC10B User Manual (English) - Page 6
Top, bottom and side - 10 0 megapixel digital camera
 |
UPC - 600603123153
View all Insignia NS-DSC10B manuals
Add to My Manuals
Save this manual to your list of manuals |
Page 6 highlights
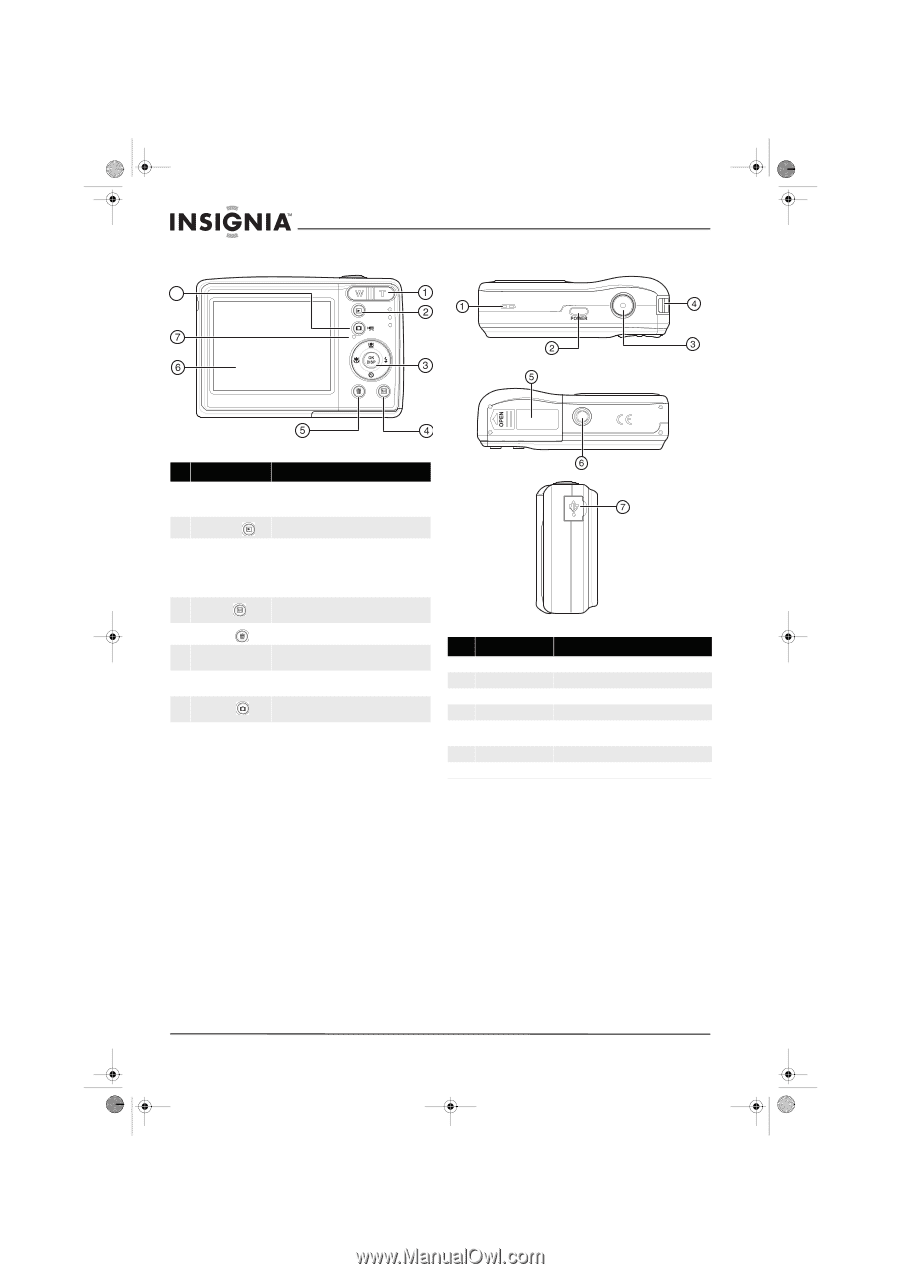
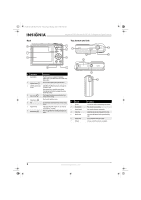
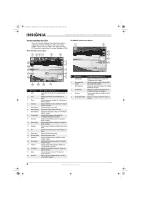
NS-DSC10A-10B_09-0323_MAN_V2.book Page 2 Monday, April 27, 2009 8:42 AM Back 8 Insignia NS-DSC10A and NS-DSC10B 10 Megapixel Digital Cameras Top, bottom and side # Component Description 1 Zoom button Press T to zoom in on a subject for telephoto photos/video, or press W to zoom out for wide-angle photos/video. 2 Playback button Press to view the photos/video you have taken. 3 OK/DISP and direction In RECORD or PLAYBACK mode, press to change the buttons LCD monitor view. In menu mode, press to confirm your settings. Press the direction buttons to navigate the menus and change settings. 4 Menu button Press to open the camera menu system to let you change camera settings. 5 Delete button 6 LCD 7 Operation LED 8 Record button Press to delete a photo or video. Use to compose your photos and to view the various # Button menus. 1 Speaker Lights green when the camera is on. See "LED and sound indicators" on page 2. Press to toggle between recording still images and videos. 2 Power button 3 Shutter button 4 Strap ring 5 Battery cover 6 Tripod socket 7 USB jack Description Lets you hear audio recorded during video capture. Press to turn on your camera. Press to take a photo or capture video. Attach the carrying strap (included) to this ring. Open to install batteries and an optional memory card. Use to mount the camera to a tripod. Lets you connect the camera to a computer. 2 www.insigniaproducts.com
-
 1
1 -
 2
2 -
 3
3 -
 4
4 -
 5
5 -
 6
6 -
 7
7 -
 8
8 -
 9
9 -
 10
10 -
 11
11 -
 12
12 -
13
-
14
-
15
-
16
-
17
-
18
-
19
-
20
-
21
-
22
-
23
-
24
 |
 |