Insignia NS-DSC1110A Silver User Manual (English) - Page 7
Top, Right and left, Bottom, Setting up your camera, Installing the batteries
 |
View all Insignia NS-DSC1110A Silver manuals
Add to My Manuals
Save this manual to your list of manuals |
Page 7 highlights
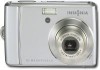
10 Megapixel Camera # Item 6 4-way navigation button 7 MENU button Description The Macro, Face Tracking, Self-Timer, and Flash buttons are also used to navigate through the on-screen menus. See "Navigating menus" on page 4. Press to open or close the on-screen menu. Top # Item 1 Speaker 2 Shutter button 3 POWER button 4 LCD backlight button Description Lets you hear audio recorded during video capture. Press to take a photo or to start or stop a video recording. Press to turn your camera on or off. Press to increase the LCD brightness for 10 seconds. Right and left Bottom # Item Description 1 Battery compartment 2 Tripod socket Insert two AA batteries into this compartment. For more information, see "Installing the batteries" on page 3. Use to mount the camera to a tripod. 3 SD/SCHC card compartment Insert an SD or SDHC memory card (not included) into this compartment. For more information, see "Installing a memory card" on page 4. Setting up your camera Installing the batteries Make sure that you read and follow the battery cautions in "Battery information" on page 1. To install the batteries: 1 Make sure your camera is turned off. 2 Slide the cover in the direction of the arrow, then lift the cover away from the battery compartment. # Item 1 USB connector 2 Strap ring Description Lets you connect your camera to a computer. Attach the wrist strap (included) to this ring. 3 Insert two AA batteries (included) into the battery compartment. Make sure that the + and - symbols on the batteries align with the + and - symbols in the battery compartment. 4 Close the battery compartment cover, then slide the cover in the direction of the arrow to lock it in place. www.insigniaproducts.com 3
-
 1
1 -
 2
2 -
 3
3 -
 4
4 -
 5
5 -
 6
6 -
 7
7 -
 8
8 -
 9
9 -
 10
10 -
 11
11 -
 12
12 -
13
-
14
-
15
-
16
-
17
-
18
-
19
-
20
-
21
-
22
-
23
-
24
-
25
-
26
-
27
-
28
-
29
-
30
 |
 |
