Insignia NS-DSC1110A Silver User Manual (English) - Page 9
Initial settings, Understanding camera modes, Understanding the LCD, Date Stamp
 |
View all Insignia NS-DSC1110A Silver manuals
Add to My Manuals
Save this manual to your list of manuals |
Page 9 highlights
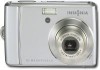
10 Megapixel Camera Item Description Understanding the LCD • In Photo mode, press to toggle the flash Photo mode mode (Auto, Red-eye Reduction, Forced On, Slow Sync, and Forced Off).Flash modes are only available for photos. • In Playback mode, press to view the next / image or video clip. Press and hold down to scroll rapidly through images and video clips. • In video Playback mode, press to fast-forward video playback. • In menu mode, press to enter the submenu or to navigate through the menu selections. • In Photo mode, press to turn the self-timer on or off. / • In video Playback mode, press to stop video playback. • In menu mode, press to navigate down through menu and submenu selections. Initial settings Note • • If the batteries are removed for longer than 48 hours, the date and time must be reset. If you reset your camera to the default settings, you will have to select the menu language and set the date and time again. When you turn on your camera for the first time, your camera will be in Simple Mode. Simple Mode hides advanced settings and makes your camera easier to operate. Your camera's default settings are: • Quality: Fine • Resolution: High (10 megapixels) • ISO: Auto • Color Balance: Auto. • Stabilizer: Off. Image stabilization is ideal for reducing blurred images that may be caused by shaky hands or low-light conditions. Turn off Stabilization when using a tripod. • Self-timer: Off. • Focus Light: On. • Metering Function: Multi. • Burst Mode: Off. • Beep: On. When beeps are turned on, an alert is heard when key functions are accessed. • Quick View: On. • Date Stamp: Off. • Power Save: On. • Battery Type: Alkaline. • Help Text: On. A brief description of what the advanced settings do is provided by viewing the help text at the bottom of the screen. To view the help text, highlight any menu option. • Simple Mode: On. Turn off Simple Mode to access advanced settings. Understanding camera modes Your camera has three modes: Photo, Video, and Playback. -Photo mode is for capturing still images. -Video mode is for capturing video. -Playback mode is for playing captured images and videos. # Item 1 Mode indicator 2 Flash 3 Macro 4 Self-timer 5 Zoom indicator 6 Shots remaining 7 Battery 8 Storage media 9 Focus area 10 Shake warning 11 Histogram 12 ISO 13 Shutter speed 14 Aperture value 15 Date stamp 16 Stabilizer 17 Face tracking 18 Color Balance Description A camera icon appears when your camera is in Photo mode. For more information, see "Understanding camera modes" on page 5. Shows the flash setting. For more information, see "Using the flash" on page 9. Appears when Macro mode is turned on. For more information, see "Using the macro feature" on page 10. Appears when the self-timer is turned on. For more information, see "Using the self-timer" on page 10. Shows the zoom setting. For more information, see "Using the zoom" on page 9. Shows the number of remaining shots. Shows the battery level. A camera icon appears when no memory card is inserted. A memory card icon appears when a memory card is inserted. Frames the area to be captured. Appears when the camera is shaking. Shows the light level for the current image. Shows the ISO setting. For more information, see "Setting ISO" on page 14. Shows the shutter speed automatically selected by your camera. Shows the aperture value automatically selected by your camera. Appears when the date stamp feature is turned on. For more information, see "Imprinting the date and time on photos" on page 19. Appears when the stabilizer feature is turned on. For more information, see "Turning the stabilizer function on or off" on page 15. Appears when face tracking is turned on. For more information, see "Using face tracking" on page 10. Shows the color balance setting. For more information, see "Setting the color balance" on page 14. www.insigniaproducts.com 5
-
 1
1 -
2
-
3
-
 4
4 -
 5
5 -
 6
6 -
 7
7 -
 8
8 -
 9
9 -
 10
10 -
 11
11 -
 12
12 -
 13
13 -
 14
14 -
15
-
16
-
17
-
18
-
19
-
20
-
21
-
22
-
23
-
24
-
25
-
26
-
27
-
28
-
29
-
30
 |
 |
