Insignia NS-RTM18BK8Q User Guide - Page 16
hinge cover from the hinge kit and cover the screw holes on the right side
 |
View all Insignia NS-RTM18BK8Q manuals
Add to My Manuals
Save this manual to your list of manuals |
Page 16 highlights
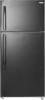
NS-RTM18WH8Q/NS-RTM18WH8Q-C/NS-RTM18BK8Q 14 Attach the refrigerator door on the bottom hinge. Use the center hinge from the hinge kit (not the piece removed in step 4), then attach the center left hinge to the left side of the refrigerator. Attach the left center hinge 15 Put the freezer door onto the center left hinge, then attach the top left hinge (from the hinge kit) to the top of refrigerator. Cover the hinge with the top left hinge cover (from the hinge kit) and cover the screw holes on the right side of the top with the cover plate you previously removed. Attach the top left hinge 16 www.insigniaproducts.com
-
 1
1 -
2
-
3
-
4
-
5
-
6
-
7
-
8
-
9
-
10
-
 11
11 -
 12
12 -
 13
13 -
 14
14 -
 15
15 -
 16
16 -
 17
17 -
 18
18 -
 19
19 -
 20
20 -
 21
21 -
22
-
23
-
24
-
25
 |
 |

16
NS-RTM18WH8Q/NS-RTM18WH8Q-C/NS-RTM18BK8Q
www.insigniaproducts.com
14
Attach the refrigerator door on the bottom hinge. Use the center hinge from
the hinge kit (not the piece removed in step 4), then attach the center left
hinge to the left side of the refrigerator.
15
Put the freezer door onto the center left hinge, then attach the top left hinge
(from the hinge kit) to the top of refrigerator. Cover the hinge with the top left
hinge cover (from the hinge kit) and cover the screw holes on the right side of
the top with the cover plate you previously removed.
Attach the left center hinge
Attach the top left hinge