Intel D845WN Product Guide - Page 26
Verify that all four fasteners are fully engaged, then press down each of the four
 |
UPC - 735858149198
View all Intel D845WN manuals
Add to My Manuals
Save this manual to your list of manuals |
Page 26 highlights
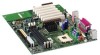
Intel Desktop Boards D845HV and D845WN Product Guide 3. Align the four fasteners (B) of the processor fan heatsink RM base with the corresponding holes in the desktop board (C). Gently press the base down until all four corners snap into place. Verify that all four fasteners are fully engaged, then press down each of the four locking pushpins (A) to fully secure the base to the desktop board (see Figure 8). A B C OM12096 Figure 8. Installing the Processor Fan Heatsink RM Base to the Board 26
-
 1
1 -
2
-
3
-
4
-
5
-
6
-
7
-
8
-
9
-
10
-
11
-
12
-
13
-
14
-
15
-
16
-
17
-
18
-
19
-
20
-
 21
21 -
 22
22 -
 23
23 -
 24
24 -
 25
25 -
 26
26 -
 27
27 -
 28
28 -
 29
29 -
 30
30 -
 31
31 -
32
-
33
-
34
-
35
-
36
-
37
-
38
-
39
-
40
-
41
-
42
-
43
-
44
-
45
-
46
-
47
-
48
-
49
-
50
-
51
-
52
-
53
-
54
-
55
-
56
-
57
-
58
-
59
-
60
-
61
-
62
-
63
-
64
-
65
-
66
-
67
-
68
-
69
-
70
-
71
-
72
-
73
-
74
-
75
-
76
-
77
-
78
-
79
-
80
-
81
-
82
-
83
-
84
-
85
-
86
-
87
 |
 |

Intel Desktop Boards D845HV and D845WN Product Guide
26
3.
Align the four fasteners (B) of the processor fan heatsink RM base with the corresponding
holes in the desktop board (C).
Gently press the base down until all four corners snap into
place.
Verify that all four fasteners are fully engaged, then press down each of the four
locking pushpins (A) to fully secure the base to the desktop board (see Figure 8).
OM12096
A
C
B
Figure 8.
Installing the Processor Fan Heatsink RM Base to the Board