Intel RS2WG160 Hardware User Guide - Page 20
Configuring the RAID Controller, Replacing a Controller, Resolving a Config Mismatch
 |
View all Intel RS2WG160 manuals
Add to My Manuals
Save this manual to your list of manuals |
Page 20 highlights
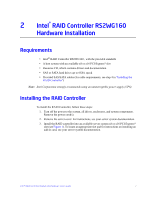
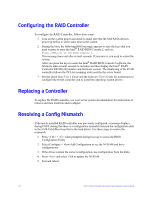
Configuring the RAID Controller To configure the RAID Controller, follow these steps: 1. Turn on the system power and check to make sure that the SAS/SATA devices power up before or at the same time as the system. 2. During the boot, the following BIOS message appears to state the keys that you need to press to enter the Intel® RAID BIOS Console 2, such as: Press to run BIOS Console 2. This message times out after several seconds. If you miss it, you need to restart the system. After you press the keys to enter the Intel® RAID BIOS Console 2 software, the firmware takes several seconds to initialize and then display the Intel® RAID Controller RS2WG160 number and firmware version. The numbering of the RAID controller follows the PCI slot scanning order used by the server board. 3. See the Quick Start User's Guide and the Software User's Guide for instructions to configure the RAID controller and to install the operating system drivers. Replacing a Controller To replace the RAID controller, see your server system documentation for instructions to remove and then install an add-in adapter. Resolving a Config Mismatch If the newly installed RAID controller was previously configured, a message displays during POST, stating that there is a configuration mismatch because the configuration data in the NVRAM differs from that in the hard drives. Use these steps to resolve the mismatch: 1. Press + when prompted during boot up to access the BIOS Configuration Utility 2. Select Configure > View/Add Configuration to see the NVRAM and drive configurations. 3. If the drives contain the correct configuration, use configuration from the disks. 4. Press and select YES to update the NVRAM. 5. Exit and reboot. 10 Intel® RAID Controller RS2WG160 Hardware User's Guide
-
 1
1 -
2
-
3
-
4
-
5
-
6
-
7
-
8
-
9
-
10
-
11
-
12
-
13
-
14
-
 15
15 -
 16
16 -
 17
17 -
 18
18 -
 19
19 -
 20
20 -
 21
21 -
 22
22 -
 23
23 -
 24
24 -
 25
25 -
26
-
27
-
28
-
29
-
30
-
31
-
32
-
33
-
34
-
35
-
36
-
37
-
38
-
39
-
40
-
41
-
42
-
43
-
44
-
45
-
46
-
47
-
48
-
49
-
50
-
51
-
52
 |
 |