Intel SC5300AF2 User Guide - Page 15
For Intel Server Chassis SR1400 or Intel Server Chassis SR2400 with Intel Server Board - bios
 |
UPC - 735858171663
View all Intel SC5300AF2 manuals
Add to My Manuals
Save this manual to your list of manuals |
Page 15 highlights
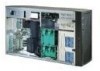
To install the Advanced Edition module, do the following: 1. Power down the system. 2. Remove AC power. 3. Open the chassis to gain access to the Intel Management Module Connector and the rear panel. 4. For Intel Server Chassis SR1400 or Intel Server Chassis SR2400 with Intel Server Board SE7520JR2: follow the instructions in the chassis Product Guide to remove the Add-in Card Riser. Insert one nylon standoff in the baseboard to support the Management Module. 5. If you are installing in a SE8500HW4 platform, skip this step. Connect the cable between the Management Module and the NIC card. If you are installing the NIC in the SR1400 or SR2400 chassis, use the short cable, otherwise use the longer cable. 6. Align the Management Module over the baseboard connector and the nylon standoff. 7. Press down on the Management Module to fully seat the connector and standoff. 8. For Intel Server Chassis SR1400 or Intel Server Chassis SR2400 with Intel Server Board SE7520JR2, install the NIC on the rear panel using 2 screws. The following illustration shows the location of the network connector (NIC3) on the rear panel of the Intel Server Chassis SR1400. NIC3 Replace the Add-in Card Riser. 9. For all other chassis types, except SE8500HW4 platforms: a. Connect the NIC to the filler panel with two screws. b. Install the NIC and filler panel in a full-height PCI rear panel slot. 10. Connect the LAN cable to the NIC. 11. Close the chassis, reconnect the AC power, and power-on the system. 12. Update the firmware and FRU/SDR for your server board. Use the latest files and instructions for your server board that you downloaded from http://support.intel.com/support/motherboards/server. 13. For headless operation (no keyboard), enter BIOS Setup (press F2 during POST) and change the "POST Error Pause" option to "disable." 14. Run the Intel Server Configuration Wizard (SCW) from the Intel Server Deployment Toolkit CD to configure the new features on the Advanced Edition module. NOTE To ensure that the NIC on the Advanced Edition module is properly configured, answer "No" to the following SCW question: "Intel Server Manager Application software and/or agents will be installed on this server." Intel® Management Module Installation and User's Guide 15
-
 1
1 -
2
-
3
-
4
-
5
-
6
-
7
-
8
-
9
-
 10
10 -
 11
11 -
 12
12 -
 13
13 -
 14
14 -
 15
15 -
 16
16 -
 17
17 -
 18
18 -
 19
19 -
 20
20 -
21
-
22
-
23
-
24
-
25
-
26
-
27
-
28
-
29
-
30
-
31
-
32
 |
 |
