Intel SRCSAS18E User Guide - Page 36
Replacing a Failed Controller that Contains Data in the Intel® RAID Portable Cache Module 2 - battery backup
 |
UPC - 675900727472
View all Intel SRCSAS18E manuals
Add to My Manuals
Save this manual to your list of manuals |
Page 36 highlights
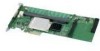
RinetphleacInintegl®a Failed Controller that RAID Portable Cache Contains Module 2 Data The Intel® RAID Portable Cache Module 2 (AXXRPCM2) is a cache memory module with an integrated battery pack. The module provides an uninterrupted power source to the module if power is unexpectedly interrupted while cached data is still present. If the power failure is the result of the RAID Controller SRCSAS18E itself failing, then the Intel® RAID Portable Cache Module 2 can be moved to a new controller and the data recovered. The replacement controller must have a cleared configuration. Perform the following steps to replace a failed controller with data in the transportable battery backup unit. 1. Power-down the system and drives. 2. Remove the failed controller from the system. 3. Remove the Intel® RAID Portable Cache Module 2 from the failed controller. 4. Insert the new Intel® RAID Portable Cache Module 2 into the replacement controller. 5. Connect the battery cable to the connector on the Intel® RAID Portable Cache Module 2, 6. Insert the replacement controller into the system. 7. Power-on the system. The controller then reads the disk configuration into NVRAM and flushes cache data to the logical drives. Resolving a Configuration Mismatch - If the replacement controller has a previous configuration, a message displays during the power-on self-test (POST) stating that there is a configuration mismatch. A configuration mismatch occurs when the configuration data in the NVRAM and the hard disk drives are different. You need to update the configuration data in the NVRAM with the data from the hard disk drive. Perform the following steps to resolve the mismatch. 1. Press when prompted during bootup to access the BIOS Configuration Utility. 2. Select Configure->View/Add Configuration. 3. This gives you the option to view the configuration on both the NVRAM and the hard drive disk. 4. Select the configuration on disk. 5. Press and select YES to update the NVRAM. 6. Exit and reboot. 17 Intel® RAID Controller SRCSAS18E User's Guide
-
 1
1 -
2
-
3
-
4
-
5
-
6
-
7
-
8
-
9
-
10
-
11
-
12
-
13
-
14
-
15
-
16
-
17
-
18
-
19
-
20
-
21
-
22
-
23
-
24
-
25
-
26
-
27
-
28
-
29
-
30
-
 31
31 -
 32
32 -
 33
33 -
 34
34 -
 35
35 -
 36
36 -
 37
37 -
 38
38 -
 39
39 -
 40
40 -
 41
41 -
42
-
43
-
44
 |
 |
