Intermec PF4i Fingerprint Developer's Guide (old) - Page 105
Creating Line Fields, Summary for Line Fields, Additional Printing Instructions
 |
View all Intermec PF4i manuals
Add to My Manuals
Save this manual to your list of manuals |
Page 105 highlights
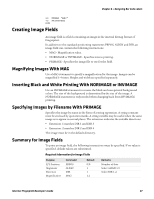
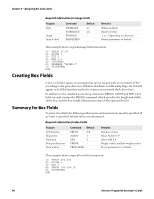
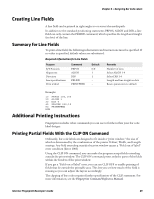
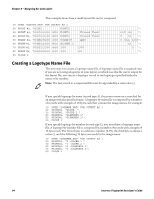
Chapter 6 - Designing Bar Code Labels Creating Line Fields A line field can be printed in right angles to or across the media path. In addition to the standard positioning statements PRPOS, ALIGN and DIR, a line field can only contain the PRLINE command, which specifies the length and weight (in dots) of the line. Summary for Line Fields To print a line field, the following information and instructions must be specified. If no value is specified, default values are substituted. Required Information for Line Fields Purpose X/Y Position Alignment Direction Line specifications Print a label Command PRPOS ALIGN DIR PRLINE PRINTFEED Default 0/0 1 1 - - Remarks Number of dots Select ALIGN 1-9 Select DIR 1-4 Length and line weight in dots Resets parameters to default Example: 10 PRPOS 100,100 20 ALIGN 1 30 DIR 4 40 PRLINE 200,10 50 PRINTFEED RUN Additional Printing Instructions Fingerprint includes other commands you can use to further refine your bar code label designs. Printing Partial Fields With the CLIP ON Command Ordinarily, bar code labels are designed to fit inside a "print window," the size of which is determined by the combination of the printer X-Start, Width, and Length settings. Any field extending outside the print window causes a "Field out of label" error condition (Error 1003) Using the CLIP ON command, you can make the program accept fields extending outside the print window. The CLIP ON command prints only the parts of the fields within the borders of the print window. If you get a "Field out of label" error, you can use CLIP OFF to enable printing of fields that lie outside the printable area. This lets you see how much of the field is missing so you can adjust the layout accordingly. The clipping of bar codes requires further specification of the CLIP statement. For more information, see the Fingerprint Command Reference Manual. Intermec Fingerprint Developer's Guide 89
-
 1
1 -
2
-
3
-
4
-
5
-
6
-
7
-
8
-
9
-
10
-
11
-
12
-
13
-
14
-
15
-
16
-
17
-
18
-
19
-
20
-
21
-
22
-
23
-
24
-
25
-
26
-
27
-
28
-
29
-
30
-
31
-
32
-
33
-
34
-
35
-
36
-
37
-
38
-
39
-
40
-
41
-
42
-
43
-
44
-
45
-
46
-
47
-
48
-
49
-
50
-
51
-
52
-
53
-
54
-
55
-
56
-
57
-
58
-
59
-
60
-
61
-
62
-
63
-
64
-
65
-
66
-
67
-
68
-
69
-
70
-
71
-
72
-
73
-
74
-
75
-
76
-
77
-
78
-
79
-
80
-
81
-
82
-
83
-
84
-
85
-
86
-
87
-
88
-
89
-
90
-
91
-
92
-
93
-
94
-
95
-
96
-
97
-
98
-
99
-
 100
100 -
 101
101 -
 102
102 -
 103
103 -
 104
104 -
 105
105 -
 106
106 -
 107
107 -
 108
108 -
 109
109 -
 110
110 -
111
-
112
-
113
-
114
-
115
-
116
-
117
-
118
-
119
-
120
-
121
-
122
-
123
-
124
-
125
-
126
-
127
-
128
-
129
-
130
-
131
-
132
-
133
-
134
-
135
-
136
-
137
-
138
-
139
-
140
-
141
-
142
-
143
-
144
-
145
-
146
-
147
-
148
-
149
-
150
-
151
-
152
-
153
-
154
-
155
-
156
-
157
-
158
-
159
-
160
-
161
-
162
-
163
-
164
-
165
-
166
-
167
-
168
-
169
-
170
-
171
-
172
-
173
-
174
-
175
-
176
-
177
-
178
-
179
-
180
-
181
-
182
-
183
-
184
-
185
-
186
-
187
 |
 |
