Intermec PX4i EasyCoder Printer (PX4i and PX6i) RFID Kit Installation Instruct - Page 7
the cover plate to slot 1 or slot 2, and remove the cover plate.
 |
View all Intermec PX4i manuals
Add to My Manuals
Save this manual to your list of manuals |
Page 7 highlights
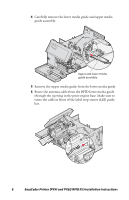
7 Slide the RFID lower media guide into the printer. Insert the pins on the guide into the holes on the print engine base. RFID lower media guide 8 Snap the RFID lower media guide into place. 9 Insert the upper media guide. 10 On the back of the printer, remove the two screws that secure the cover plate to slot 1 or slot 2, and remove the cover plate. Note: You need to use the first available slot on the printer starting from the left (slot 1). Slot 1 Slot 2 Screw (2 places) Dual slot I/O cable 11 Connect the dual slot I/O cable to the main board. EasyCoder Printer (PX4i and PX6i) RFID Kit Installation Instructions 7
-
 1
1 -
 2
2 -
 3
3 -
 4
4 -
 5
5 -
 6
6 -
 7
7 -
 8
8 -
 9
9 -
 10
10 -
 11
11 -
 12
12
 |
 |
EasyCoder Printer (PX4i and PX6i) RFID Kit Installation Instructions
7
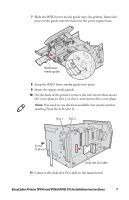
7
Slide the RFID lower media guide into the printer. Insert the
pins on the guide into the holes on the print engine base.
8
Snap the RFID lower media guide into place.
9
Insert the upper media guide.
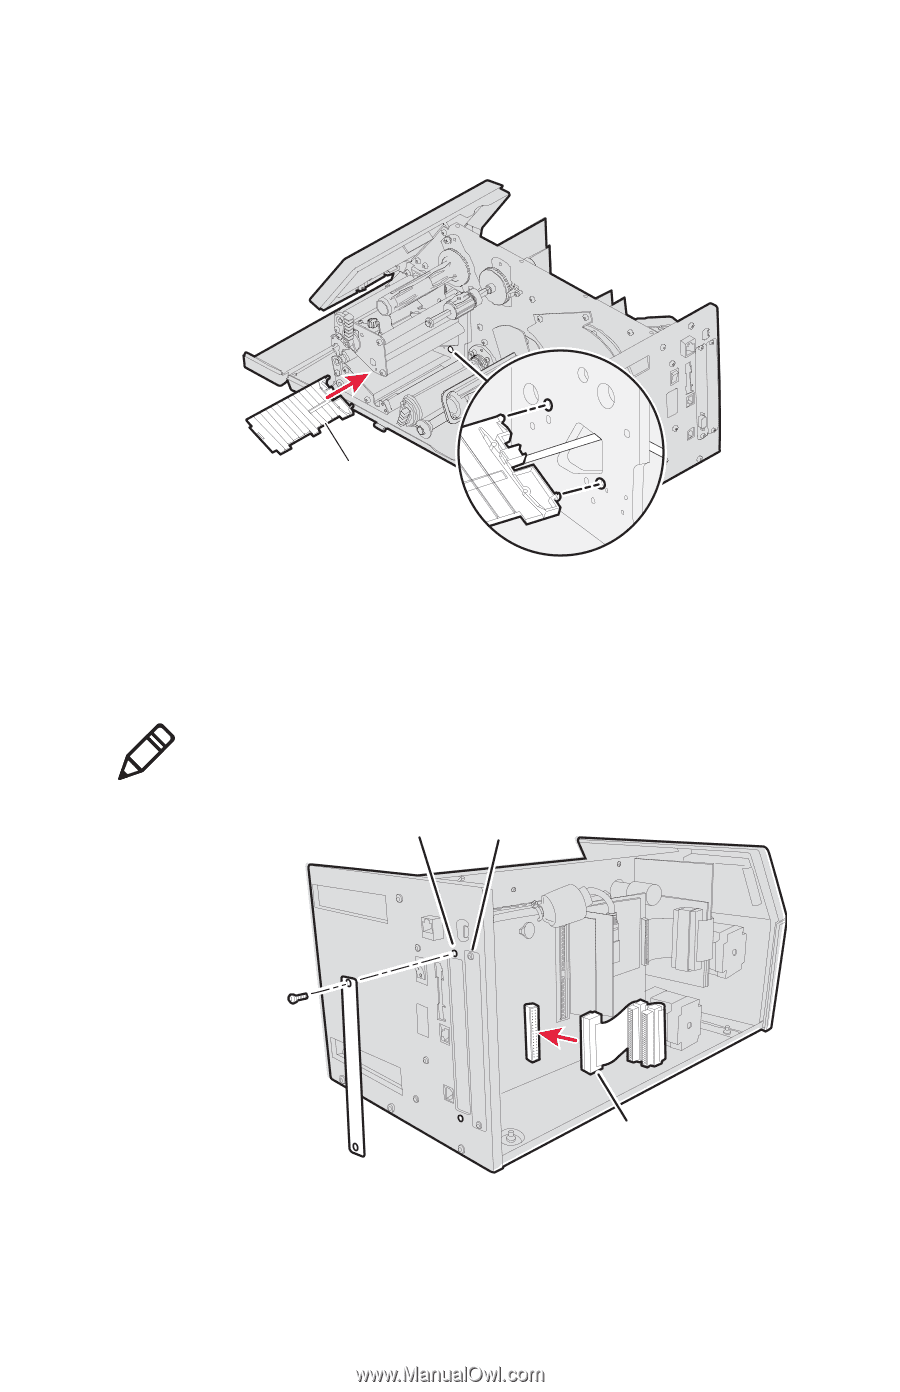
10
On the back of the printer, remove the two screws that secure
the cover plate to slot 1 or slot 2, and remove the cover plate.
11
Connect the dual slot I/O cable to the main board.
RFID l
o
wer
m
e
di
a
guid
e
Note:
You need to use the first available slot on the printer
starting from the left (slot 1).
Screw
(2 places)
Sl
ot
1
Sl
ot
2
D
u
al sl
ot
I/O cable