Invacare TDXSP2 Owners Manual 4 - Page 24
Pinch Points - tdx sp2 power wheelchair weight
 |
View all Invacare TDXSP2 manuals
Add to My Manuals
Save this manual to your list of manuals |
Page 24 highlights
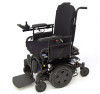
Invacare® TDX® SP2 Series Adequate mobility and upper body strength is required to perform this activity independently. 1. Transfer to and from the wheelchair in the presence of a qualified healthcare professional to determine individual safety limits. 2. Turn power button OFF BEFORE entering or exiting the wheelchair. 3. Reduce gap between transfer surface B and wheelchair seat C to the minimum distance A necessary to perform transfer. 4. ALWAYS ensure both motor locks are engaged and wheel hubs (if equipped) to prevent the wheels from moving before transferring into or from the wheelchair. 5. Align casters parallel to the drive wheels to improve stability during transfer. 6. Invacare strongly recommends ordering the optional wheel locks as an additional safeguard if not present. 7. Flip up footplates or swing footrests outward. 8. Shift body weight into seat with transfer During independent transfer, little or no seat platform will be beneath you. Use a transfer board if at all possible. 2.5 Pinch Points WARNING! Risk of Minor to Serious Injury Pinch points can cause minor to serious injury. - Be mindful of potential pinch points and use caution when using this product. 24 WARNING! Risk of Injury Pinch points can cause injury. - Be aware that a pinch point A exists between the head tube cap and walking beam. - Be aware that a pinch point B exists between the walking beam/head tube cap and telescoping tube when the wheelchair is at the lowest seat to floor height. - Be aware that a pinch point C may occur when rotating the center mount front rigging assembly. Fig. 2-12 Pinch Points - Head Tube Cap/Walking Beam and Telescoping Tube Fig. 2-13 Pinch Points - Center Mount Front Rigging 60101831-A
-
 1
1 -
2
-
3
-
4
-
5
-
6
-
7
-
8
-
9
-
10
-
11
-
12
-
13
-
14
-
15
-
16
-
17
-
18
-
 19
19 -
 20
20 -
 21
21 -
 22
22 -
 23
23 -
 24
24 -
 25
25 -
 26
26 -
 27
27 -
 28
28 -
 29
29 -
30
-
31
-
32
-
33
-
34
-
35
-
36
-
37
-
38
-
39
-
40
-
41
-
42
-
43
-
44
-
45
-
46
-
47
-
48
-
49
-
50
-
51
-
52
-
53
-
54
-
55
-
56
-
57
-
58
-
59
-
60
-
61
-
62
-
63
-
64
-
65
-
66
-
67
-
68
-
69
-
70
-
71
-
72
-
73
-
74
-
75
-
76
-
77
-
78
-
79
-
80
-
81
-
82
-
83
-
84
-
85
-
86
-
87
-
88
 |
 |
