JET Tools GH-1440-1 User Manual - Page 14
Controls
 |
View all JET Tools GH-1440-1 manuals
Add to My Manuals
Save this manual to your list of manuals |
Page 14 highlights
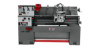
Gear box The gear box (D, Fig. 13) is made from high quality cast iron and is mounted to the left side of the machine bed. Steady rest The steady rest (E, Fig. 13) serves as a support for shafts on the free tailstock end. The steady rest is mounted on the bedway and secured from below with a bolt, nut and locking plate. The sliding fingers require continuous lubrication at the contact points with the workpiece to prevent premature wear. To set the steady rest: 1. Loosen three hex socket screws. 2. Loosen knurled screw and open sliding fingers until the steady rest can be moved with its fingers around the workpiece. Secure the steady rest in position. 3. Set the fingers snugly to the workpiece and secure by tightening three hex socket cap screws. Fingers should be snug but not overly tight. Lubricate sliding points with Mobil DTE® Oil Heavy Medium. 4. After prolonged use, the fingers will show wear. Re-mill or file the tips of the fingers. Follow rest The traveling follow rest (F, Fig. 13) is mounted on the saddle and follows the movement of the turning tool. Only two fingers are required as the place of the third is taken by the turning tool. The follow rest is used for tuning operations on long, slender workpieces. It prevents flexing of the workpiece from the pressure of the cutting tool. The sliding fingers are set similar to the steady rest, free of play, but not binding. Always lubricate with Mobil DTE® Oil Heavy Medium. Controls 1. Control Panel - located on front of gearbox. A. Coolant On-Off Switch (A, Fig. 14) - turns coolant pump on and off. B. Power Indicator Light (B, Fig. 14) - illuminated whenever lathe has power. Emergency Stop Switch (C, Fig. 14) - press to stop all machine functions. Caution: Lathe will still have power. To restart machine, rotate button clockwise until it disengages. C. Jog Switch (D, Fig. 14) - Press and release to advance spindle momentarily. 14 Figure 13 (repeated) Figure 14
-
 1
1 -
2
-
3
-
4
-
5
-
6
-
7
-
8
-
 9
9 -
 10
10 -
 11
11 -
 12
12 -
 13
13 -
 14
14 -
 15
15 -
 16
16 -
 17
17 -
 18
18 -
 19
19 -
20
-
21
-
22
-
23
-
24
-
25
-
26
-
27
-
28
-
29
-
30
-
31
-
32
-
33
-
34
-
35
-
36
-
37
-
38
-
39
-
40
-
41
-
42
-
43
-
44
-
45
-
46
-
47
-
48
-
49
-
50
-
51
-
52
-
53
-
54
-
55
-
56
-
57
-
58
-
59
-
60
-
61
-
62
-
63
-
64
-
65
-
66
-
67
-
68
 |
 |
