JVC D347US Instruction Manual - Page 11
Power, How To Attach The Lens Cap, Charging The Battery Pack
 |
UPC - 046838026928
View all JVC D347US manuals
Add to My Manuals
Save this manual to your list of manuals |
Page 11 highlights
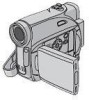
How To Attach The Lens Cap To protect the lens, attach the provided lens cap to the camcorder as shown in the illustration. NOTE: To confirm the lens cap is on correctly make sure the cap is flush to the camcorder. GETTING STARTED EN 11 Power This camcorder's 2-way power supply system lets you choose the most appropriate source of power. Do not use provided power supply units with other equipment. Charging The Battery Pack Battery pack mount GETTING STARTED Battery pack 1 PUSH BATT. Place here during shooting. How To Attach The Shoulder Strap Follow the illustration. 1 Thread the strap through the eyelet. 2 Fold it back and thread it through the strap guide and the buckle. ● To adjust the length of the strap, loosen and then tighten the strap in the buckle. 3 Slide the strap guide fully towards the eyelet. Buckle Arrow 2 POWER/ CHARGE lamp To DC connector Power switch AC Adapter To AC outlet Strap guide 2 1 Set the Power Switch to "OFF". 2 2 With the arrow on the battery pack pointing downward, push the battery pack slightly against the battery pack mount 1. 3 Slide down the battery pack until it locks in place 2. 4 Connect the AC Adapter to the camcorder. 5 Plug the AC Adapter into an AC outlet. The POWER/CHARGE lamp on the camcorder 1 Eyelet 3 blinks to indicate charging has started. 6 When the POWER/CHARGE lamp goes out, charging is finished. Unplug the AC Adapter from the AC outlet. Disconnect the AC Adapter from the camcorder.
-
 1
1 -
2
-
3
-
4
-
5
-
 6
6 -
 7
7 -
 8
8 -
 9
9 -
 10
10 -
 11
11 -
 12
12 -
 13
13 -
 14
14 -
 15
15 -
 16
16 -
17
-
18
-
19
-
20
-
21
-
22
-
23
-
24
-
25
-
26
-
27
-
28
-
29
-
30
-
31
-
32
-
33
-
34
-
35
-
36
-
37
-
38
-
39
-
40
-
41
-
42
-
43
-
44
-
45
-
46
-
47
-
48
-
49
-
50
-
51
-
52
-
53
-
54
-
55
-
56
-
57
-
58
-
59
-
60
-
61
-
62
-
63
-
64
-
65
-
66
-
67
-
68
-
69
-
70
-
71
-
72
-
73
-
74
-
75
-
76
-
77
-
78
-
79
-
80
-
81
-
82
-
83
-
84
-
85
-
86
-
87
-
88
 |
 |
