JVC GR-D372 Instructions - Page 34
Snapshot (Record Still Image On Tape), Motor Drive Mode, Manual Focus
 |
UPC - 046838026935
View all JVC GR-D372 manuals
Add to My Manuals
Save this manual to your list of manuals |
Page 34 highlights
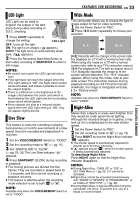
34 EN FEATURES FOR RECORDING Snapshot (Record Still Image On Tape) This feature lets you record still images that look like photographs onto a tape. 1 Set the VIDEO/MEMORY Switch to "VIDEO". 2 Set the Power Switch to "REC". M 3 Set the recording mode to " ".(੬ pg. 15) 4 Set "SNAP/SLOW" to "SNAP". (੬ pg. 29, 30) 5 Press SNAPSHOT. ● There is the sound effect of a shutter closing. ● The "PHOTO" indication appears and a still image will be recorded for approx. 5 seconds, then the camcorder re-enters the Record-Standby mode. ● You can perform Snapshot also during recording. A still image will be recorded for approx. 5 seconds, then the normal recording resumes. A M ● Snapshot is effective when the recording mode selection is set to both " " or " ". ● Snapshot mode cannot be used when the 16:9 Wide mode (16:9 indicator) is selected. Motor Drive Mode Keeping SNAPSHOT pressed in step 5 provides an effect similar to serial photography. (Interval between still images: approx. 1 second) ● The Motor Drive mode is disabled when "REC SELECT" is set to " / ". (੬ pg. 32) Manual Focus The camcorder's Full Range AF system offers continuous shooting ability from close-up (as close as approx. 5 cm (2") to the subject) to infinity. However, correct focus may not be obtained depending on the shooting condition. In this case, use the manual focus mode. 1 Set the Power Switch to "REC". M 2 Set the recording mode to " ". (੬ pg. 15) 3 Press FOCUS. The manual focus indicator appears. 4 Press 1 or 2 to focus Manual focus indicator on a subject. ● When the focus level cannot be adjusted any further or closer, " " or " " will blink. 5 Press SET. Focus adjustment is complete. To reset to Auto Focus Press FOCUS twice. Manual focus is recommended in situations listed below. ● When two subjects overlap in the same scene. ● When illumination is low.* ● When the subject has no contrast (difference in brightness and darkness), such as a flat, one- color wall, or a clear, blue sky.* ● When a dark object is barely visible in the LCD monitor or the viewfinder.* ● When the scene contains minute patterns or identical patterns that are regularly repeated. ● When the scene is affected by sunbeams or light reflecting off the surface of a body of water. ● When shooting a scene with a high-contrast background. * The following low-contrast warnings appear blinking: , , and .
-
 1
1 -
2
-
3
-
4
-
5
-
6
-
7
-
8
-
9
-
10
-
11
-
12
-
13
-
14
-
15
-
16
-
17
-
18
-
19
-
20
-
21
-
22
-
23
-
24
-
25
-
26
-
27
-
28
-
 29
29 -
 30
30 -
 31
31 -
 32
32 -
 33
33 -
 34
34 -
 35
35 -
 36
36 -
 37
37 -
 38
38 -
 39
39 -
40
-
41
-
42
-
43
-
44
-
45
-
46
-
47
-
48
-
49
-
50
-
51
-
52
 |
 |
