JVC GZ-HM200BUS Instructions - Page 19
Date/Time Setting, Select [AREA SETTING].
 |
UPC - 046838037788
View all JVC GZ-HM200BUS manuals
Add to My Manuals
Save this manual to your list of manuals |
Page 19 highlights
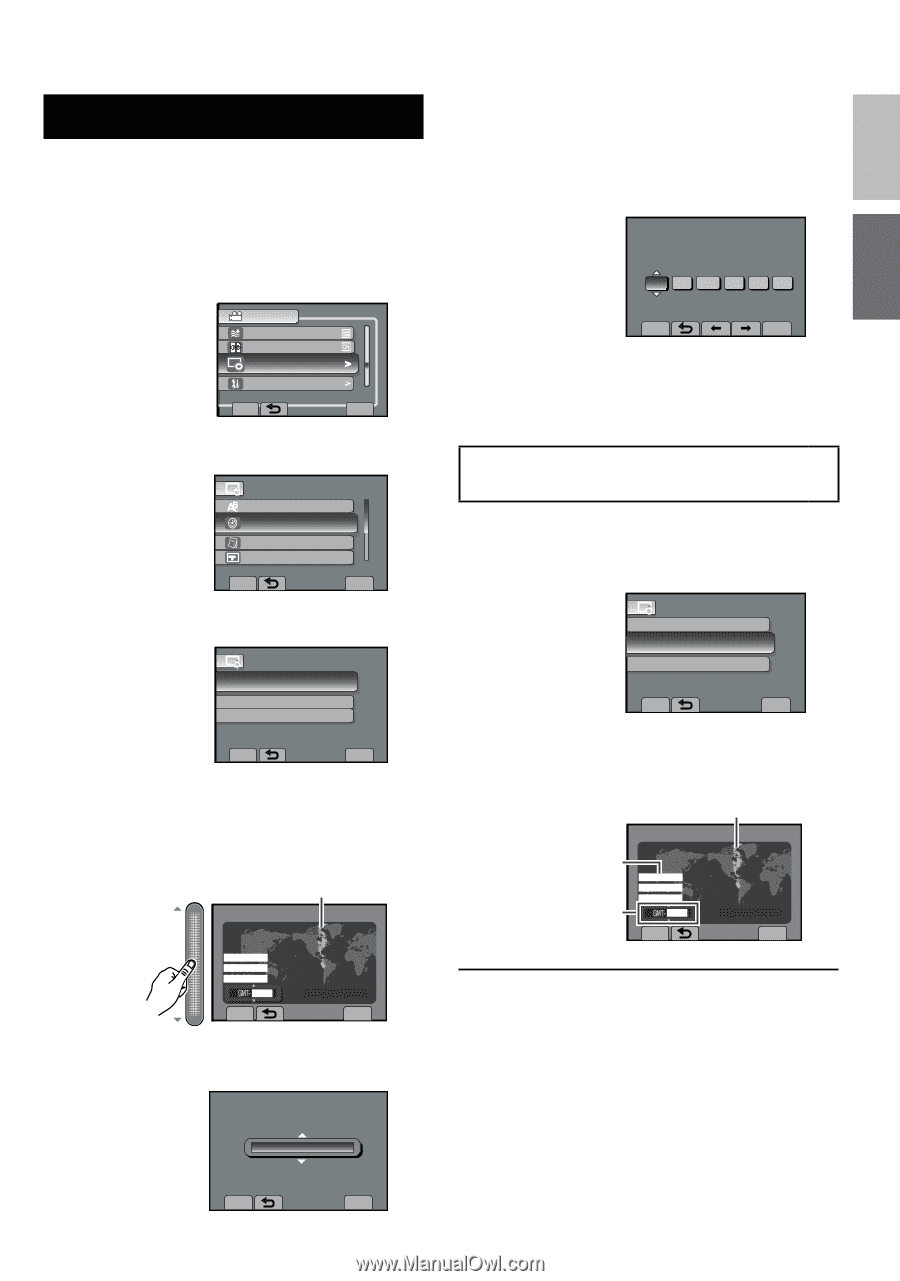
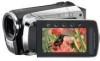
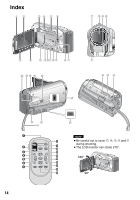
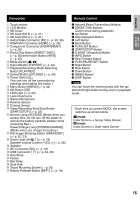
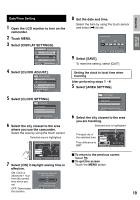
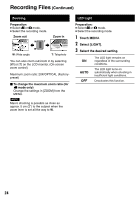
ENGLISH GETTING STARTED Date/Time Setting 1 Open the LCD monitor to turn on the camcorder. 2 Touch MENU. 3 Select [DISPLAY SETTINGS]. VIDEO WIND CUT AUTO SWITCH REC MEDIA DISPLAY SETTINGS > BASIC SETTINGS CONFIGURE ON-SCREEN DISPLAY SET > QUIT 4 Select [CLOCK ADJUST]. DISPLAY SETTINGS LANGUAGE CLOCK ADJUST DATE DISPLAY STYLE MONITOR BRIGHT SET DATE AND TIME SET QUIT 5 Select [CLOCK SETTING]. CLOCK ADJUST CLOCK SETTING AREA SETTING SET FOR DAYLIGHT SAVING TIME SET THE CITY, DATE AND TIME SET QUIT 6 Select the city closest to the area where you use the camcorder. Select the area by using the touch sensor. Selected area is highlighted AREA SETTING 8 Set the date and time. Select the item by using the touch sensor and select [}] to set. CLOCK SETTING DATE NOV 1 SAVE TIME 2009 08 54 PM GMT+ 9:00 QUIT 9 Select [SAVE]. To reset the setting, select [QUIT] Setting the clock to local time when traveling After performing steps 1 - 4 5 Select [AREA SETTING]. CLOCK ADJUST CLOCK SETTING AREA SETTING SET FOR DAYLIGHT SAVING TIME SET WHEN IN ANOTHER COUNTRY SET QUIT 6 Select the city closest to the area you are traveling. Selected area is highlighted Principal city of the selected area Time difference to GMT AREA SETTING SET NOV.10.2009 04:55PM QUIT NOV.10.2009 04:55PM SET QUIT 7 Select [ON] if daylight saving time is effective. To return to the previous screen Select @. To quit the screen Touch the MENU button. ON: Clock is advanced 1 hour from the normal time which you set. OFF: Deactivates the function. SET FOR DAYLIGHT SAVING TIME DAYLIGHT SAVING TIME (DST) OFF NOV.10.2009 04:55PM SET DAYLIGHT SAVING TIME SET QUIT 19
-
 1
1 -
2
-
3
-
4
-
5
-
6
-
7
-
8
-
9
-
10
-
11
-
12
-
13
-
 14
14 -
 15
15 -
 16
16 -
 17
17 -
 18
18 -
 19
19 -
 20
20 -
 21
21 -
 22
22 -
 23
23 -
 24
24 -
25
-
26
-
27
-
28
-
29
-
30
-
31
-
32
-
33
-
34
-
35
-
36
-
37
-
38
-
39
-
40
-
41
-
42
-
43
-
44
-
45
-
46
-
47
-
48
-
49
-
50
-
51
-
52
-
53
-
54
-
55
-
56
-
57
-
58
-
59
-
60
-
61
-
62
-
63
-
64
-
65
-
66
-
67
-
68
-
69
-
70
-
71
-
72
-
73
-
74
-
75
-
76
-
77
-
78
-
79
-
80
-
81
-
82
-
83
-
84
-
85
-
86
-
87
-
88
-
89
-
90
-
91
-
92
-
93
-
94
-
95
-
96
-
97
-
98
-
99
-
100
-
101
-
102
-
103
-
104
 |
 |