JVC GZ-HM440US Basic User Guide - Page 7
Using the Touch Screen - gz hm440 manual
 |
View all JVC GZ-HM440US manuals
Add to My Manuals
Save this manual to your list of manuals |
Page 7 highlights
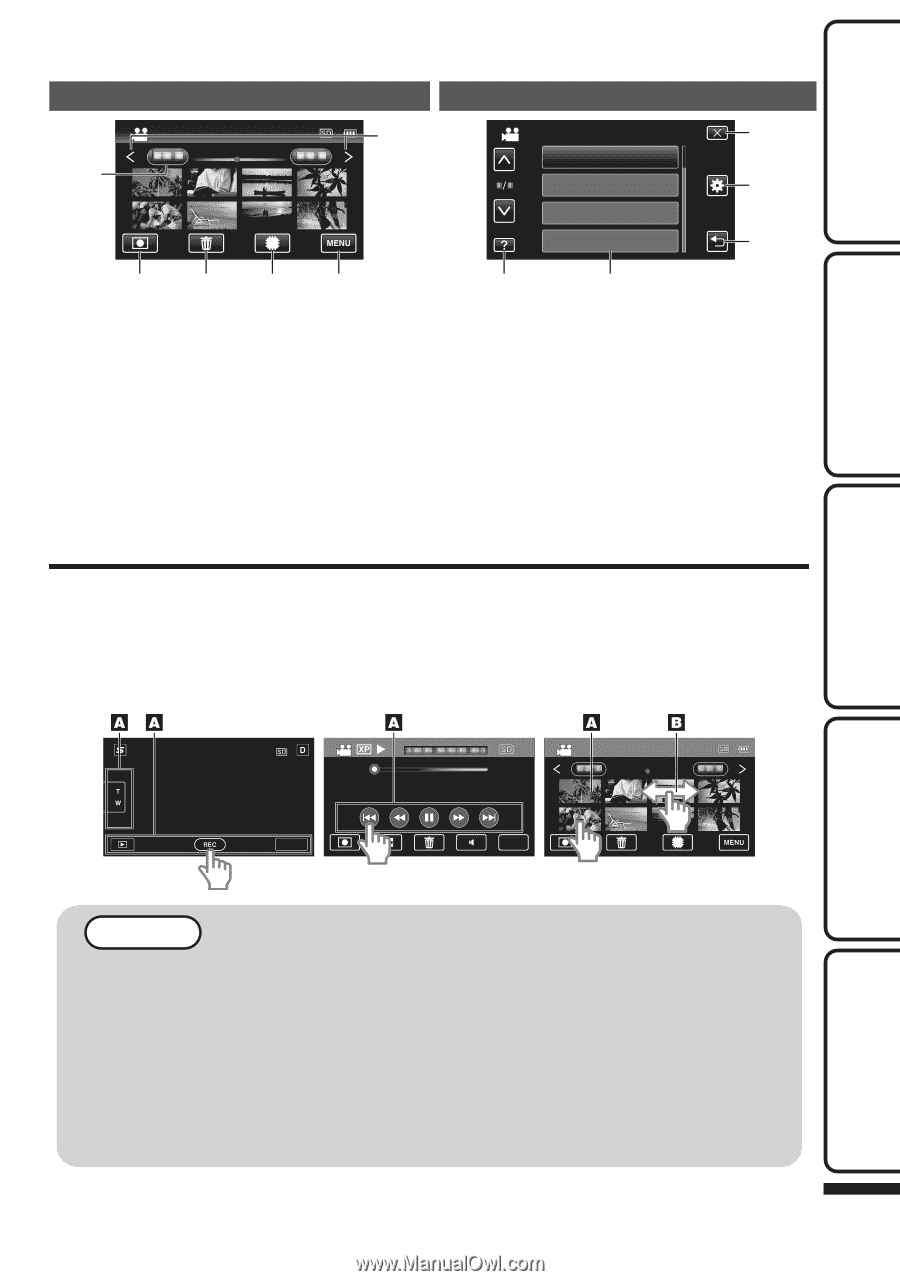
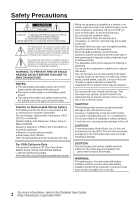
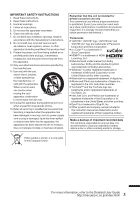
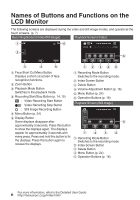
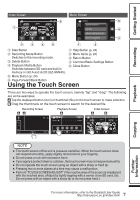
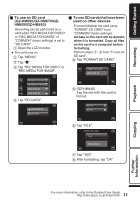
Getting Started Recording Index Screen 2011 1 Menu Screen 6 VIDEO SCENE SELECT FOCUS BRIGHTNESS ADJUST WHITE BALANCE 5 4 3 . 2345 .1 2 A Date Button A Help Button (p. 24) B Recording Mode Button B Menu Items (p. 24) Switches to the recording mode. C Return Button C Delete Button D Common/Basic Settings Button D Playback Media Button Switches between SD card and built-in E Close Button memory or slot A and slot B (GZ-HM440). E Menu Button (p. 24) F Page Forward/Back Button Using the Touch Screen There are two ways to operate the touch screen, namely "tap" and "drag". The following are some examples. A Tap the displayed button (icon) or thumbnail (file) on the touch screen to make selection. B Drag the thumbnails on the touch screen to search for the desired file. Recording Screen Playback Screen Index Screen 0:01:23 0:12:34 2011 MENU MENU Playback Copying . Further Information NOTE 0 The touch screen of this unit is pressure-sensitive. When the touch screen does not respond smoothly, apply slightly more force to your fingertip. 0 Do not press or rub with excessive force. 0 If you apply a protect sheet or a sticker, the touch screen may not respond smoothly. 0 Do not operate the touch screen using an object with a sharp or hard tip. 0 Pressing two or more places at a time may cause a malfunction. 0 Perform "TOUCH SCREEN ADJUST" if the reactive area of the screen is misaligned with the touched area. (Adjust by lightly tapping with a corner of an SD card, etc. Do not press with an object with a sharp tip or do not press hard.) 7 For more information, refer to the Detailed User Guide http://manual.jvc.co.jp/index.html/
-
 1
1 -
 2
2 -
 3
3 -
 4
4 -
 5
5 -
 6
6 -
 7
7 -
 8
8 -
 9
9 -
 10
10 -
 11
11 -
 12
12 -
13
-
14
-
15
-
16
-
17
-
18
-
19
-
20
-
21
-
22
-
23
-
24
-
25
-
26
-
27
-
28
-
29
-
30
-
31
-
32
-
33
-
34
-
35
-
36
-
37
-
38
-
39
-
40
-
41
-
42
-
43
-
44
-
45
-
46
-
47
-
48
-
49
-
50
-
51
-
52
-
53
-
54
-
55
-
56
-
57
-
58
-
59
-
60
-
61
-
62
-
63
-
64
 |
 |