JVC GZ-MG20 Instruction Manual - Page 20
Inserting/Removing an SD Card, Formatting a Recording Medium - hdd camera
 |
View all JVC GZ-MG20 manuals
Add to My Manuals
Save this manual to your list of manuals |
Page 20 highlights
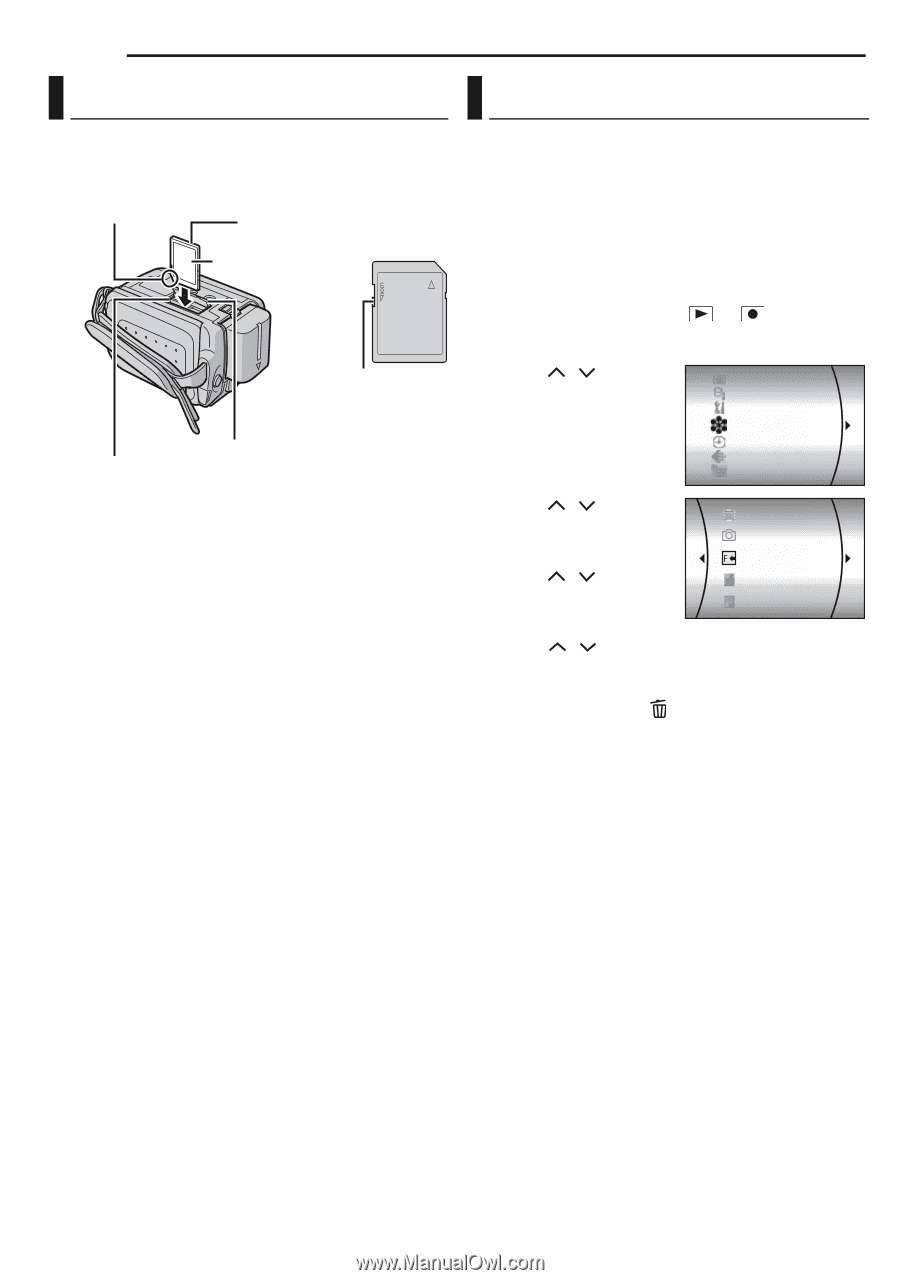
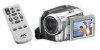
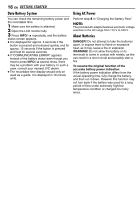
20 EN GETTING STARTED Inserting/Removing an SD Card Formatting a Recording Medium You can use an SD card as a recording medium in the SD slot. See page 62 for the guaranteed media to work with this camera. Clipped Edge SD Card (optional) Label Write/Erase Protection Tab SD Card Cover SD Slot 1 Make sure the camera's power is off. 2 Open the SD card cover. 3 To insert an SD card, firmly insert it with its clipped edge first. To remove an SD card, push it once. After the SD card comes out of the camera, pull it out. ● Do not touch the terminal on the reverse side of the label. 4 Close the SD card cover. To protect valuable files Slide the write/erase protection tab on the side of the SD card in the direction of "LOCK". This prevents the SD card from being recorded over. To record on this SD card, slide the tab back to the position opposite to "LOCK" before inserting it. NOTE: Before using a new SD card, it is necessary to format the card. (੬ pg. 20) ATTENTION: Do not insert or remove the SD card while the camera is turned on, as this may cause the SD card to be corrupted or cause the camera to become unable to recognise whether or not the SD card is installed. You can format (initialise) the built-in hard disk (HDD) or SD cards. You have to format the newly-purchased SD cards with this camera before using them. This enables stable speeds and operation when accessing the recording medium. Be aware that all files and data including protected files will be erased. (੬ pg. 38) 1 Set the power switch to or . 2 Press MENU. The menu screen appears. 3 Press / to select [REC MEDIA SETTING], DIS CAMERA SETTING then press 49. BASIC SETTING REC MEDIA SETTING DISPLAY QUALITY WIDE MODE 4 Press / to select [FORMAT], then press 49. 5 Press / to select VIDEO MODE IMAGE MODE FORMAT CLEAN UP [HDD] or [SD], then press 49. COPY/MOVE 6 Press / to select [EXECUTE], then press 49. ● By pressing the 49 button while selecting [HDD] and holding down the button in step 5, you can erase the data on the hard disk in a format that is difficult to recover. Moreover, by repeating this procedure, you can make the data even more difficult to recover. When formatting in this way, a formatting progress bar is displayed. ● To cancel the formatting, select [CANCEL], then press 49. CAUTION: Do not remove the SD card or perform any other operation (such as turning off the power) during format. Also, be sure to use the provided AC adapter, as the recording medium may be corrupted if the battery becomes exhausted during format. If the recording medium becomes corrupted, format it again. NOTE: Do not format the recording medium on the PC. Make sure to format the recording medium on the camera.
-
 1
1 -
2
-
3
-
4
-
5
-
6
-
7
-
8
-
9
-
10
-
11
-
12
-
13
-
14
-
 15
15 -
 16
16 -
 17
17 -
 18
18 -
 19
19 -
 20
20 -
 21
21 -
 22
22 -
 23
23 -
 24
24 -
 25
25 -
26
-
27
-
28
-
29
-
30
-
31
-
32
-
33
-
34
-
35
-
36
-
37
-
38
-
39
-
40
-
41
-
42
-
43
-
44
-
45
-
46
-
47
-
48
-
49
-
50
-
51
-
52
-
53
-
54
-
55
-
56
-
57
-
58
-
59
-
60
-
61
-
62
-
63
-
64
-
65
-
66
-
67
-
68
-
69
-
70
-
71
-
72
-
73
-
74
-
75
-
76
-
77
-
78
-
79
-
80
-
81
-
82
-
83
-
84
-
85
-
86
-
87
-
88
-
89
-
90
-
91
-
92
-
93
-
94
-
95
-
96
-
97
-
98
-
99
-
100
-
101
 |
 |